
This is a post that I originally wrote for the ‘Sewing for Baby’ series at Honeybear Lane. I am still working my way through all the monkey fabric.
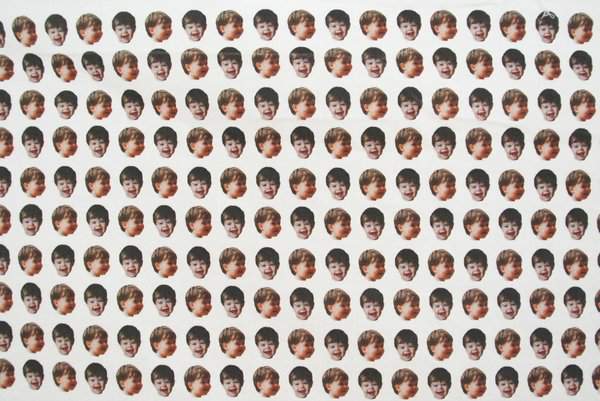
Hello everyone. I am Laura from Craftstorming and I’m so excited to be here today – I have been looking forward to sharing this project for a long time. When Heidi first contacted me about taking part in this ‘Sewing for Baby’ series I had just finalised the layout on my first ever fabric design to order from Spoonflower and I thought it was the perfect project for the series.
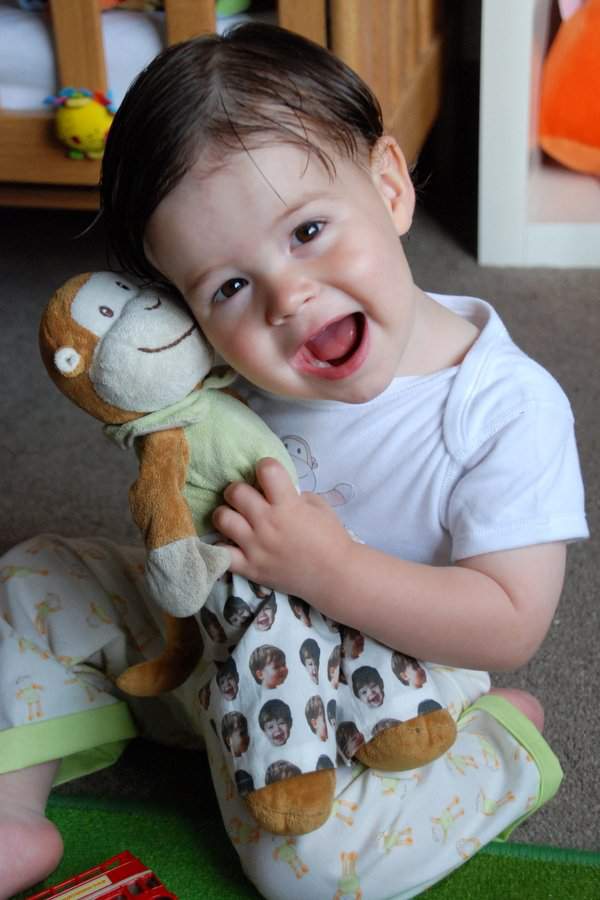
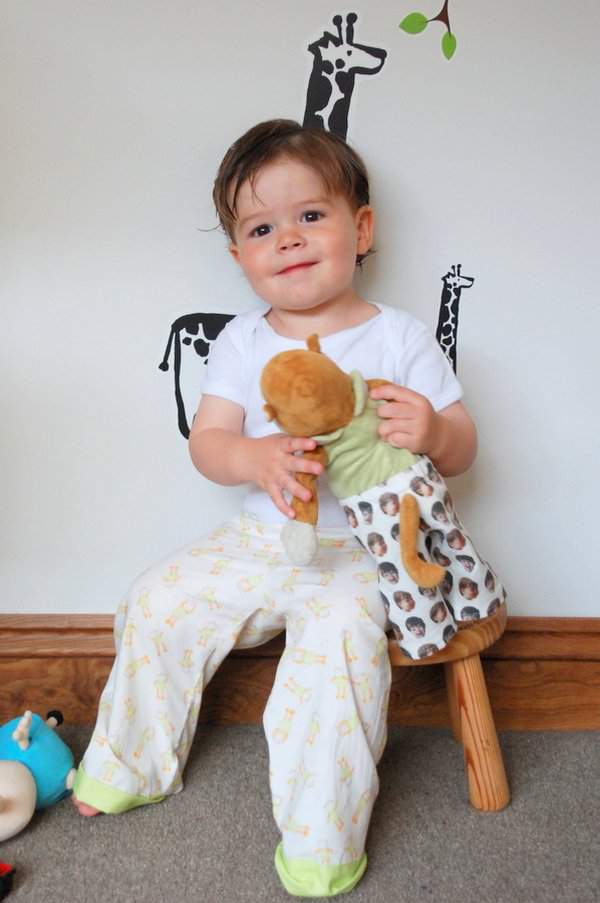
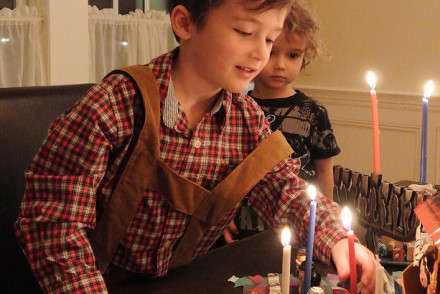
If you look more closely at Rowan’s pyjamas trousers you will see that the inspiration for the fabric design is my youngest son’s favourite soft toy, Monkey, who he’s cuddling in the photo. Monkey is wearing his own customised pj trousers made from fabric with pictures of Rowan on. Rowan also has an image of Monkey on his top.
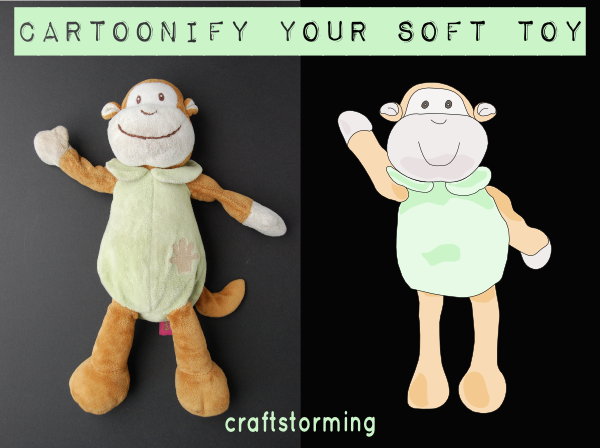
Rowan and Monkey are virtually inseparable and I’m sure a lot of your babies also have a soft toy that they can’t be without. Unfortunately we haven’t been able to find a spare Monkey – we even contacted the manufacturer but they’ve stopped selling them. I started thinking about other ways we could recreate monkey and that led to designing a fabric with him on. So how would you like to create a digital ‘cartoony’ version of that toy? Once you’ve created your digital file there are so many things you can use it for – posters, cards, cupcake toppers are just some ideas. You will also have lots of clothing related options, including….
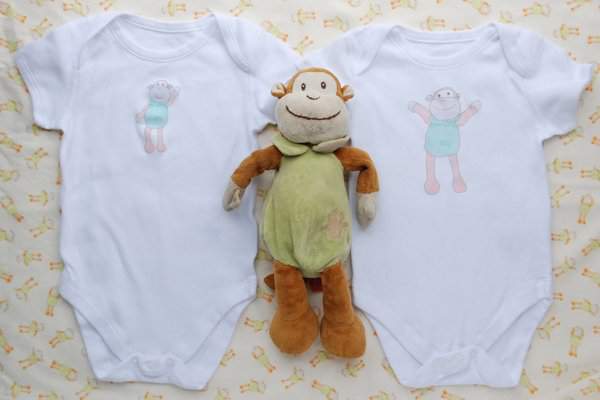
Use transfer paper to create clothing with your image on. Don’t forget to reverse the image when printing on transfer paper.
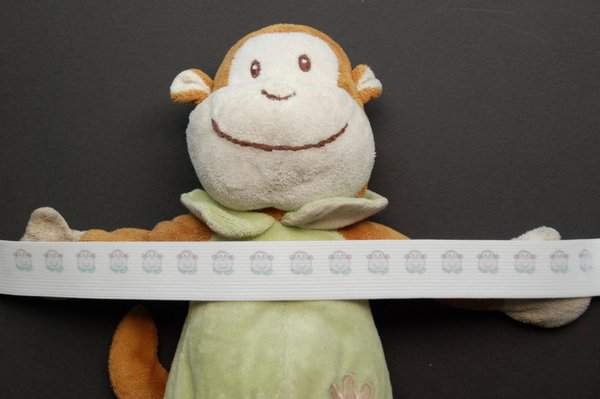
Use a small copy of the image and transfer paper to customise your own elastic – I have a tutorial for this here.
Or create your own fabric
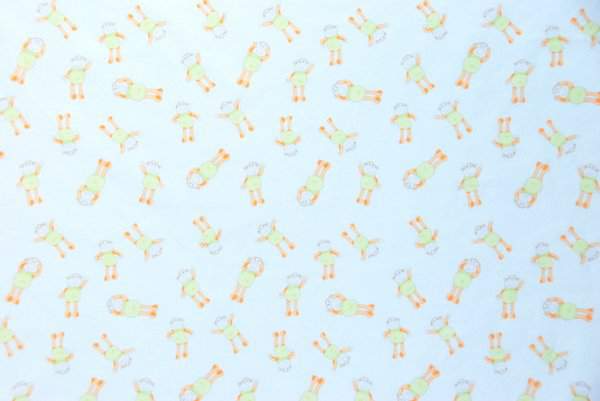
You can find my design on Spoonflower here. Fabric prices start at $15.75 a yard for your own designs.
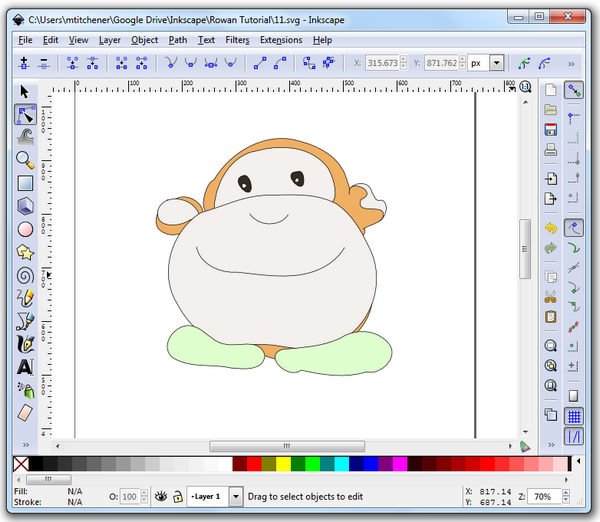
I used Inkscape, a free digital svg program that you can download here, to take a photography of Monkey and ‘cartoonify’ it. Once you’ve created your design as a vector file you can resize it to whatever size you need without any loss of quality. I would like to mention here that I am far from an expert. It took quite a while for me to do this but I learned a lot in the process. Hopefully this tutorial will help others to do it a lot quicker. If you’ve never used Inkscape before then it’s worth having a play to familiarise yourself with some of the features first. I’ve kept the tutorial fairly high level and only cover Monkey’s head and collar but once you’ve the same techniques would apply to do the body. There are some brilliant YouTube tutorials if you’re having trouble with a particular step. It’s worth mentioning that you can use Ctrl+Z at any time to undo the last step. Let’s begin…
1. Take a photo of the soft toy
Ideally you want a reasonably high quality photo taken in good natural light and no shadows. I used black as the background as it provided a clear contrast. Monkey says hi!

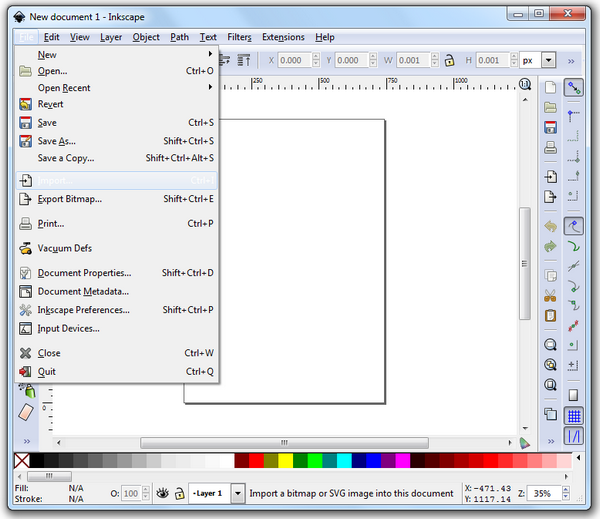
2. Open Inkscape and import your photo. Select the embed option when asked.
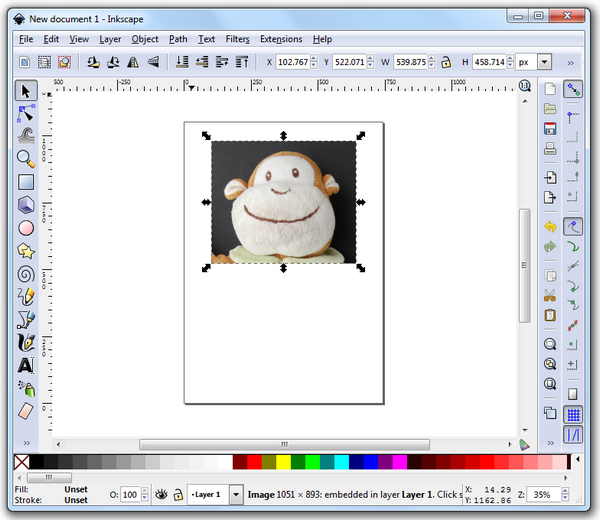
3. Click on the ‘Select’ tool (top left arrow). Resize your image with the corner tools so it fits on the page. Hold down Ctrl (or click the padlock at the top closed before resizing) to keep the aspect ratio the same. Move the image to the middle of the page.
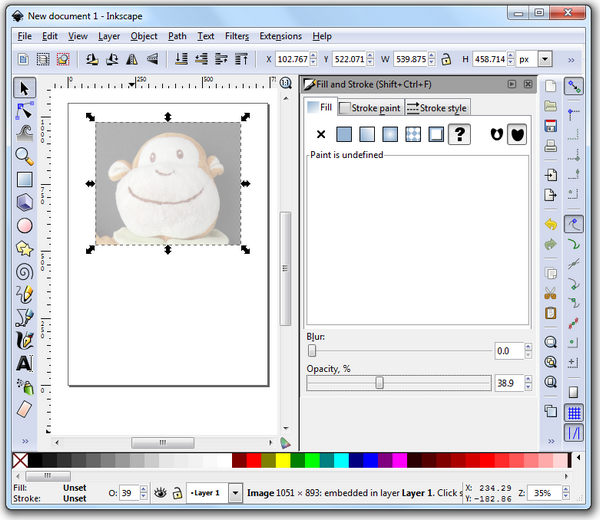
4. From the menu options select ‘Object’ then ‘Fill and Stroke’. A new panel will appear that gives you lots of options for the selected object(s). Reduce the opacity (at the bottom) to make it easier to see the lines you will draw in the next steps.
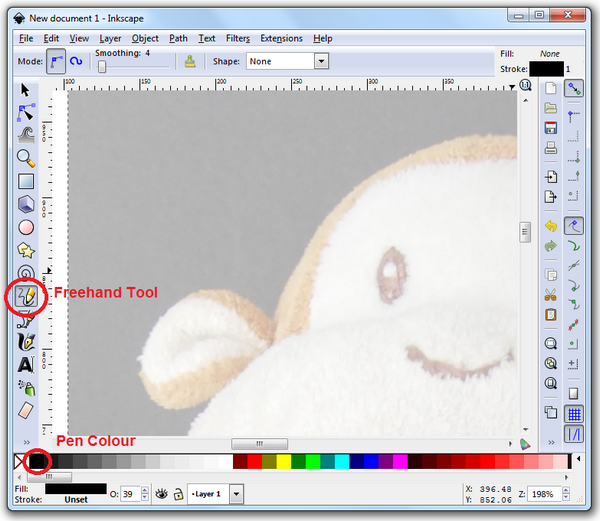
5. Zoom in with the + key. Select the ‘Draw Freehand Lines’ tool (or press F6). Choose your pen colour from the colours at the bottom. You want a colour that will show up easily over your image.
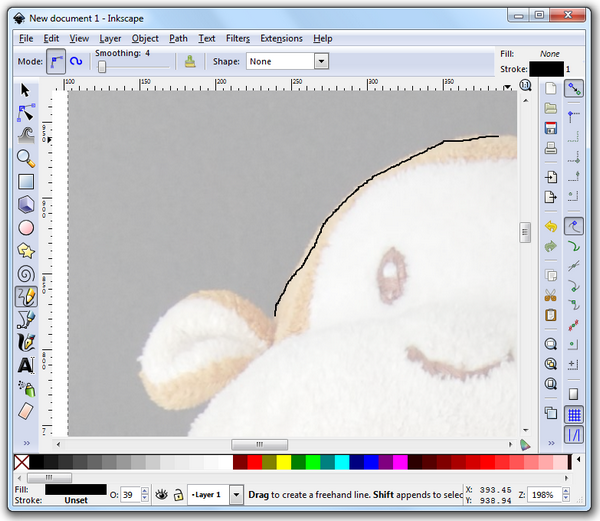
6. Draw round the shapes over the image – it doesn’t matter if you’re not that accurate as we will adjust them later. To draw, position the mouse where you want to start drawing, hold down the left mouse button and (keeping it held) draw all the way around that section. To define each section you want to look at the image and separate by body part and colour. So for each eye there are two sections – one is the black part and one the white.
Your aim is that each section you’ve identified should be represented by one object. Every time you let go of the left mouse button and start again a new object will be created, so you need to draw around each section in one go. For example, here we are drawing around the top brown part of the head. I started at the bottom left, drew around the top of the head, then I will continue down the other side, inwards to where the brown meets the white of the face, around the top of the white (or bottom of the brown), out to the side again and back to meet where I started. Only then will I let go of the left mouse button.
I was not aiming to recreate Monkey’s shape exactly (as you can see from the side by side comparison at the start of the tutorial) but Inkscape gives you the ability to make the shape as accurate to real life as you want when you make the adjustments later.
7. Each different shape you draw will create an ‘Object’. Later on we will layer some objects on top of others. To prevent gaps between two adjacent objects it is best to have some overlap when tracing. For example, the collar on the left and the face overlap so draw the collar slightly overlapping the face and the face slightly overlapping the collar.
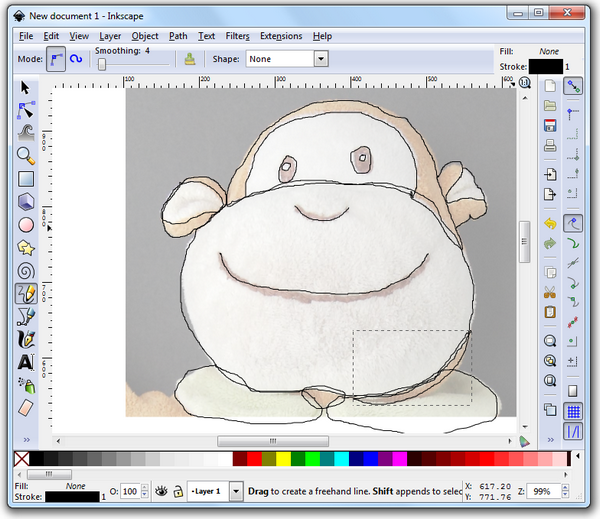
8. Once you have finished tracing around every part of your image you can start to enhance it and smooth out the lines. Press Ctrl+A to select all shapes. Next press Ctrl+L multiple times – this will smooth all of the lines you have traced.
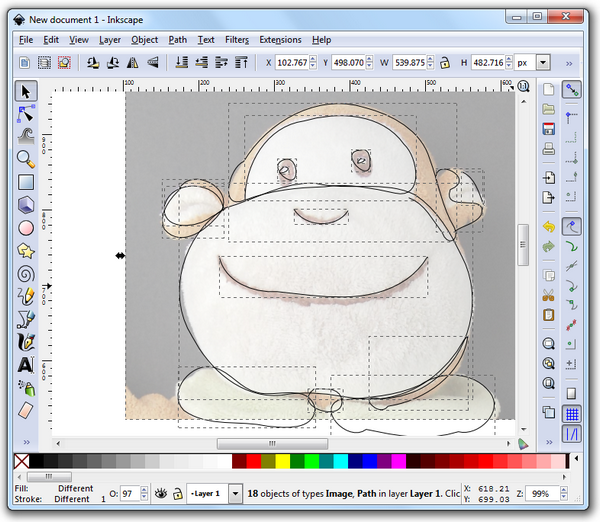
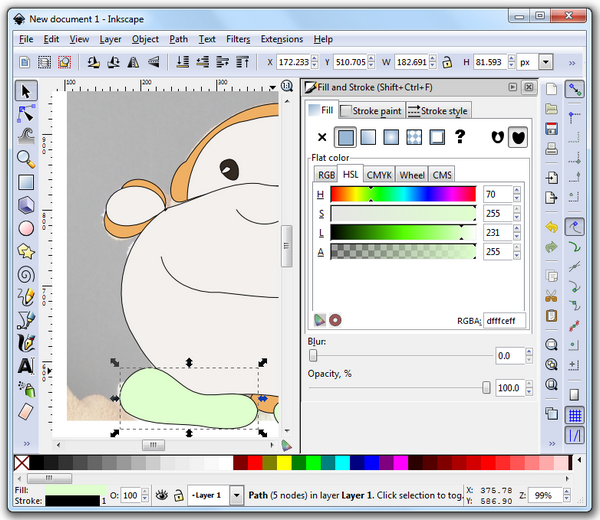
9. Click on the ‘Select’ tool (or press F1) again. Reopen the ‘Fill and Stroke’ panel. Select each object in turn and set its fill colour. For a solid colour choose the fill option to the right of the cross. There are several colour systems to choose – I find it easiest to click on the ‘Wheel’ tab but you may find another one suits you better. Cut and paste the RGBA value to make objects exactly the same colour.

10. Move the objects up or down in the order so that they are correctly positioned in front of or behind each other. For example, in the screenshot below ‘Raise selection one step’ is circled in red. This has been used to position the white object above the brown for the ear. The other three options are to ‘Lower selection to bottom’, ‘Lower selection one step’ and ‘Raise selection to top’.

In the next screenshot you can see that the left collar object has been moved up, so although you can see both the face and the collar objects, wherever there is any overlap it is the collar object that you see.
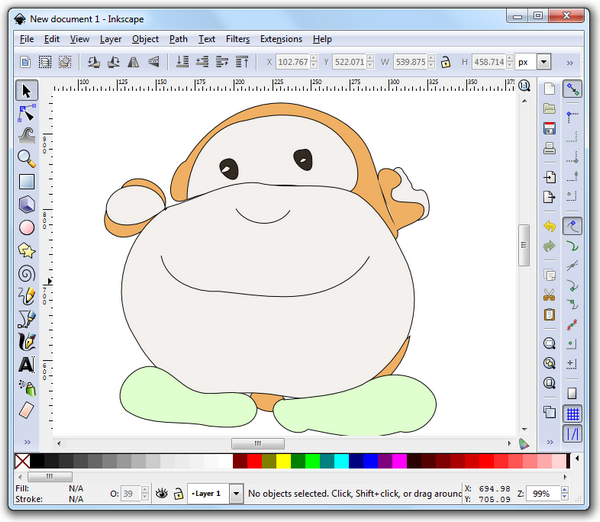
11. Using the ‘Select’ tool select the background (original) image and delete it with the Delete key.
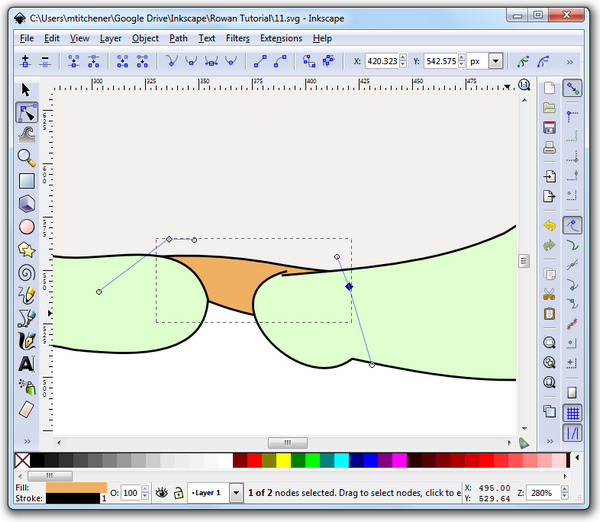
12. Zoom in and select any objects that aren’t quite right (one at a time). Select the ‘Edit Paths with Nodes’ tool (or press F2).
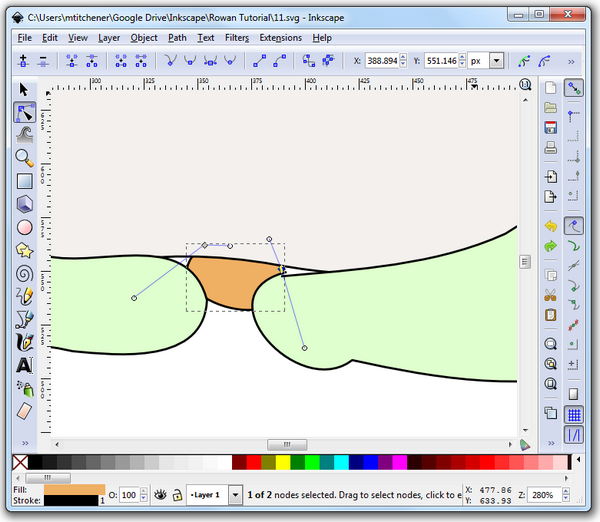
13. Move the nodes, or the control points (to change the angle the lines enter/exit the node) so that everything overlaps nicely and joins up. Delete any unnecessary nodes with the Delete key.
14. Repeat any of the steps above until you are happy with your design.
15. You’ve finished. Now you can use your image for whatever you want. At this point it’s useful to group all the objects together. To do this select all objects (Ctrl+A) and choose Object then Group from the menu options, or Ctrl+G. I would also keep an ungrouped copy in another file so it’s easier to make any changes in the future.
Of course, once you’ve finished one vector image you can adapt it using the same method. Once I had my initial image I played around with drawing different arms, legs and facial expressions to create a few different versions of Monkey using the same techniques as I described above. The fabric design has a random repeat which required a bit of trial and error using the tiled clone tool.
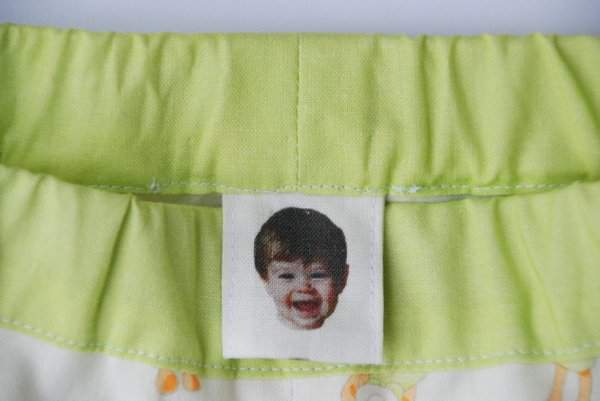
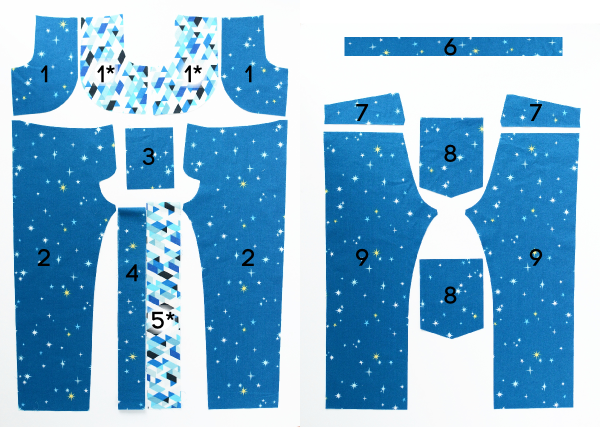
In addition to the Monkey repeat I uploaded a design the exact colour of Monkey’s tummy, so I knew I had a contrast fabric in the perfect colour. This is what I used for the cuffs and waistband on Rowan’s trousers. I also designed a panel with a few random designs for things that I plan to try out and this included a section of Rowan fabric that I used to make Monkey’s pj trousers.
It felt a bit strange cutting this fabric up but it meant I was also able to create a really cute tag for Rowan’s pj trousers.
For both pairs of pyjamas I used the Bedtime Story Pajama Pants pattern from Oliver + S. I widened the waistband on Rowan’s pair as I didn’t have any 3/4″ elastic so needed the casing to be large enough for 1″ elastic. I also made the cuffs a lot bigger and they can fold down as Rowan grows. I wanted them to fit for a long time after all this effort. I have a paper copy of the younger sizes (6M to 3T) but bought the digital version of the bigger sizes (4 to 8 yrs) recently. I was so happy when this was released as I love the design of this pattern and it means I can make them for my eldest son too now. By printing the pattern pieces out at 50% I was able to use the 4T size with only minimal adjustments for Monkey, including slight narrowing and a tail hole.
I got a bit excited and ordered quite a lot of this fabric, so I will have a few more projects to share on Craftstorming soon. In the meantime I’m really hoping that Rowan doesn’t suddenly go off Monkey.
Thanks so much to Heidi for having me here today. If you have any questions then add them to the comments and I will do my best to answer you.


4 Comments
What an adorable idea!! I love it!! 🙂
Thanks Jane 🙂
That is such a cool app. I can’t wait to play with it.
That is an awesome idea!! So cute!