
I’m bringing a guest post home. I made this a while ago for the Boy’s Own Style series hosted by Narelle at Cook Clean Craft. Click on the button below to go to her round-up of all the other fantastic projects in the series.

***
Hello everyone, I’m Laura. I blog over at Craftstorming where I write about sewing and baking mostly. As the mum of two boys I am always really happy to see more boy sewing ideas so I’m very excited to be joining you for this series today.
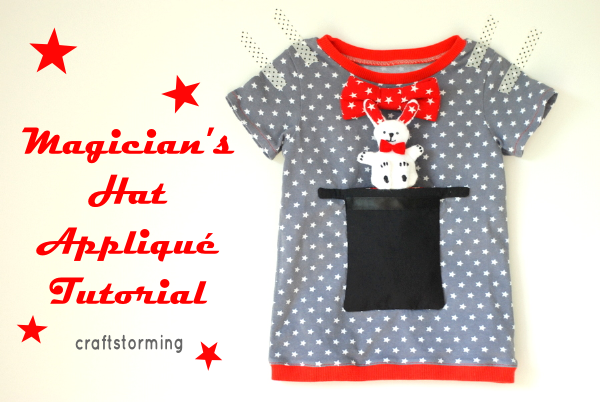
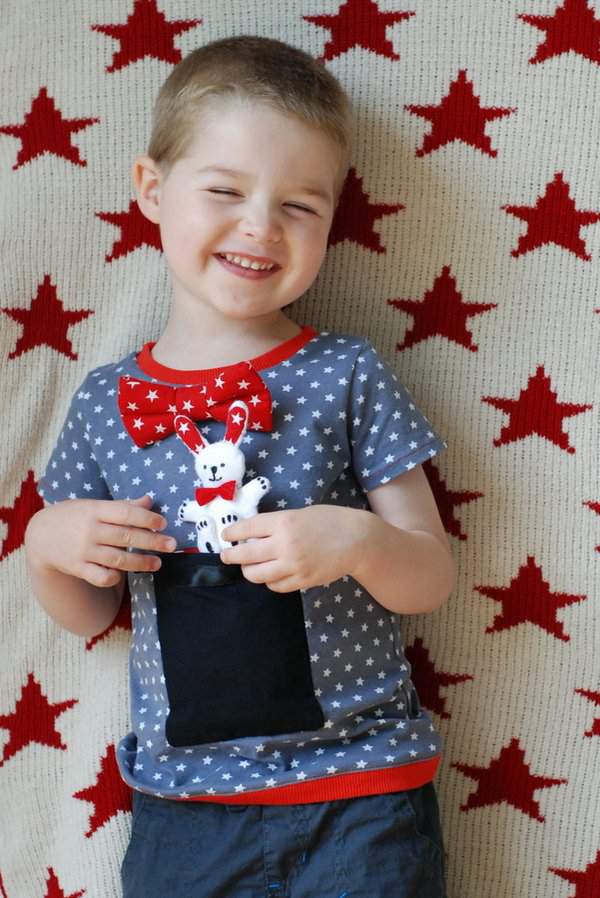
Often a good pattern and an interesting fabric are enough when making clothes for boys. Sometimes though you want to add a more personal touch to a garment. On those occasions I like to look for ways to include a fun and playful interactive element. For todays’s post I had the idea of making a T-shirt with a magician’s hat appliqué. And now, Ladies and Gentlemen, Casper Houdini will perform a magic trick for you.
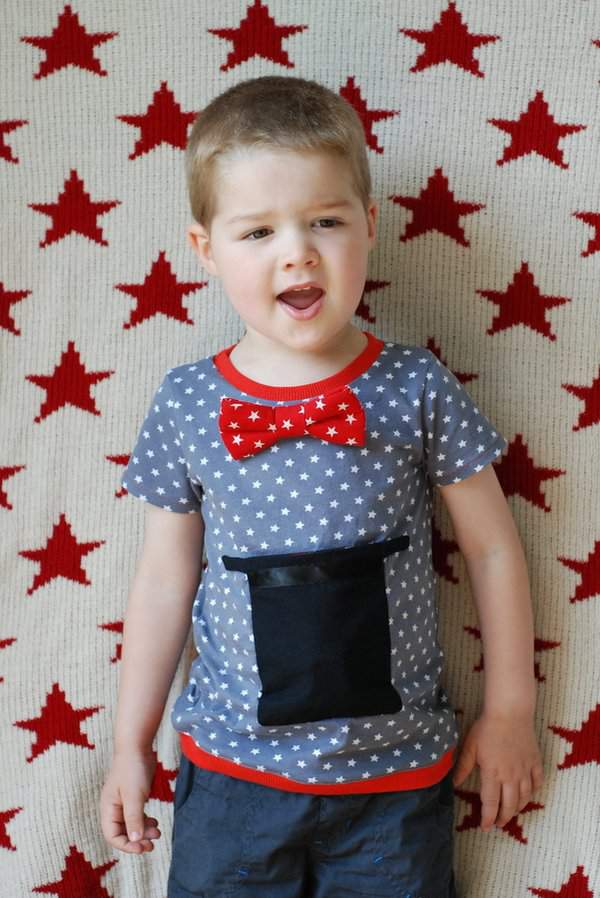
Watch very carefully

You will see that my pockets are empty so I will begin
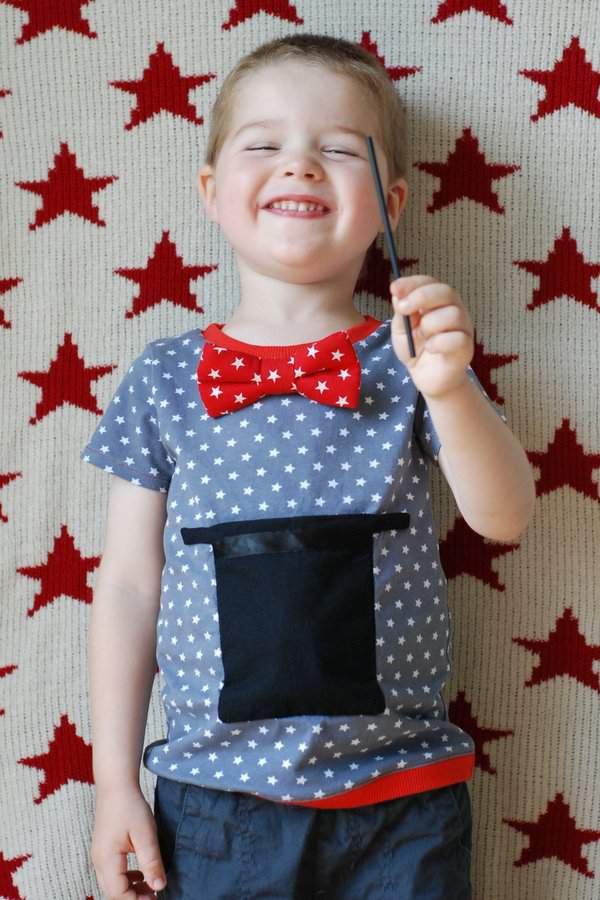
Abracadabra hocus pocus and before your eyes I will make….
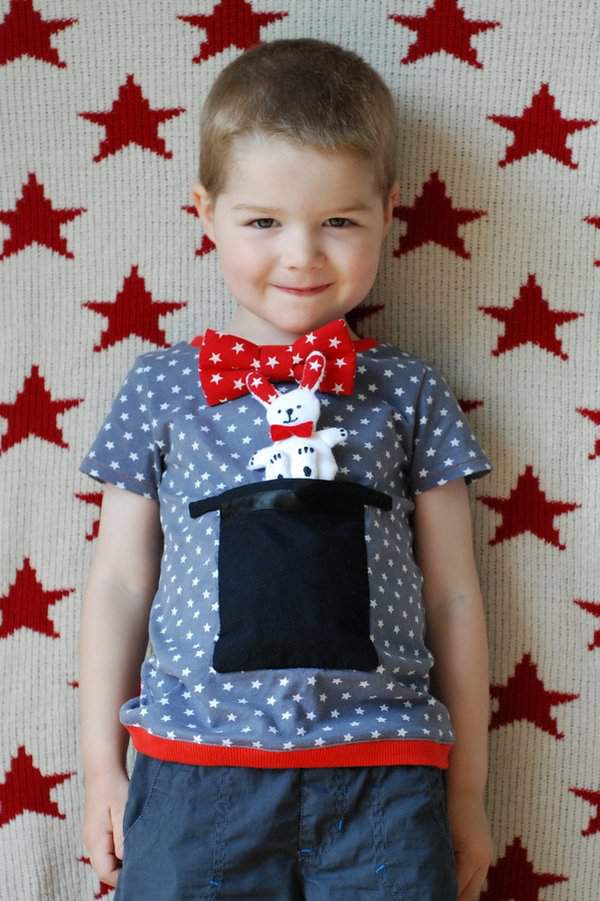
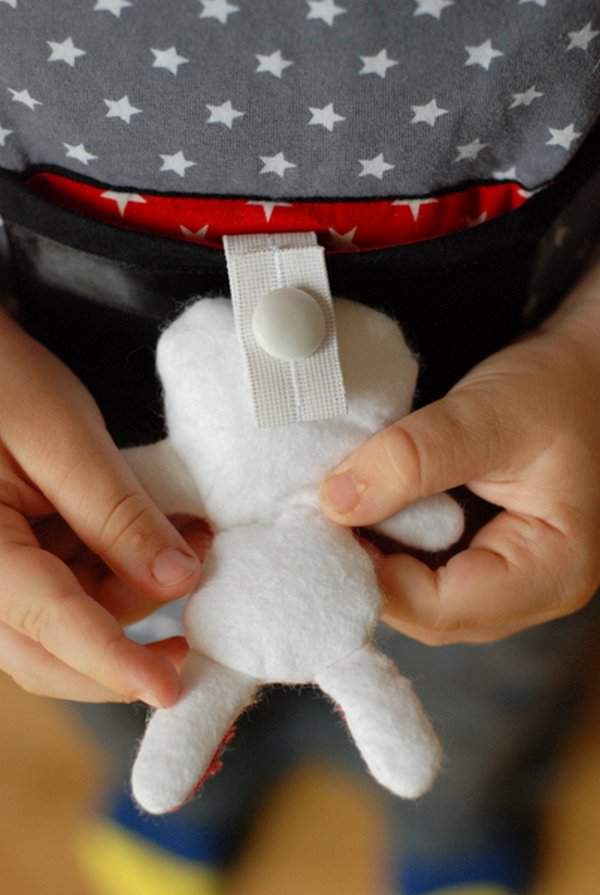
….a white rabbit appear.
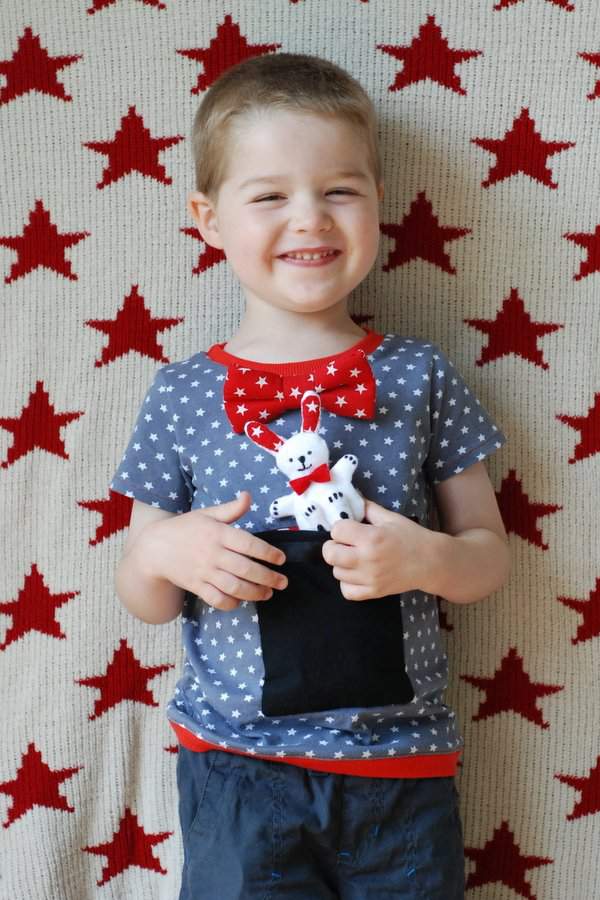
Magic hey?
The hat is made up of two layers with a pocket in the middle for the rabbit to hide in. I have sewn buttonhole elastic into the bottom of the pocket and added a small button for the rabbit’s tail so it can be removed. You could still do this for any soft toy you have made or bought.
There are many other ways you could apply this idea, such as having a tunnel with a train coming out of it or maybe a jack-in-the-box. If you want to make a magician’s hat too then here’s how I made it. I’ve included a downloadable template to save you time.
Materials;
– Black fabric – approx. 18” x 7”
– Fusible interfacing- Black fabric – approx. 18” x 7”
– Magician’s Hat template – download it here
– Lining fabric – approx. 11” x 7”
– Turning tool (I used a wooden skewer)
All seam allowances are 3/8″. I made the brim of the hat as narrow as possible while still making it possible to turn. It was still a bit of a struggle so if you want to make it a bit easier use a 1/4″ seam around the brim. I will mark this clearly later.
Cut out 2 hat pieces in main fabric plus 2 pieces in interfacing.
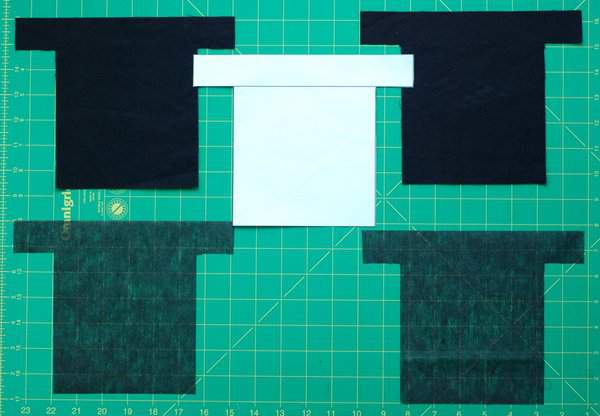
Iron your interfacing onto the wrong side of the hat pieces and cut out your pocket pieces. Mine were 5 and 3/8″ wide by 6 and 1/2″ high, just a bit smaller than the rectangle part of the hat.
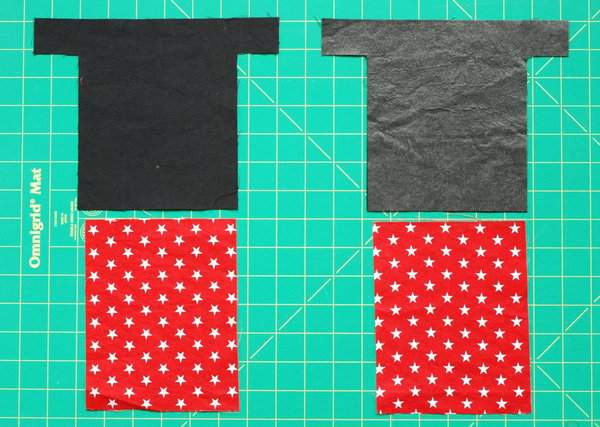
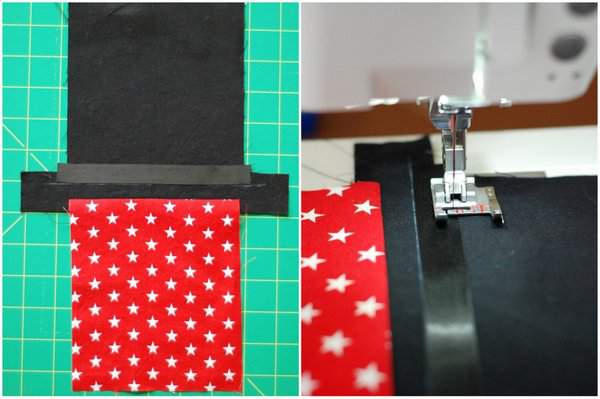
Mark centre of top of front side of each hat and pocket piece. Take one hat piece and one pocket piece. Arrange so the tops and centres line up, with the fabrics right sides facing. Sew together then press the pocket piece upwards so both right sides are visible together. Repeat for other hat and pocket pieces.

I added some ribbon to one of the hat pieces at this point. You will need to work out the placement of the brim after you have sewn and turned the hat. Just mark a line that is 3/8″ (or 1/4″ if using smaller seam allowance) down from the current edge of the brim and line up the bottom edge of the ribbon with it. Secure the ribbon with pins and edge stitch both sides of the ribbon.
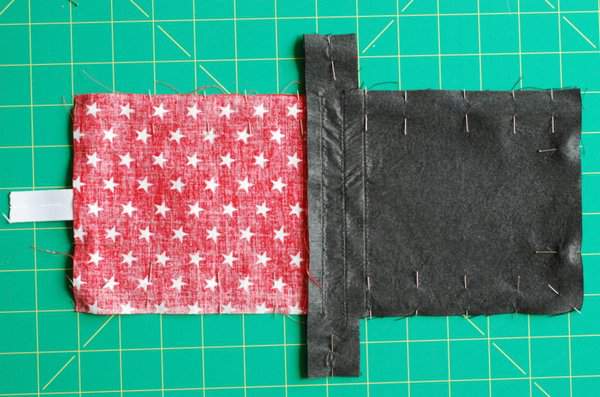
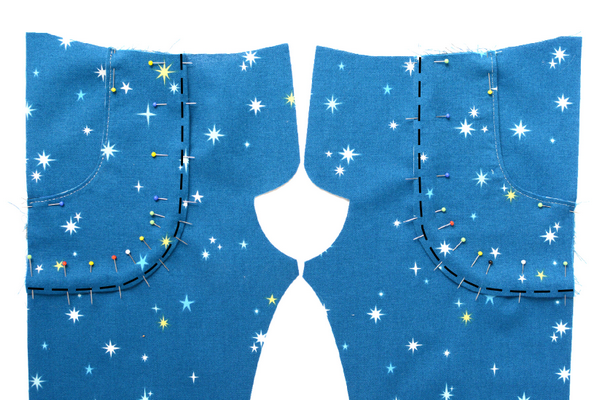
Place the two pieces right sides facing and pin. Make sure to position buttonhole elastic between the bottom of the pocket piece if you are using it. I made the elastic longer than necessary and just trimmed it to the right length when I attached the rabbit.
I find it helpful to mark on all the spots where I will need to pivot and change direction.
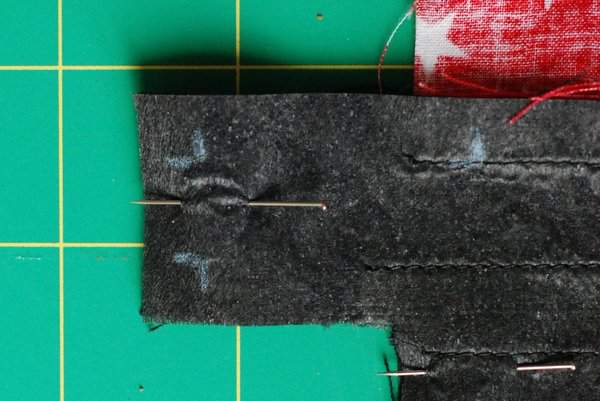
Sew around the edge as marked below with dashed lines. Leave a gap at bottom of the hat of at least 2″. Start and end at to edge of fabric where the gap is as helps to flip seam allowance inside when you turn the hat. I have marked the brim seams in red so choose for these whether you prefer a 3/8″ or 1/4″ seam allowance. Pivot with needle down and turn whenever you need to change direction.

Clip into the seam allowance at corners, taking care not to cut through the stitches. Trim the seam allowance around the brim to around 1/8″

Wrestle with the edges of the brim first. Then turn rest through.
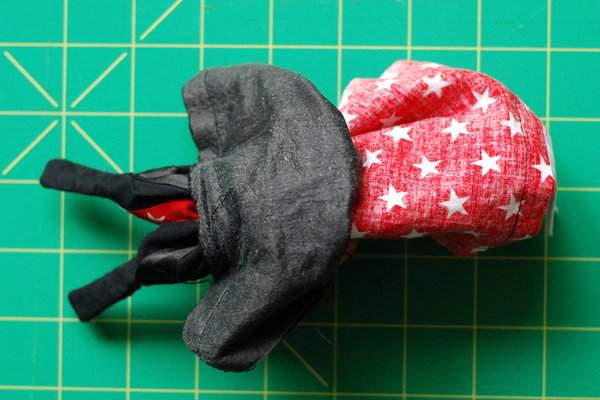
Trim the elastic so level with bottom (which is in fact the top) of the hat. Sew up the gap by hand using a blind stitch.

Take your T-shirt and work out where you want to sew on the hat. Interface the inside of the T-shirt behind where the hat will go. I sewed it on by hand so the stitches wouldn’t show but you could just sew around the edge with your machine.
Make or buy a rabbit and sew a button on for the tail. Attach it to the elastic and hide in the pocket.

I made my T-shirt using the Flashback Skinny Tee pattern as I had the perfect fabric. I used this brilliant tutorial for the bow tie, because every magician needs a fancy bow tie.
I won’t be doing a tutorial for the rabbit, except to say don’t do it the way I did, really. To fit the pocket I needed a fairly small rabbit that was also not too deep, oh and it had to be white. I couldn’t find anything fitting that description in the shops so realised I’d have to make one. I started by drawing out how I’d like my rabbit to look. That was easy enough, how hard could it be to make a rabbit that looks like my sketch? Turns out the answer is pretty hard, and slow. Here’s a comparison.
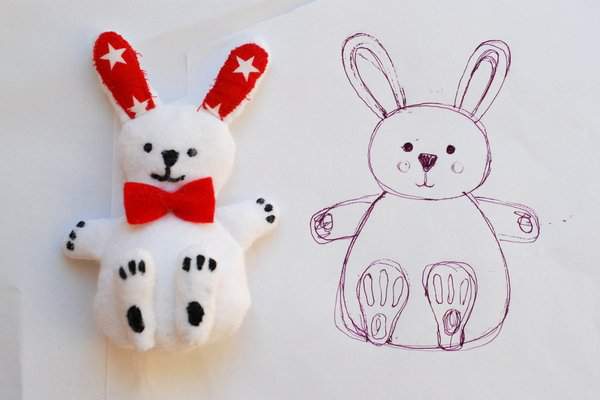
So I’d recommend using a soft toy you already own or, if you do need to make one then check out these cute felt animals. Helena from Craft and Creativity made them using a tutorial and pattern from Mollie Makes – they look much easier and a lot quicker. Whatever pattern you use just remember to add a button on the back to join it to the elastic you sewed into the pocket. That way your child won’t lose it but you can still remove it easily. Hopefully your child will love doing magic tricks as much as mine.
Some good examples of ‘interactive clothing’ I’ve made before are shown below. You can find tutorials for each for each of these by following the links below.
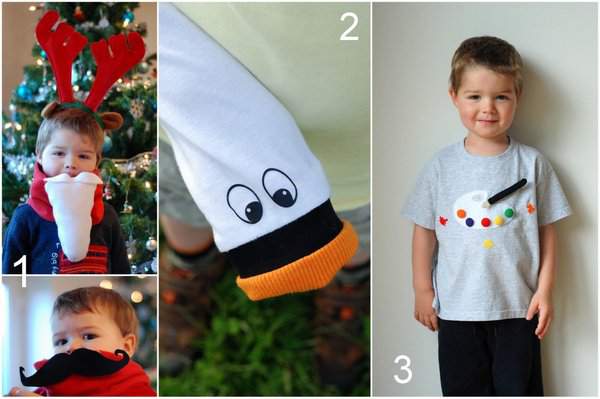
1. Santa Snood with Interchangeable Facial Hair
3. Paint Palette Appliqué – with covered button paints and a removable felt paintbrush
A couple of ideas I love from other blogs are the ‘Stuff ‘n’ Stay’ Tutorial by Sophie at Cirque du Bebe and the ‘Bumblebee Pocket Tutorial’ from Vanessa at Designs by Sessa. If you’re short on time then you could use a shop-bought T-shirt for many of the projects I’ve mentioned. I have another post coming soon on a project I’ve been working on for a long time where I’ve created some highly personalised clothes for my youngest son, so stayed tuned to my blog if you’re looking for more ideas.
Thanks so much Narelle for having me here today and for running this inspiring series.


Laura, You are SO talented and creative! This interactive shirt is adorable! The little magician and his bunny are too:)
I saw this in SewSet yesterday and love love loved it!!! Just awesome, thanks so much for sharing!!!
You are full of great ideas! How sweet are all these interactive projects. Your kids are the lucky to have you 🙂 you are one crazy cool mom!
Oh my goodness! That shirt is just the coolest! I’ve pinned this one for future reference… hope it brings you some more view love 😉
Just found you via the fb sewing group and now off to take a better look around.
Cass 🙂
Thanks so much Cassandra, good to ‘meet’ you. I’ll definitely pop over to your blog when I get the chance.
Oh my goodness! This is adorable and I can not wait to make two for my boys!!! Thank you for this tutorial my boys are going to be over the moon with this shirt!
http://www.rebelsandpebbles.com