
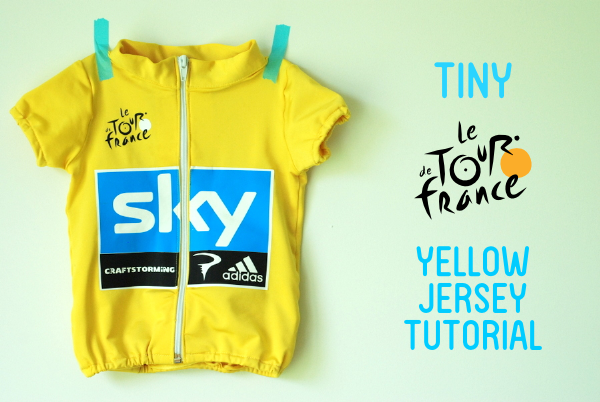

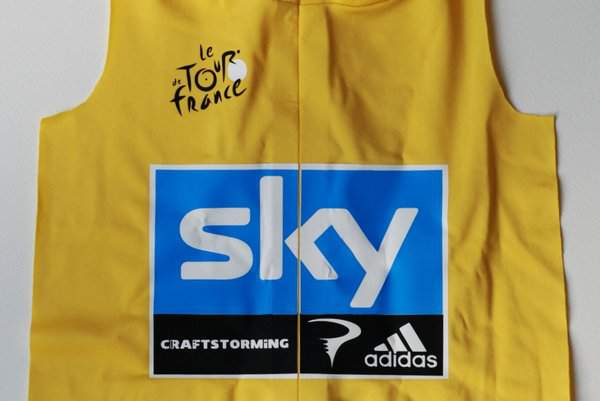
The Tour de France set off today and for the first time ever a British rider, Bradley Wiggins, is the favourite to end the race in the yellow jersey. Wiggins rides for Team Sky, which was set up in 2010 with the aim of winning the Tour de France with a British rider by 2013. At the time I thought this was completely unrealistic but, incredibly, they are very close to achieving it. Of course, there is the matter of a mere 3,497km to go before the result is decided but they have already come far closer than I ever expected. In support of Wiggins and Team Sky (and because I thought they’d look cute) I decided to make some tiny yellow jerseys, or mini maillot jaune. Team Sky also gained a new sponsor…

So do you want to make a mini Maillot Jaune for your own budding cyclist? I used the Flashback Skinny Tee from Made by Rae as a starting point and made a few adjustments to get a cycling jersey. The changes include adding elasticated pockets on the back, a full length zip on the front, elasticated waistband and sleeves and adding a collar in the same material as the T-shirt. Rae just released it in sizes 6-14 too so you could make it for older children as well.
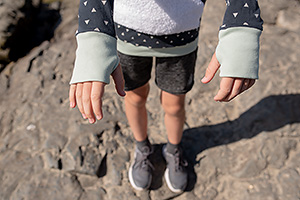
Someone's gone the wrong way

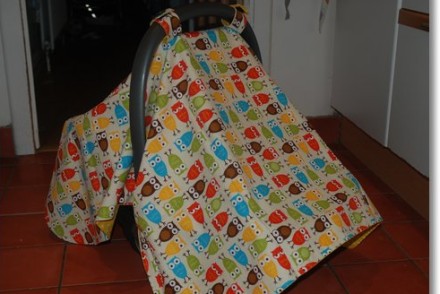
Cycling can make you really thirsty
Ok, let’s begin…
You will need;
T-shirt pattern
Knit fabric (about ½ yard for 4T, I used this yellow lycra with 4 way stretch but any stretchy knit with good recovery would work well)
Co-ordinating thread
¼” elastic
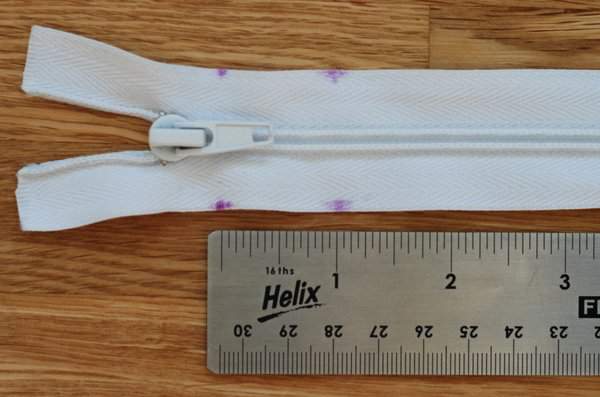
1 open ended (separating) zip (size 14” for 2T, 16” for 4T)
Lightweight fusible interfacing
Tailor’s chalk
Sewing machine (I also used my serger but you don’t need one)
Fabric scissors
Highly recommended;
Water soluble basting tape (I love this stuff)
Good quality sharp pins
Rotary cutter and 24″ quilting ruler
If you are using a lycra fabric then I have a few tips. It is the first time I have sewn with this fabric and I am far from an expert but hopefully I can stop you making the same mistakes that I did…
1. Use a ball point or stretch needle
2. Pins are much more likely to leave marks or snag so make sure you only use really sharp ones
3. Be extra careful with your seam ripper as the fabric tears very easily
4. Don’t use a really hot iron and test a scrap bit of fabric first
5. Don’t skip the interfacing – your zip will look a lot better for it
6. Though the fabric has 4 way stretch there is one direction that is more stretch than the other – cut your pattern pieces so the stretchiest direction goes across the body
7. I found there was a subtle difference in the colour of two sides of the fabric so make sure you’re consistent. On the plus side it was fairly easy to tell as it curls obviously to the right side. It still didn’t stop me attaching one sleeve the wrong way though.
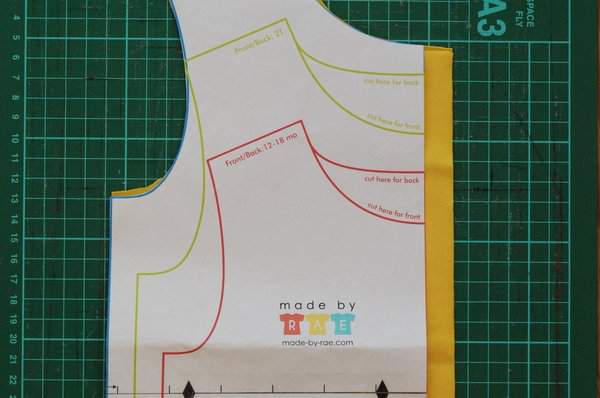
1. Cut out your pattern pieces
You need to cut your back piece and sleeves (long or short) as normal. You may want to add a bit more length as cycling jerseys are typically a bit longer than T-shirts. For the front don’t cut on the fold (so you will have two front pieces) and add half an inch to the width down the middle. You can see the top half of my front pieces below.
You also need to cut out an extra piece for the back pockets. I used the main pattern piece and cut the shape from the bottom to 7” up for the 4T jersey. When deciding how high you want your pocket piece remember that you will lose almost 1.5” of the height to seams, so cutting 7” high gives you 5.5” high pockets.
Also, cut two pieces of interfacing that are the height of the middle of your front pieces by 1” wide. Iron these onto the wrong size of your front pieces.
We will cut the collar (and collar interfacing) in a later step. You will now have the following pieces;

2. Mark your pockets
Adding the pockets is optional but they do make it look like a proper cycling jersey. My children love theirs, especially as it gives them somewhere to keep their drink and snacks or toys when they’re out.

This step makes it so much easier to see where to join the pocket piece to the back to sew the pocket seam. It is more difficult to judge once you’ve sewn the elastic into the pocket piece.
Start with your back pocket piece and use tailor’s chalk to mark on the location of the pockets. First mark on ½” from each side seam for the seam allowance. Then measure the distance between these two markings and divide by the number of pockets you want. Make a mark that distance from each of the two seam allowance markings.
Next draw a line down from each of the pocket markings. You will sew here to divide up the pockets. Here is my pocket piece, hopefully you can see the chalk lines.
Repeat this process with the main back piece so the markings are in exactly the same places.
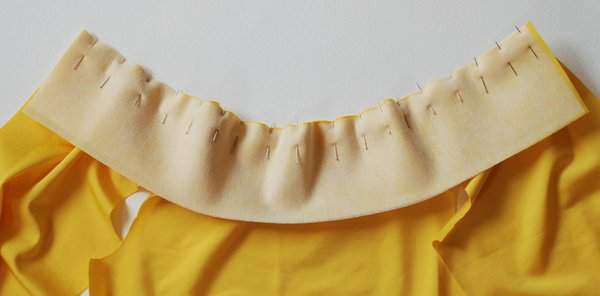
3. Add elastic
Press the top (narrower edge) of the pocket piece ½” to the wrong side and pin.
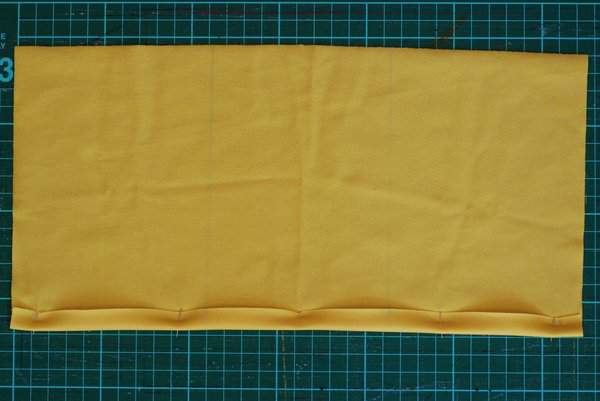
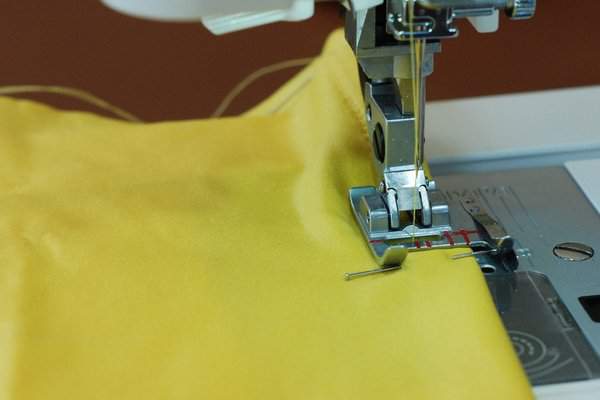
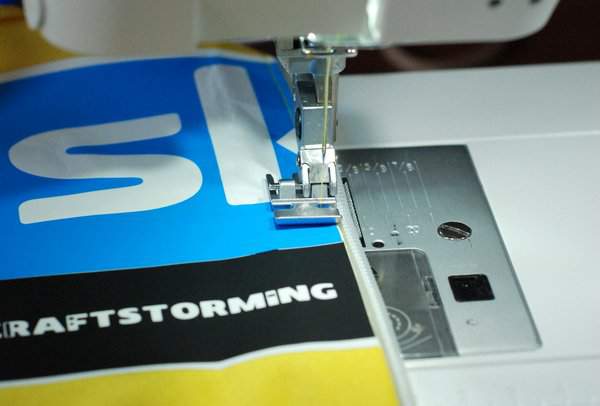
Sew the seam with a 3/8” seam allowance. Use a stretch stitch if you have one, if not then I’d recommend a zig zag stitch as the pockets will probably get stretched a lot.
Cut a piece of ¼” elastic that measures about 1.5” less than top of the pocket piece. Use a bodkin or safety pin to pull the elastic through the casing.
When the tail end of the elastic is level with the edge of the pocket piece stitch it into place about ¼” from the edge.
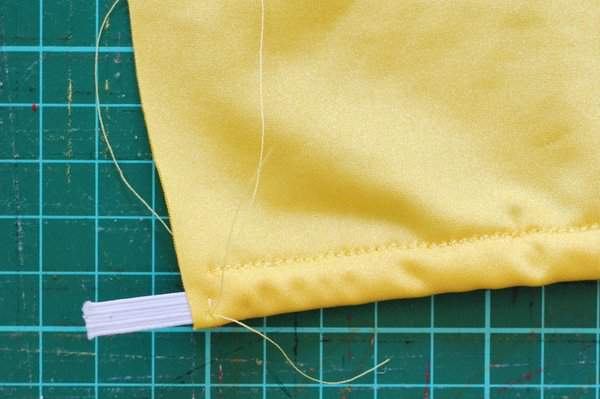
Pull the other end of the elastic through. At this point you can judge if you want to make the elastic shorter to get stretchier pockets. Once you’re happy with the length stitch the elastic into place as before.
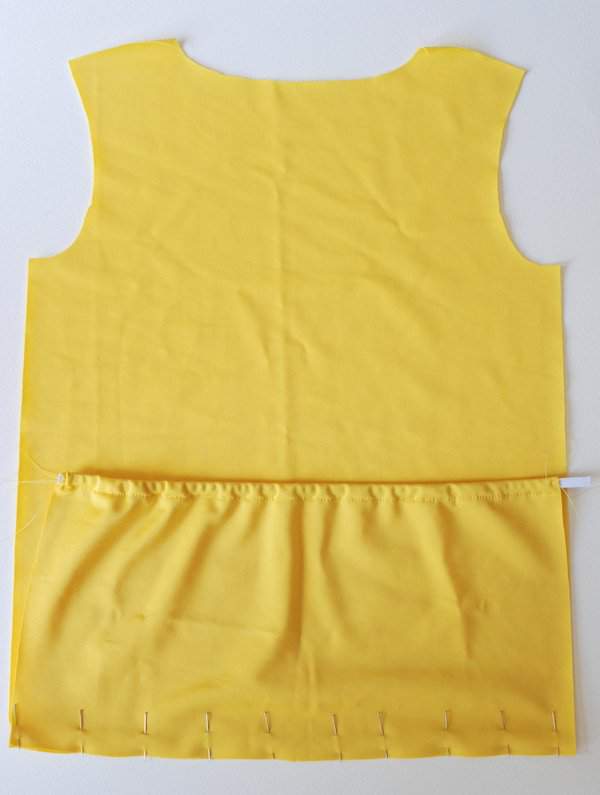
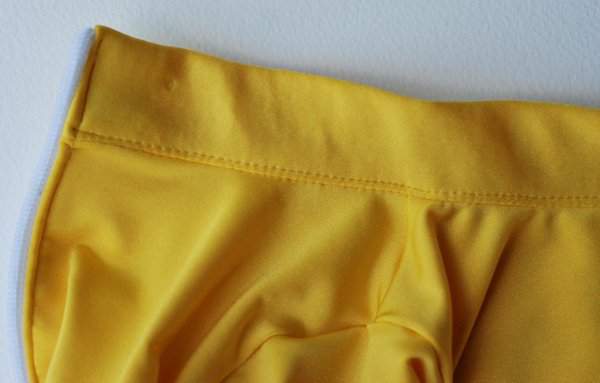
4. Attach the pocket piece
Pin the pocket piece into place so the wrong side of the pocket piece is facing the right side of the back piece. I used my serger to join the pieces together on each seam. If you use a sewing machine instead then a straight stitch is fine on the side seams but use a zig zag or mock overlock stitch for the bottom. Sew within the seam allowance stated in your pattern, as close to the edge as you feel comfortable with.
I found this fabric had a tendency to slip when I was sewing two pieces together across the width (despite using lots of pins), although it was fine in the other direction. If using a sewing machine I would recommend joining the two pieces with water soluble basting tape before sewing across the bottom. Don’t worry if you get a wavy effect on the bottom seam as the elasticated casing we add later will hide this.
I also serged the bottom of the fronts of the shirts so they would be the same length and have the same finish. This is optional if you’ve used a sewing machine.
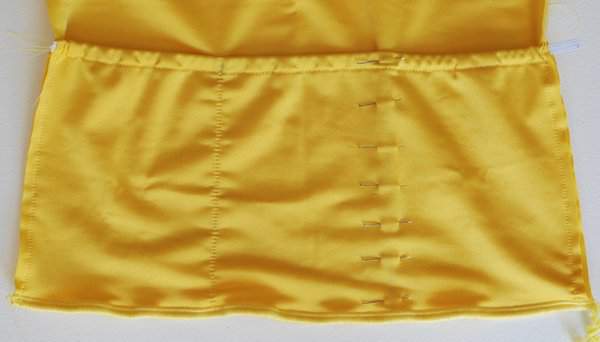
Pin the pocket and back pieces together at the pocket markings. Stitch down the elastic at the top securely then sew down the lines you marked to create the pockets.
5. Sew the shoulder seams
Place the back piece with right side facing up. Place the front pieces on top right sides down, pin and sew as per the pattern instructions.
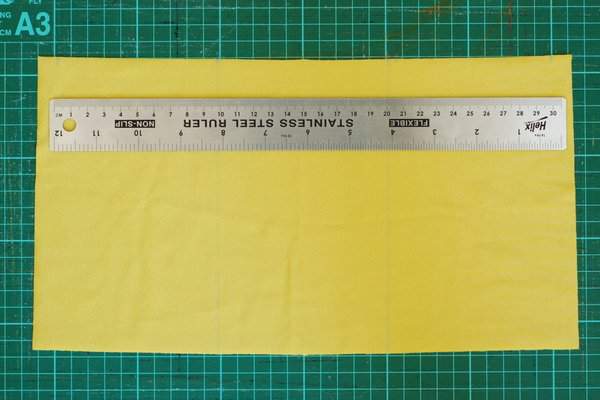
6. Cut and attach collar piece
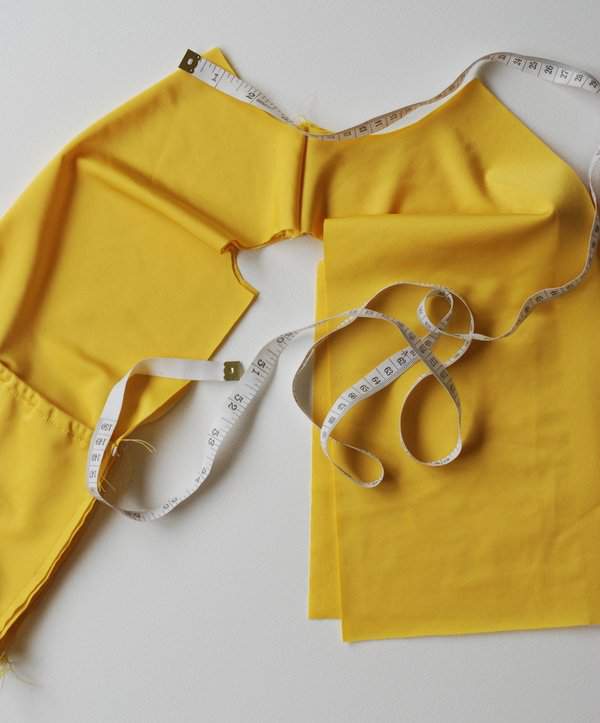
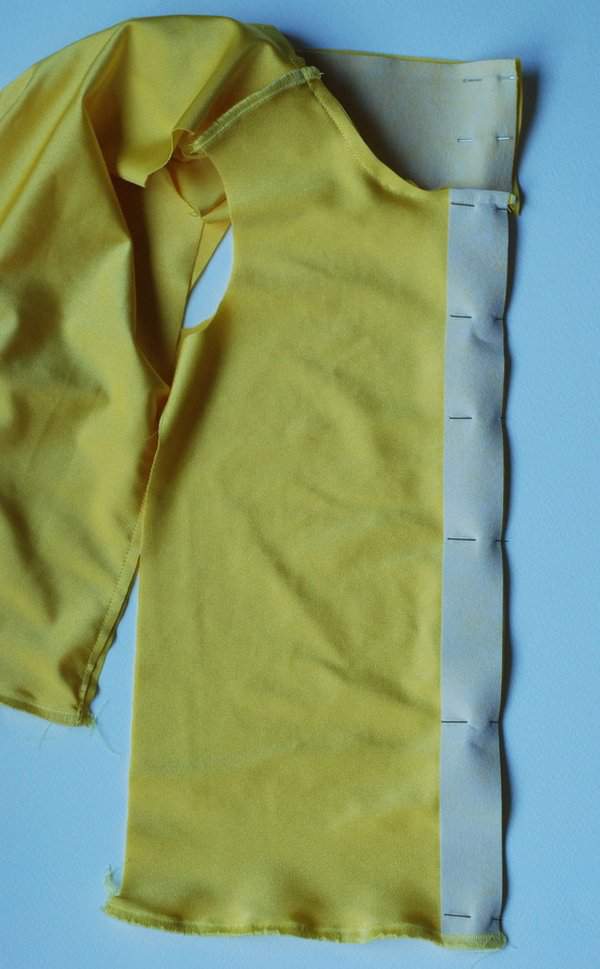
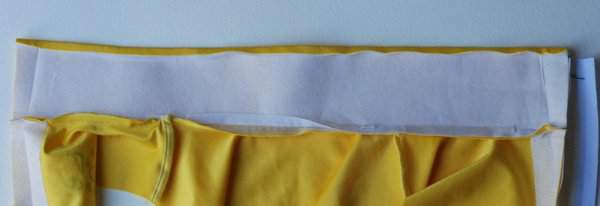
Measure the neckline opening. I found it easiest to measure by laying the top out as shown in the photo below and doubling my measurement.
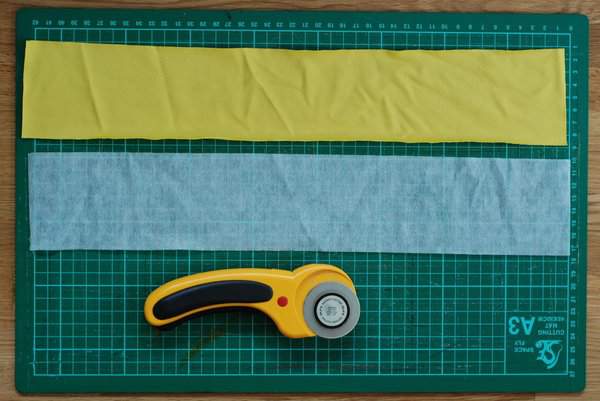
Cut your collar piece to be this width by 3″. This will give you a collar that is 1 and 1/8 inches high. If you would like a different height collar adjust your measurement accordingly – you will need to cut you piece with a height of 2 x (desired collar height + 3/8″).
I measured the 4T size as 16″ wide, although I added an inch just to be safe and ended up needing it, so my piece was 17″ by 3″. Cut a piece of lightweight fusible interfacing the same width but by 2¼”. This means that the edges will not have interfacing and reduces some bulk in the collar seam.
 +
+
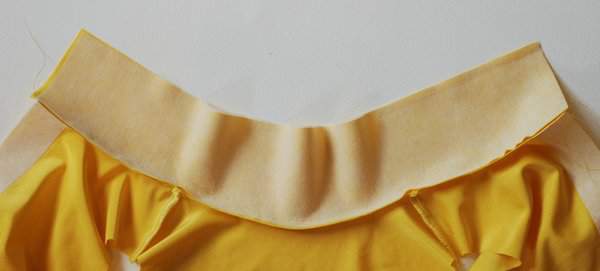
Iron the interfacing onto the wrong side of the collar piece, leaving 3/8″ of the collar uncovered at the top and bottom. Pin the edge of the collar piece to the edge of the T-shirt, right sides together. Sew with a 3/8″ seam using a regular straight stitch.
Flip the collar upwards and press seam allowances upwards towards the top of the collar.
7. Add any decoration
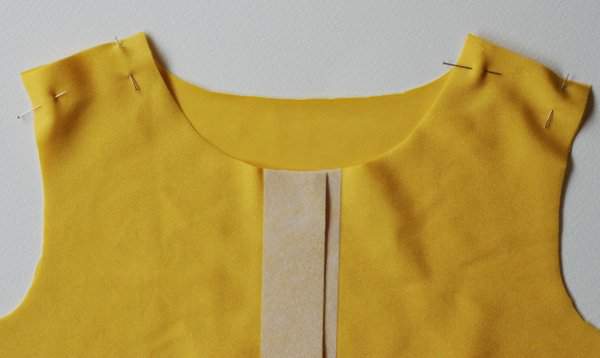
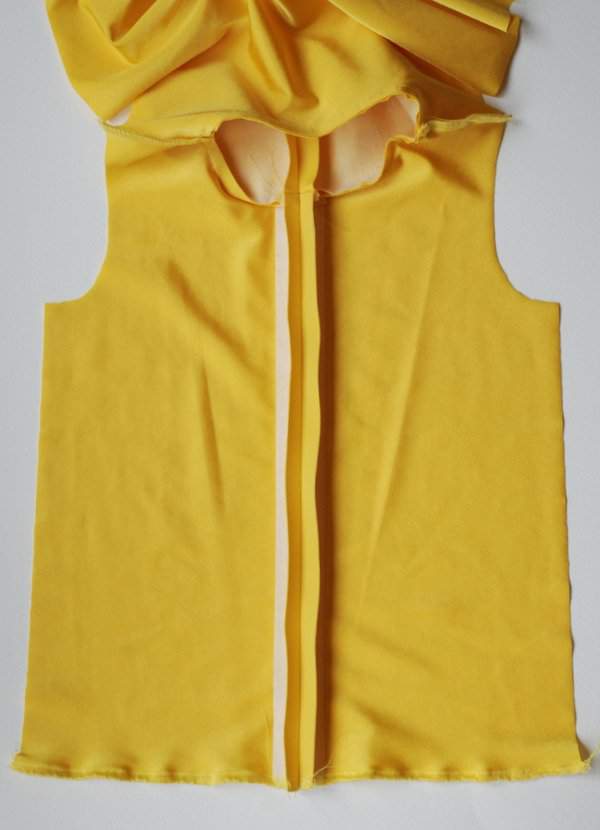
If you are adding any detail such as a logo like I did then sew the two front pieces (including the collar) together in the middle, right sides facing and with a ½” seam allowance. Use a the longest straight stitch you can and take care to line up the collar seam that you sewed in the previous step.
I found it easier to make sure my split design would line up this way. I also tried adding the zip with the seam closed like this too but found I couldn’t line up the edge of the fabric as close to the teeth as I wanted on both sides.
Press the seam allowances open and add your design to the right side.
I used Inkscape to design my cutting file and Make The Cut to cut it out of heat transfer with my Black Cat Lynx. I layered the heat transfer to match the Team Sky design.
If you’re not adding any decoration or want to add it once you’ve finished they jersey then just press the middle of each front piece half an inch to the wrong sides and move onto the next step.
8. Zip
If you sewed the two front pieces together in the previous step then very carefully unpick them. Fold the top of the collar 3/8″ to the wrong side and press. I used water soluble basting tape to hold it in place.
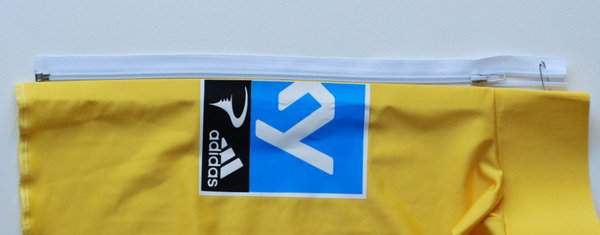
Now we need to check how long your zip needs to be. Measure the length of the middle from the bottom to the collar seam (not the top of the collar), add 1 and 1/8 inches for the height of the collar (or whatever measurement you chose in step 6 then deduct ½” (for the hem at the bottom). For the 4T size I needed my zip to be about 15″ and for the 2T I needed it to be 13″. Mark the measurement on your zip with chalk or a disappearing fabric pen, then lie the zip in place on your top to check.
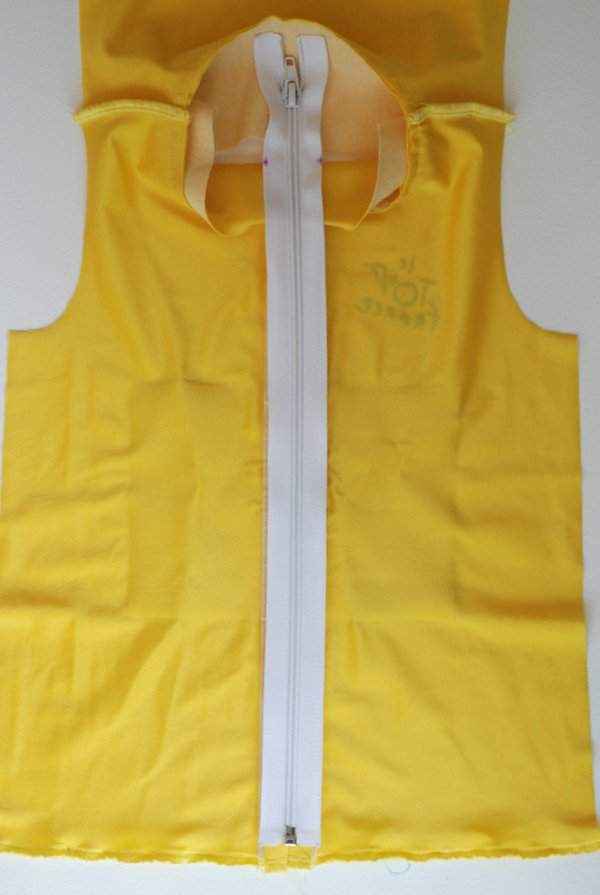
You can see in the photo above that I’ve place the zip ½” from the bottom. I then folded my collar over to the height it will be after folding down so the top of it now lines up with the collar seam. My pen mark is level with the top of the collar. You will actually need your zip to be a little bit longer than this so you double it over at the top to prevent the zip pull coming off.
Take your zip away from the top and make a further mark about 1″ above the previous one.
Move the zip pull down below these marks and cut across the top marks.
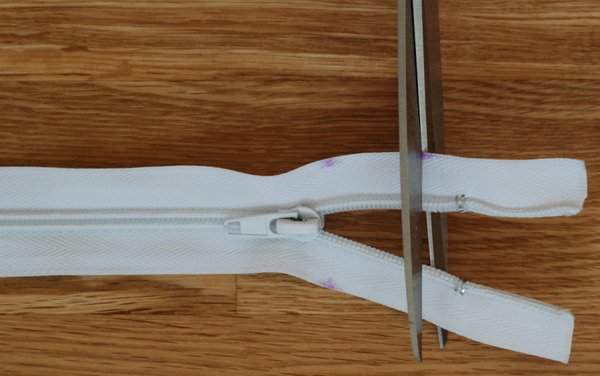
I would recommend putting a temporary stop in place by using a safety pin. This will prevent you accidentally pulling the zip pull of (yes, I did this).
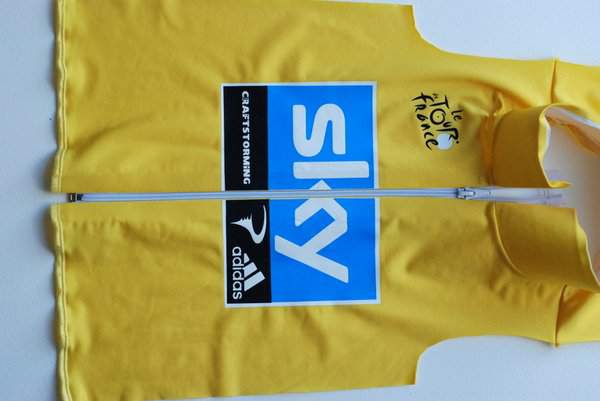
Pin or use water soluble basting tape to attach one side of the zip to the top. Starting at the bottom attach in place and pull the top taut as you work your way up. This will prevent the fabric bunching up when you sew your zip in place. When you get to the top attach up to the middle of the collar then leave the rest. The interfacing you applied earlier means that you can’t stretch the fabric too far.
Repeat on the other side, making sure you line up both sides at the bottom, at the collar and your design if you have one.
Now open the zip fully. We are going to sort out the top of the zip. This is the hardest part of the tutorial to explain but hopefully this picture will help.
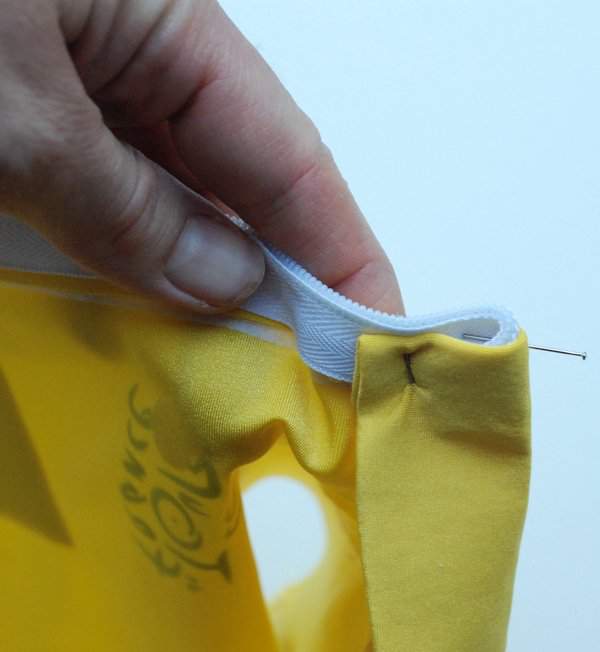
You need to flip over the collar so the edge you can see lines up with the collar seam. Pin this into place. Arrange the top as close to the zip teeth as possible on the front side. On the reverse side though you need to angle the zip inwards. If you don’t do this and fold it straight over you will find that the teeth make it really difficult to close the zip all the way to the top. Pin this into place and do the same on the other side.
Do the zip up again and double check that everything lines up. Use your zipper foot and a straight stitch to sew your zip onto the top. Start at the top and backstitch a couple of stitches. I found I had to pull it through by hand initially to move over the teeth at the back of the top but once you get past this the rest is easy.
Repeat on the other side and your zip is finished.
9. Finish Collar
Fold the full width of the collar down so that the top of it lines up with the collar seams. Secure in place with pins or water soluble basting tap. If using pins then pin from the right side of the fabric as this is the side I’d recommend is on top when you sew.
Sew along the collar about 1/16″ from the collar seam.
10. Attach sleeves and sew side seams
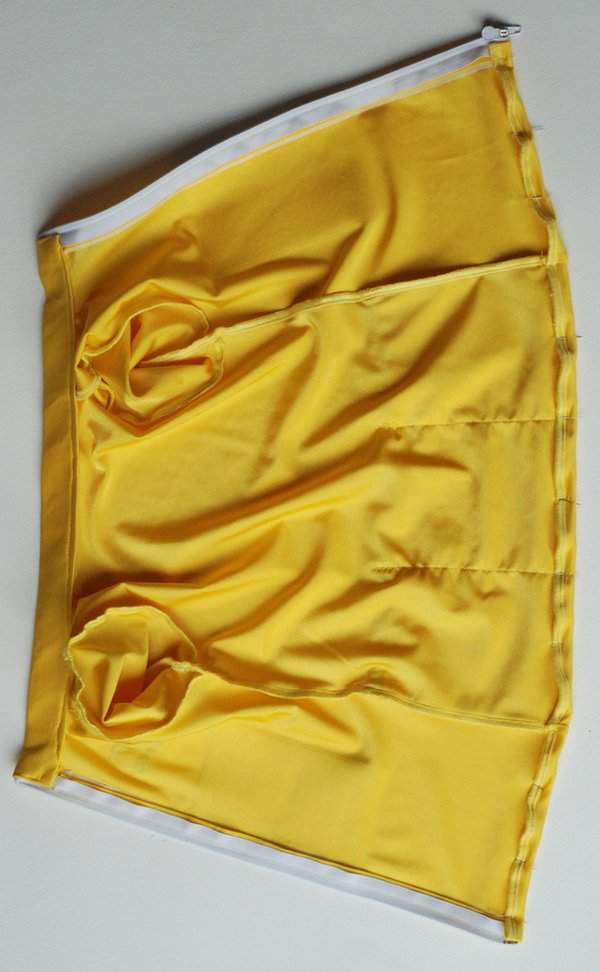
Sew sleeves and underarm and side seams as per your pattern. Your top will look something like this…

11. Waistband hem
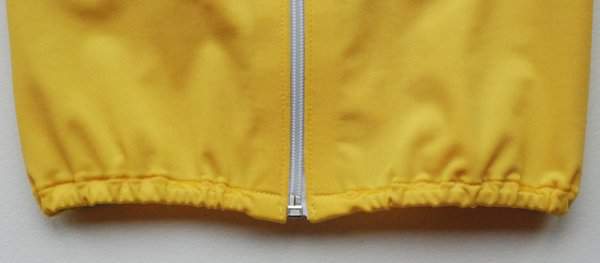
I added an elasticated waistband as this often features on cycling jerseys. Fold your hem ½” towards the wrong side. Pin and sew.
Measure the waistband and cut elastic about 2” shorter. Feed this through using a safety pin. Stitch the first side in place then check you are happy with the length before stitching the other end in place.
Tip: to avoid accidentally pulling the trailing end of the elastic through and having to start again place a safety pin on both ends.
12. Hem the sleeves
I created an elastic casing for the sleeves too. Fold the sleeve edge ½” to the wrong side as before and pin. As you sew around the sleeve leave about ½” open near the underarm seam.
Measure the opening of the sleeve and cut elastic about this length. Feed this through with a safety pin until it can be pulled through the other side. Overlap the ends by about ½”, check you’re happy with this and it won’t be too tight for your little one’s arm. Sew the two ends of the elastic together.

Sew the opening of the casing closed and repeat for the other sleeve. Woo hoo! You have finished your cycling jersey.
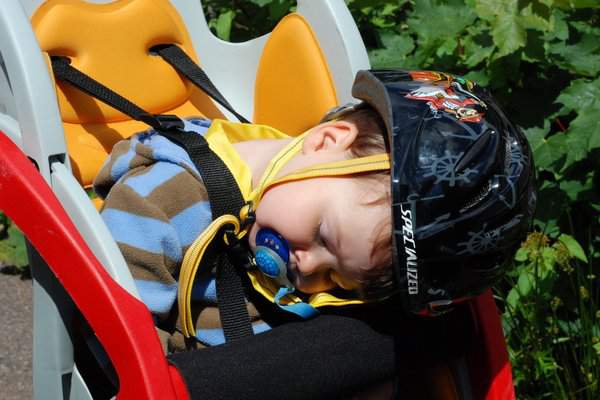
If you use this tutorial then just let me know if you’ve got any questions. I’d love to see any finished jerseys – you can email me with pictures at laura@craftstorming.com. I’ll leave you with this photo – I expect this is how the Tour de France riders feel at the end of a long day.


19 Comments
Love love love love love it!! That is so cute and looks so good! Awesome tutorial too! Do you like the stretch stitch on your machine? I haven’t had much luck with mine.
Thanks Abby. I used stitch no. 2 on our machines for a stretch stitch. It took a while to get used to the way the fabric feeds in but I really like it now.
Oohh, I wish I had this tutorial some days ago! Tomorrow the Tour is arriving in my town and I have a son who is mad about it! I will try to make at least one for the 22th! Thank you!
That’s so exciting Sarah, I hope you and your son have a fantastic day tomorrow. I had hoped to get this tutorial up a bit earlier but didn’t quite manage it. I’m really pleased to hear you’ll be using the tutorial.
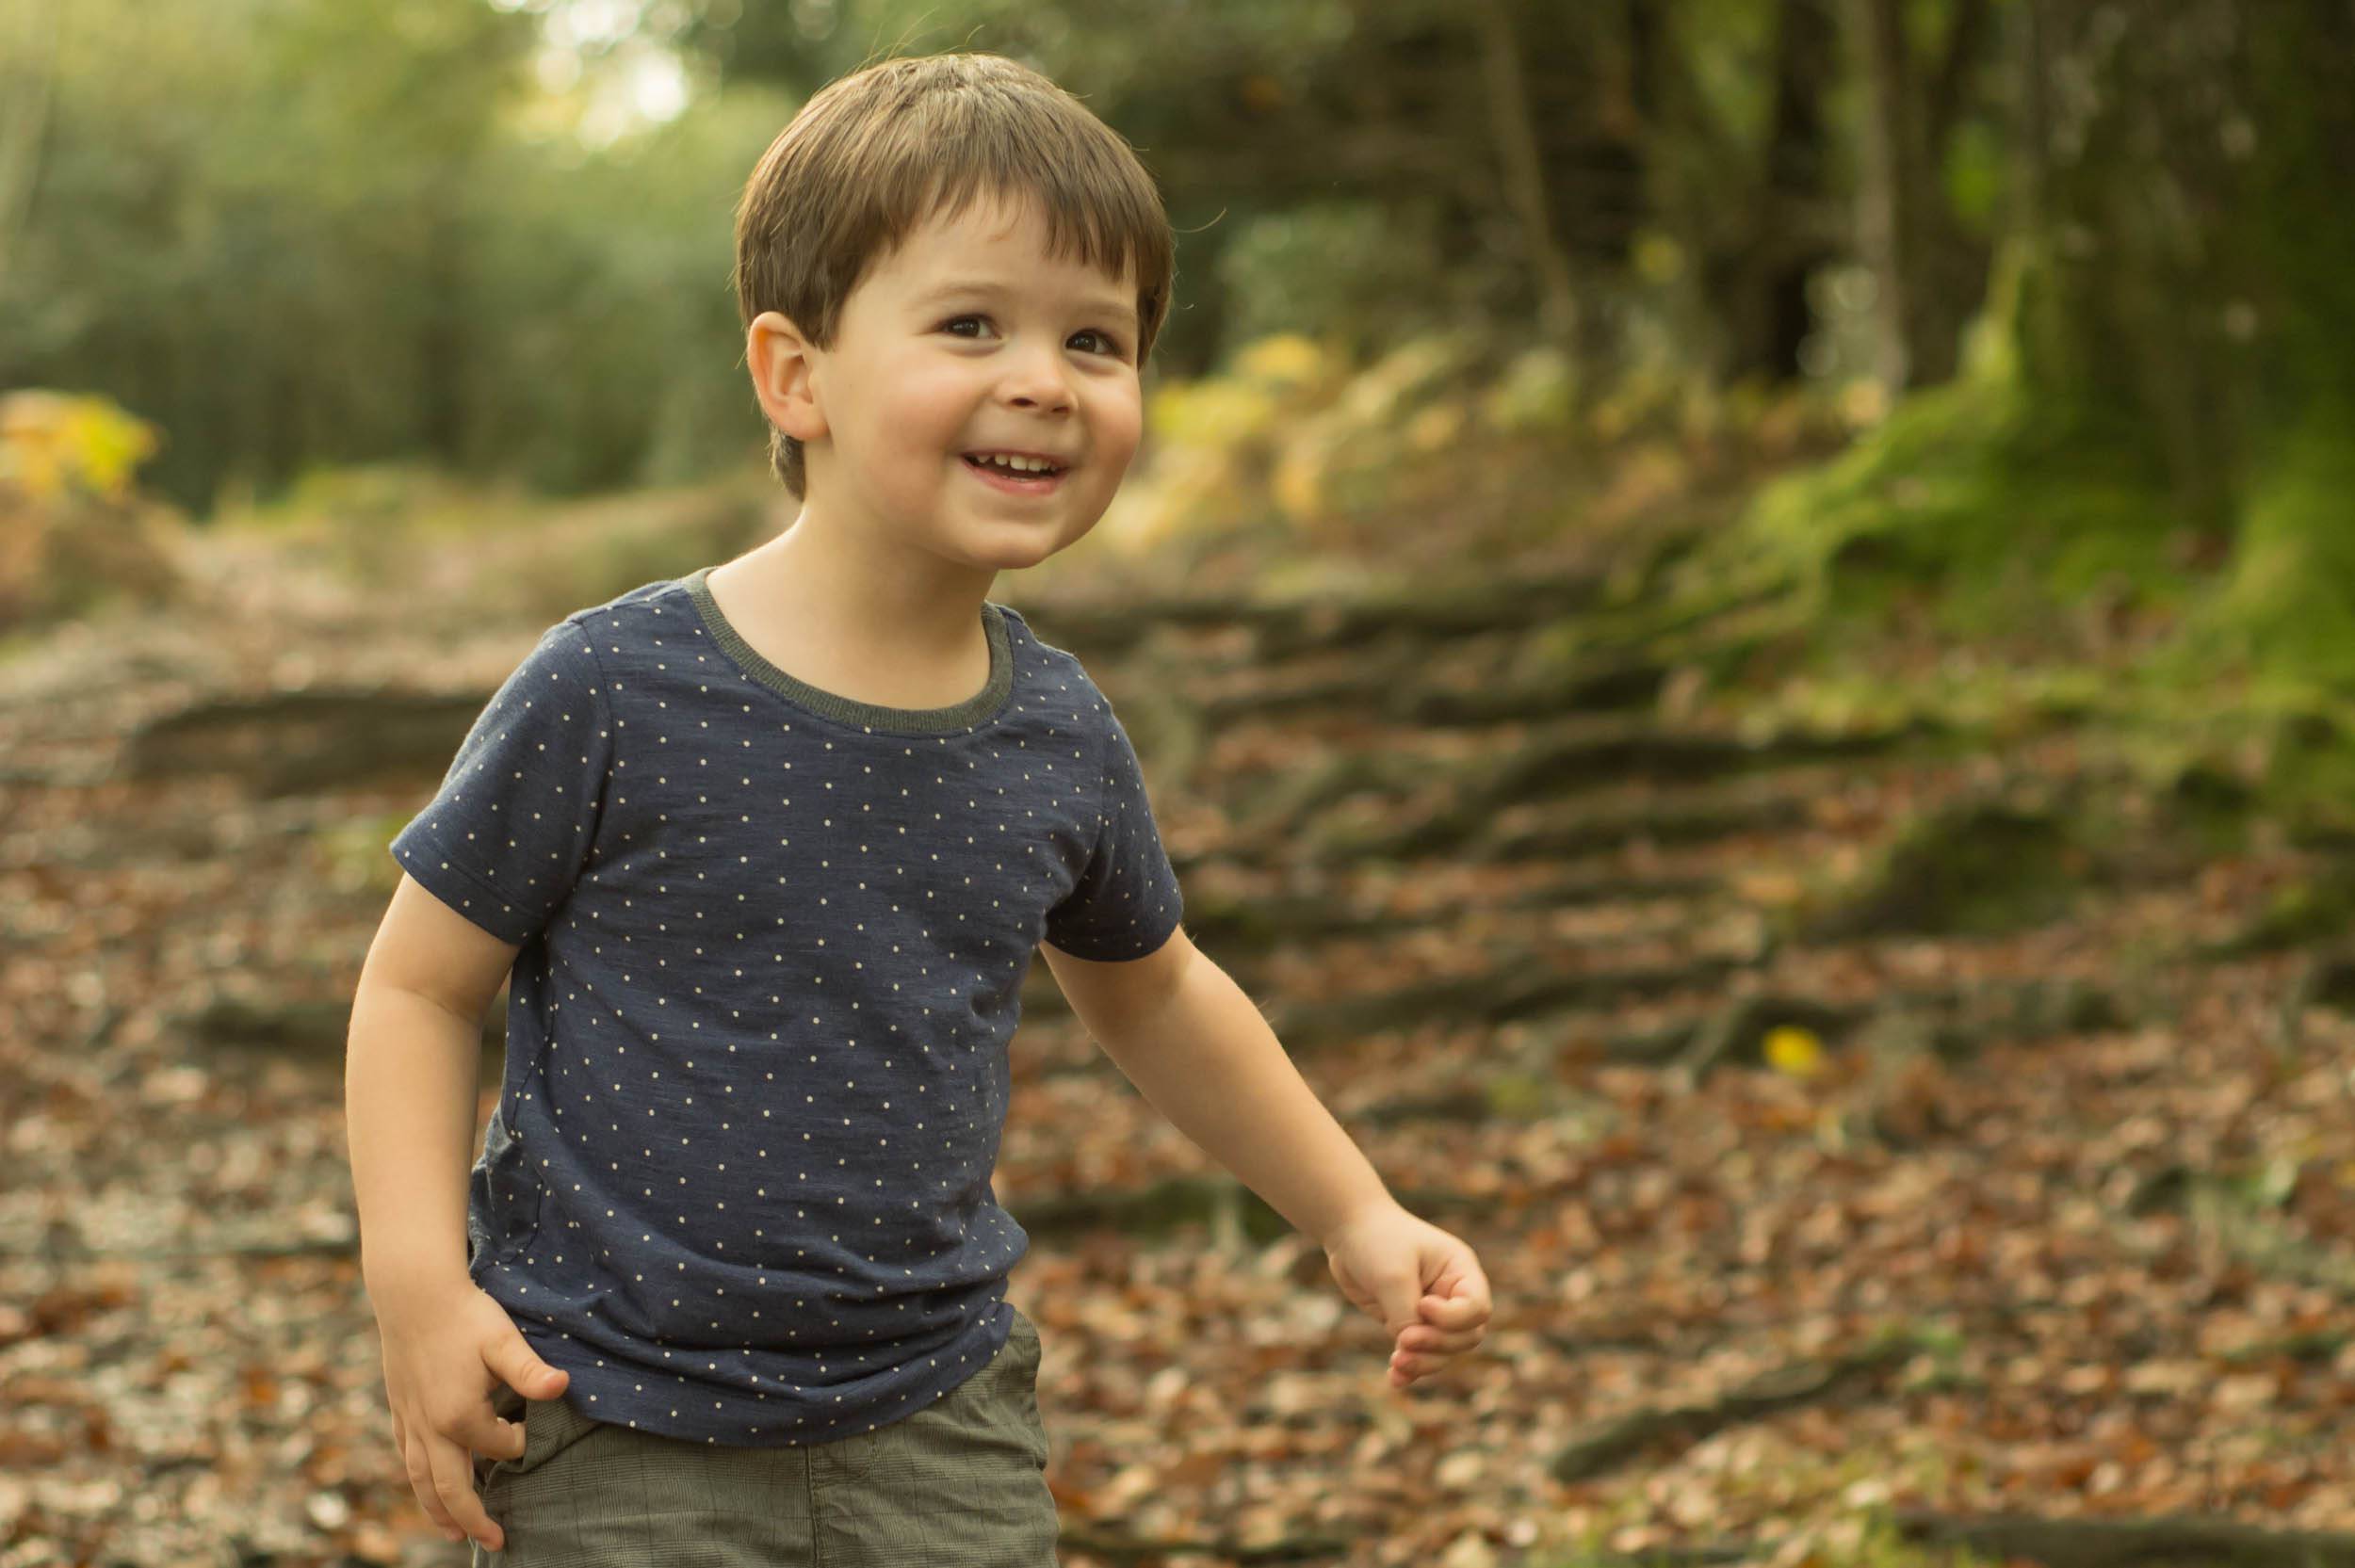
i love this so, so, so much! fantastic tutorial too. gotta love that flashback skinny tee pattern – it’s the perfect base. your little guy looks so excited to be on team sky! 🙂
Thanks Kristin 🙂 Yep, it’s such a great pattern.
OMG. SO. AWESOME!!!
🙂
🙂 Thanks Rae
Laura, you’ve outdone yourself… what a fantastic post. I don’t saw but it looks rather complicated. Wow, how cute are your boys in those shirts.
Totally floored me, as always. Thanks for the visual feast.
Hope to see you at a meet up. x
Aw, thanks Tina, you’re too kind. Hopefully I’ll see you at the August meet up x
OK I’m French, I watch Le tour de France and seriously your tiny jersey is like the CUTEST THING EVER !!!!
YOU ROCK!!!!!!!! 🙂
Iris
from the MARRIED LIFE
matthewandiris.blogspot.com
That’s adorable! I love the pocket details and the customised logo…
WOW WOW WOW!!!!!
I’ve just found this via Rea’s blog, your yellow jersey is amazing. We are big cycling fans up here in ‘Wet’ Wakefield and I have a 5 year old who would love one of these, I searched high and low for a junior size Sky or TDF jersey with absolutely no luck, (instead I ended up buying him a normal jersey tee from the TDF shop, which isn’t quite the same as a proper yellow jersey!). Why didn’t I think of making my own? Not enough time to make one for this year, but I’m bookmarking this page for next year’s 100th anniversary.
Fingers crossed for Brad and the Sky boys, and if Cav doesn’t win on the Champs Elysees on Sunday I’m going to have a 5 year old and 41 year old who will be inconsolable!
Thanks for a great tutorial.
Laura, I’m not sure how i missed this earlier, but this is so darn cute!!! love it!!!
I am so over the moon for this Tour de France shirt! My husband is a huge fan, and if I made one for the little guy he would flip!! This is just so creative and fantastic – I love it! WELL DONE!!! I featured it today on the homepage over at SewSet. Awesomeness. Thanks for sharing!
– Jess
SewSet.com
MeSewCrazy.com
What a cute jersey! (And the wearer is pretty adorable, too!) Now that the time trial is over, I can safely say congrats on the win and 2nd place by your countrymen. How exciting! We’ve been Tour fans for years (especially during the “Lance years” – we live in Texas), and our DVR is devoted to the race every July.
I LOVE it! I am going to feature it on my blog:
http://seemesew.blogspot.com
Thanks Shantel.
Am very impressed with this but struggling to find an image of the Sky logo you used having scoured Google images. Do you have a link or if not is it possible to upload it somewhere? Would be very grateful! Cheers, Steve