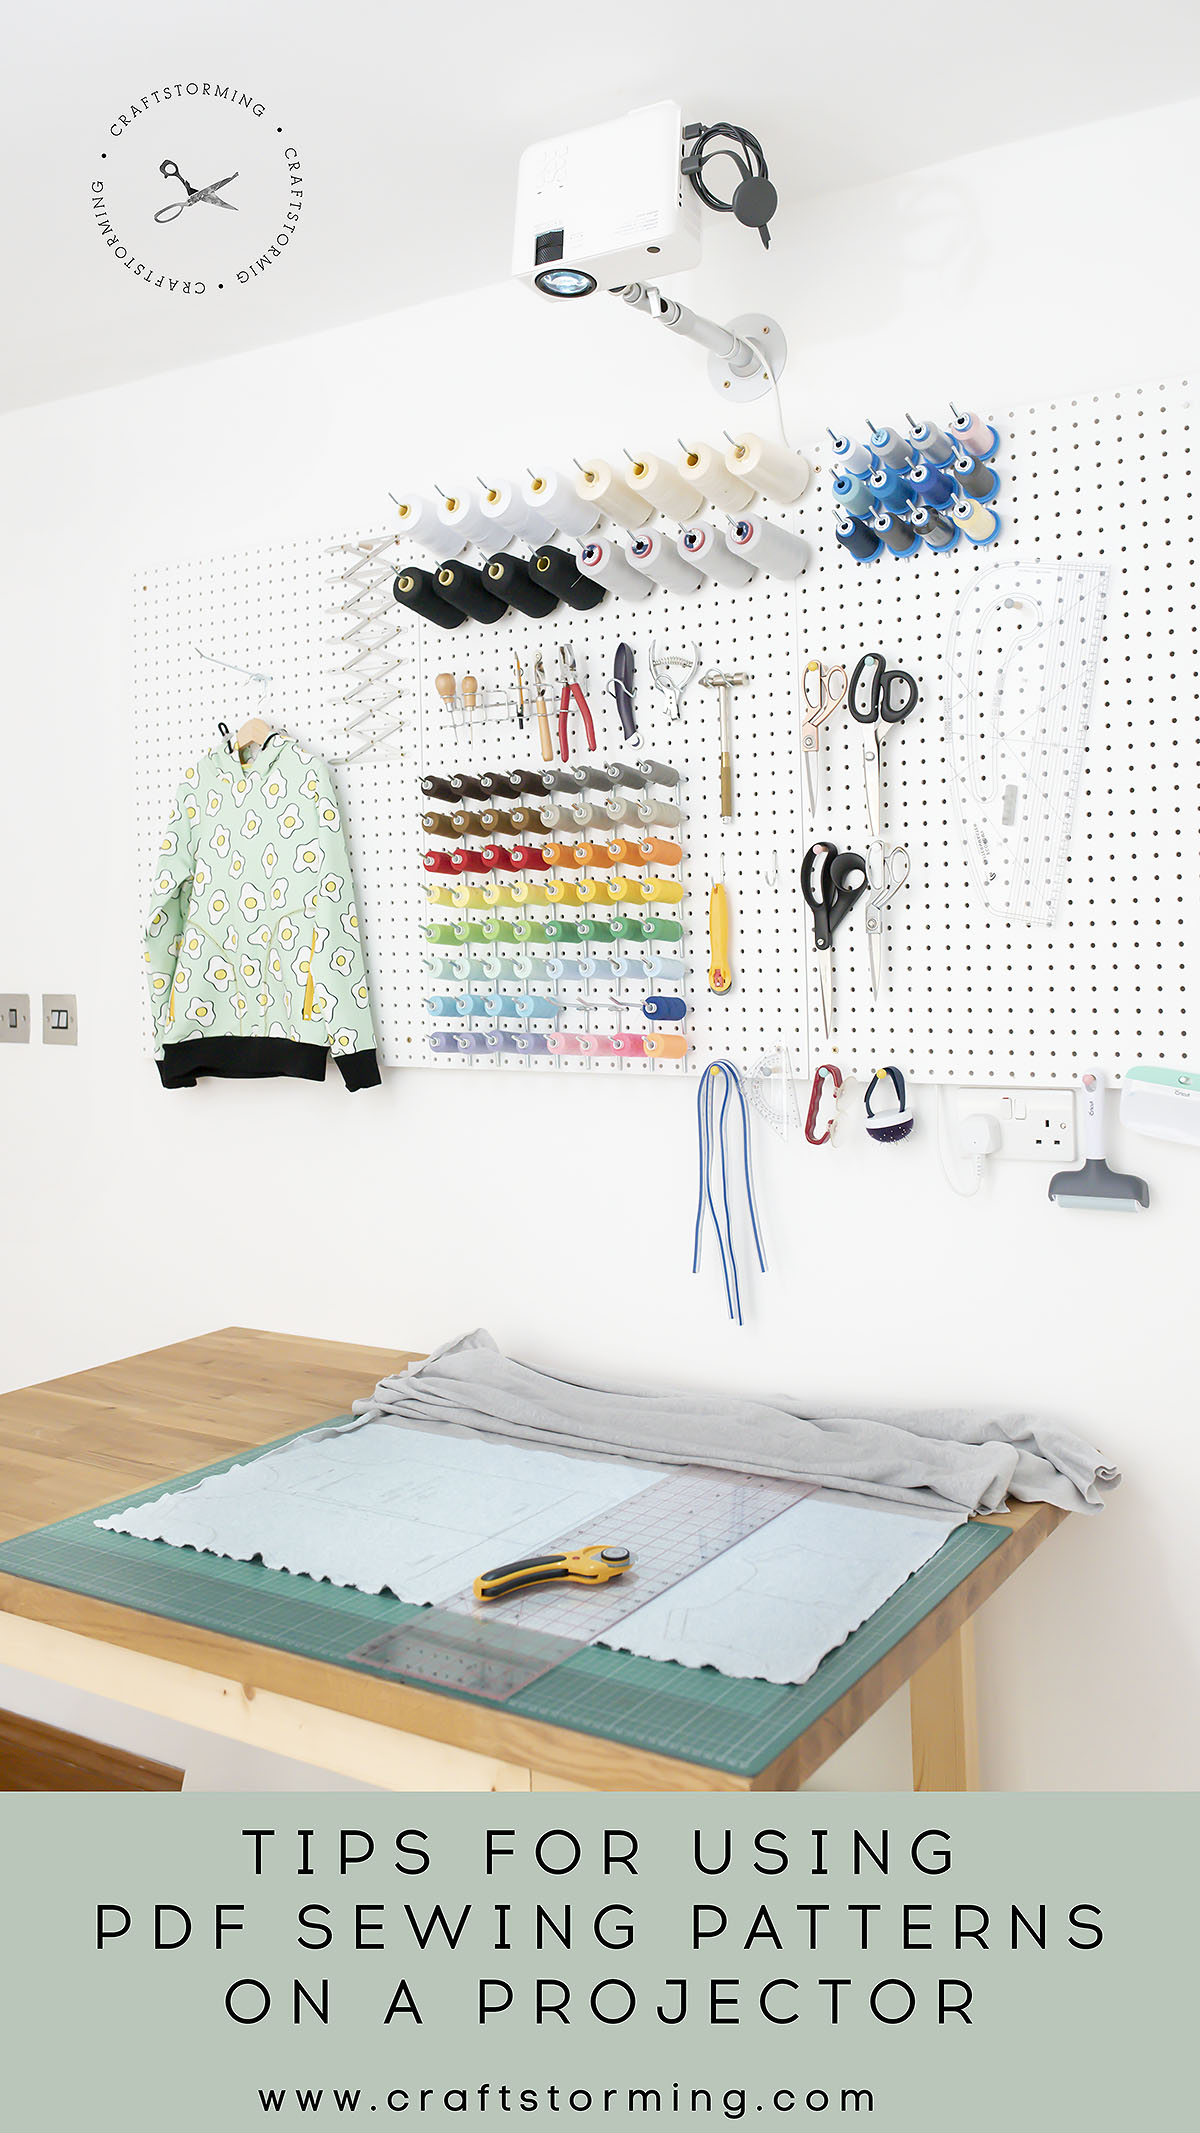
I have already discussed the main features of a projector for pdf sewing patterns in my previous introduction post, along with some of the pros and cons of using a projector. This follow up post is for those of you who have chosen to buy a projector, and now want to start using it. I’ve included some video tutorials for the first time, so let me know if you’ve found them helpful. I highly recommend a very supportive Facebook group, called Projectors for sewing, for anyone wanting more information. If you want to skip to a particular topic in this post, just click on the heading.
In this post we are going to cover;
- How a projector file differs from an A0 file
- Titchy Threads patterns with projector files
- Software to use
- Opening your files using Chromecast
- Using Full Screen Mode in Adobe
- Inverting colours in Adobe
- Other tips and tricks
how a projector file differs from an A0 file?
Most people will not have the option to print A0 size files at home, so print files are created for people to send to a print shop. Many designers, including Titchy Threads, do not include layers in their A0 file. Some do but the lines may be too thin to see clearly when projected. The files are also laid out optimally to minimise the number of pages requred to save printing costs.
There are many other things that can be included in a projector file though, some essential and others depend on preference. While it is often possible to use an A0 on a projector, you will really appreciate files that have these additional features once you start using a projector regularly.
LAYERS – layers are essential for a projector file to select only the size you are cutting, otherwise it can be very confusing to work out which lines to use.
GRID LAYERS – I have included two layers to check calibration – a 10cm grid, and a 4″ grid. Other pattern companies may include different sizes. Once you have checked calibration these can be turned off.
THICK LINES – in order to see the pattern lines projected onto the fabric, lines should be around 3pt (about 1.7mm). Solid lines are preferable although I have seen a photo of dashed lines that displayed very clearly.
ONE PAGE DOCUMENT – some patterns have pieces that are split over multiple pages for the A0 file. Sometimes it is even necessary to tape pages together for very large pattern pieces. For a projector file there is no limit on the page size and it’s more helpful to have the pieces within one page.
PAGE DIMENSIONS – you are no longer restricted to print sizes, and need to take into account moving along the fabric. The preferred format seems to be starting with A0 size with landscape orientation. The width of the file can then be increased to fit all of the pieces in. The person sewing would then scroll along the file to move each piece over their cutting area.
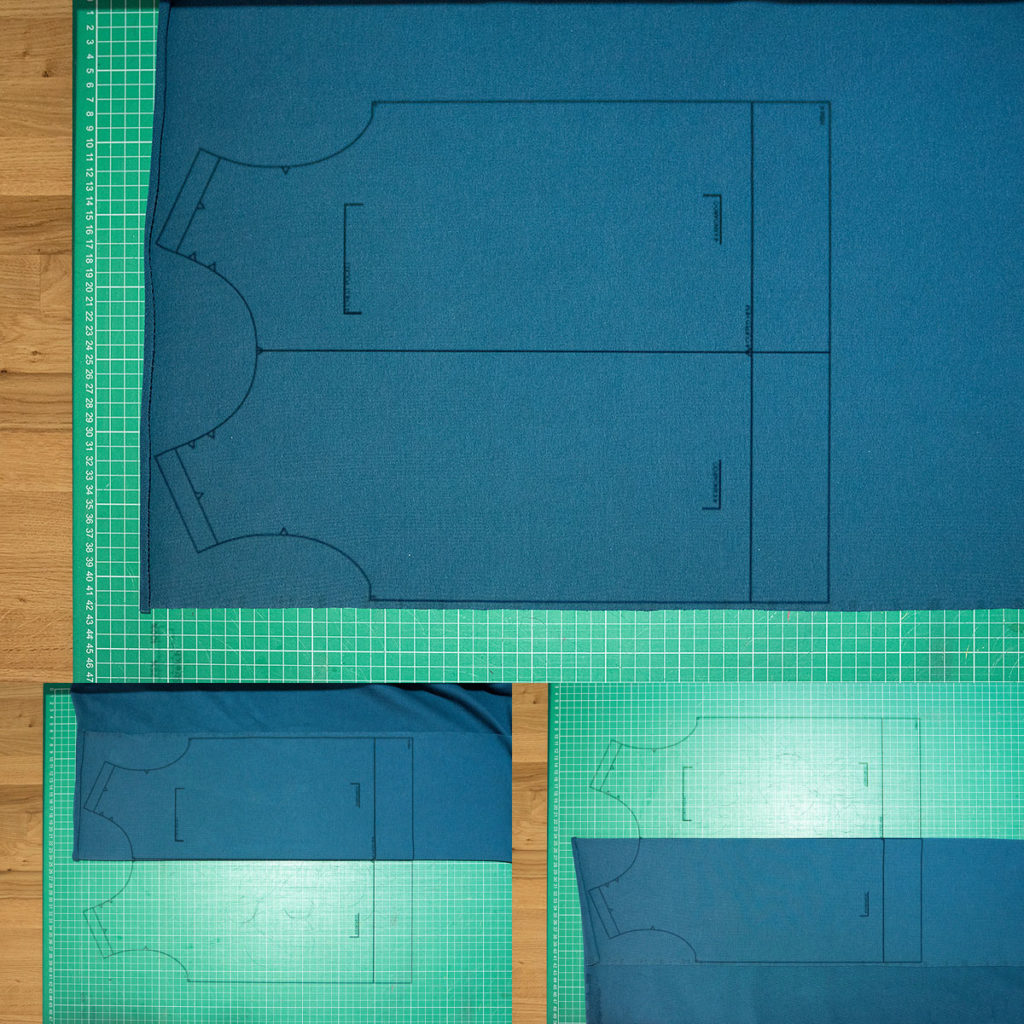
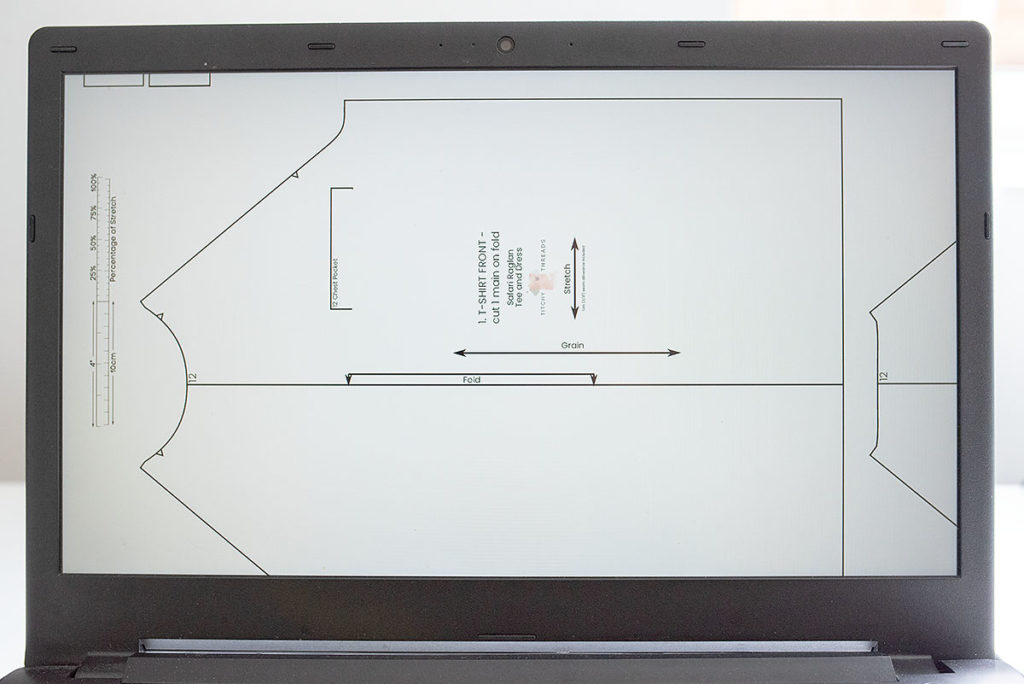
Below is an example layout of one of my projector files. As you can see, it is a wide and thin rectangle.

GRAINLINE DIRECTION – all of the pieces should be arranged with the grainline in the same direction. It is just possible to see that this is the case in the image above.
LARGER FONT FOR LABELS – it is more difficult to read a label on a projected image than a printed image. It helps to make the fonts a lot bigger and increase the thickness, although this isn’t always practical for smaller pieces.
FULL SIZE PIECES – as optimising for print is no longer necessary, a common request is to have full sizes pattern pieces for those that were previously cut on the fold. This is useful for arranging panels or preventing unwanted comedy pattern placement (such as flower boobs!). You can still leave the foldline down the centre, for those that prefer cutting on the fold, and it gives people the option to fold from both sides of the fabric.
PADDING – adding space around each edge of the file of at least 2.5cm gives the person using the file more flexibility on where they can position the pattern pieces on their cutting mat.
Are there any other features you that you think would be useful in a projector file? Leave a comment on this post, or come over to the Titchy Threads Facebook group and let me know!
which Titchy Threads patterns include projector files?
I’m excited to introduce projector files for the following patterns:
If you already own any of these patterns, then you just need to log in on the Titchy Threads website and you’ll find the additional file in your downloads section. A projector file will automatically be included with any new patterns, in addition to the A4/Letter file and the A0 file.
My projector files include all of the features I listed in the previous section. I would like to say a big thank you to Deborah and Karen, who have given me valuable feedback as I developed these files. I will be adding projector files for more of my patterns soon, and will keep this list updated.
software to use
ADOBE ACROBAT READER
If you are using a PC or a Mac then I would always recommend using the latest version Adobe Acrobat Reader to open the file, for projector use or for printing. The free version is all you will need.
XODO APP
This is free and is the only mobile app that is compatible with PDF layers. The main downside I’ve found compared to using Adobe Acrobat Reader on your PC or Mac is that you cannot set the zoom percentage. Instead you have to use your fingers to zoom in and out, so it can take a bit longer to get the size just right. For this reason, I prefer to use my laptop. It’s a handy backup option when my sons need to borrow my laptop for a school Zoom meeting though!
opening your files with Chromecast
My projector set up is described in more detail in the previous post. I have an Apeman 4800 with a Chromecast plugged in to allow me to project wirelessly. I made two videos, one of me opening a file up from my laptop, and another opening a file from my phone.
If you have a different set up, such as using a Mac, or have a wireless projector, then your process for opening your files will vary slightly.
Using full screen mode in Adobe
This removes all of the menus on the screen, maximising the amount of projected pattern pieces shown on your cutting mat. The photos below shows the difference in the area projected when using this.
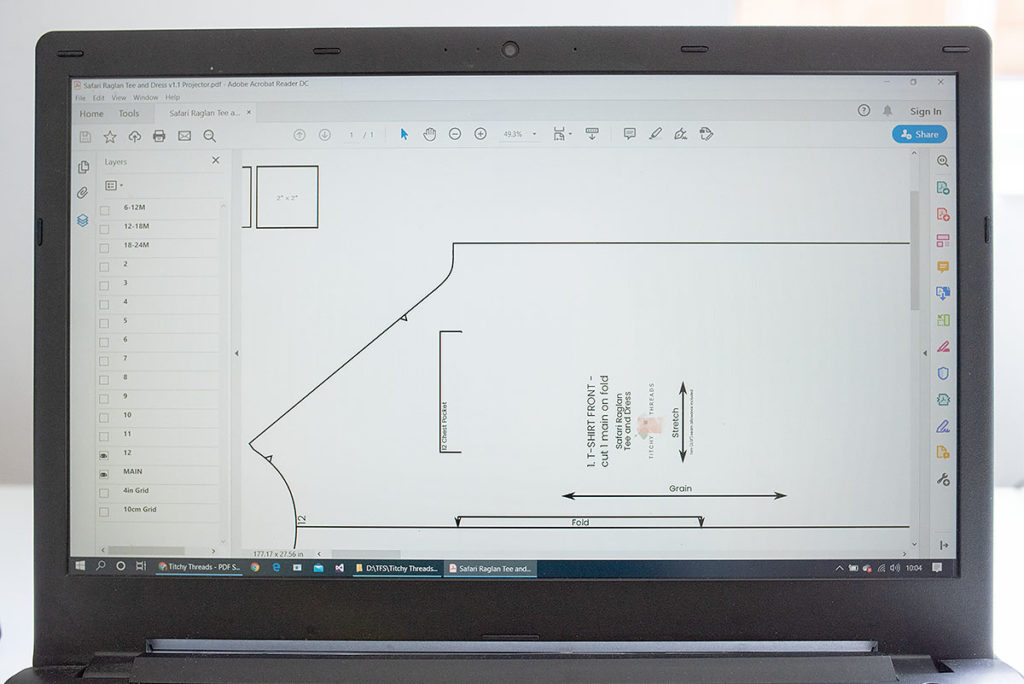
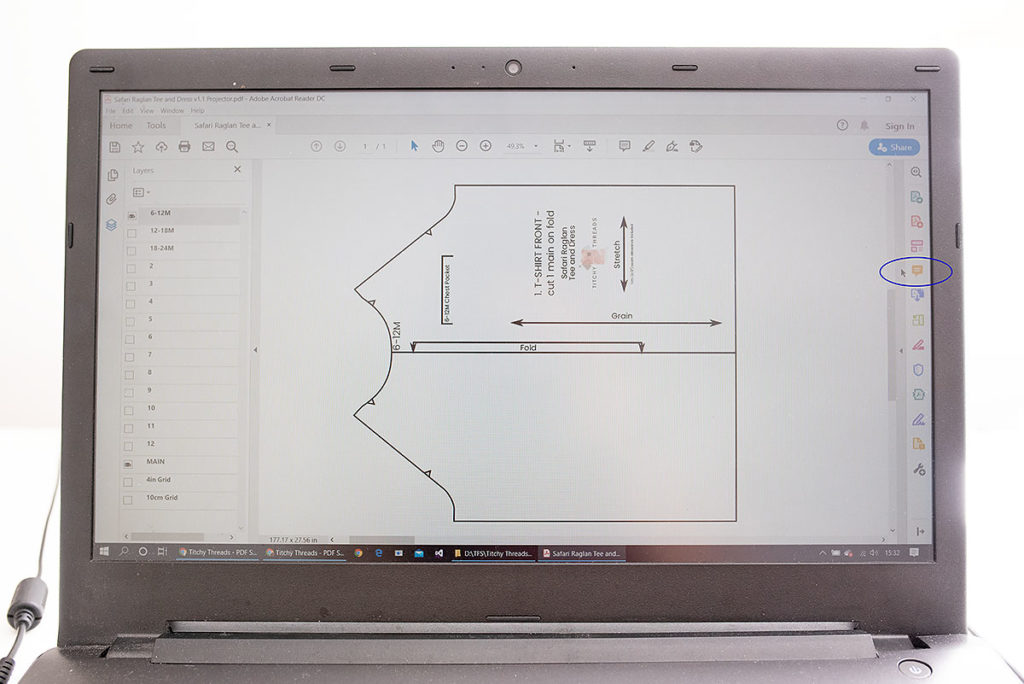
1. When you first open Adobe you will need the layers menu to select the size(s) you want, and turn off the grid after you’ve check your zoom percentage is correct.
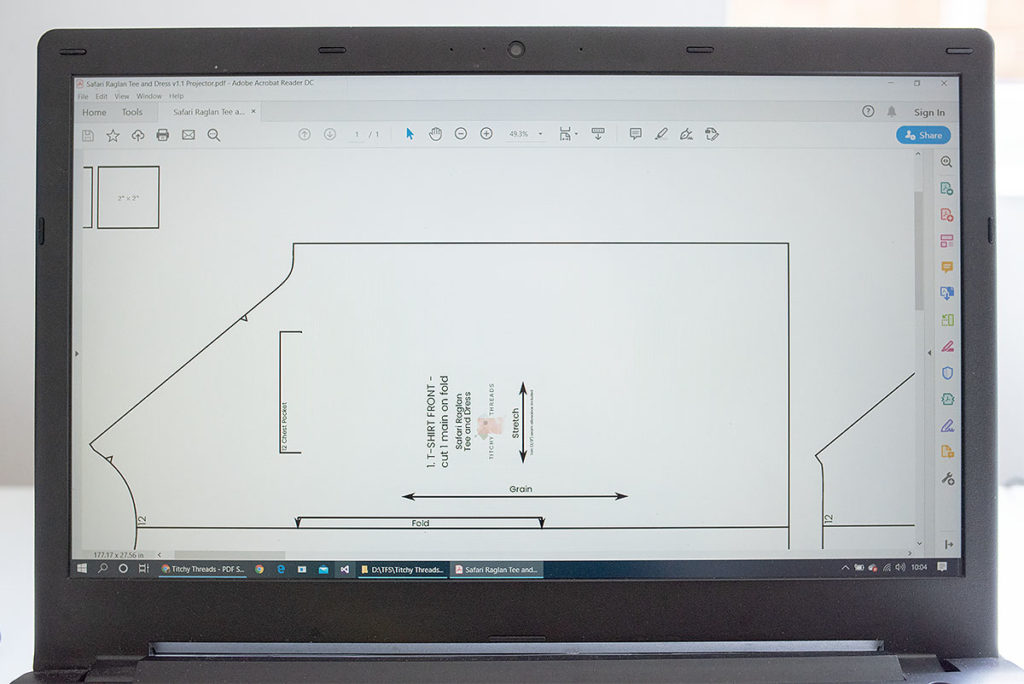
2. You can now close the layers menu on the left, to display a wider area of the pattern. This may be enough for your pattern pieces, depending on the size you are making (and your set up).
3. If you want to display even more of the pattern hit Ctrl+L (or Cmd+ L on a Mac) to display full screen. All of the menus have disappeared, however my computer defaults to showing the full pattern. I immediately hit Ctrl+Y and input my zoom percentage that I worked out at the beginning.
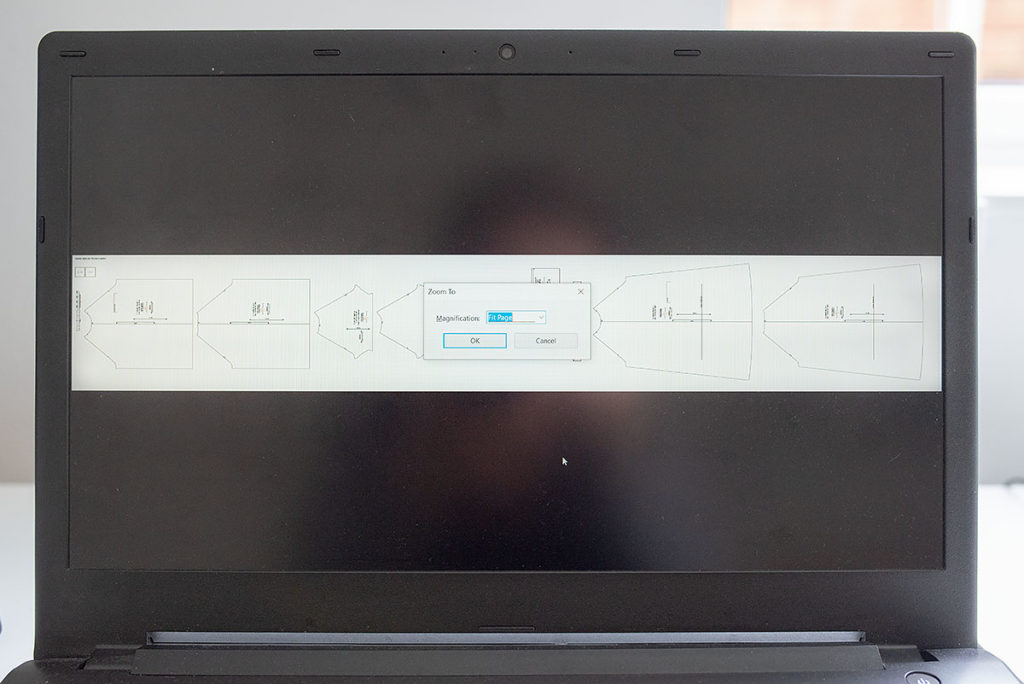
4. This is what is visible after inputting my zoom percentage. I can use the scroll bar to move around the pieces. You can see a lot more of the piece than in step 1, and for some pieces it could make the difference between being able to cut the whole piece easily or needing to move the pattern and fabric around.
Press the Escape button when you want to exit Full Screen Mode
inverting colours in Adobe
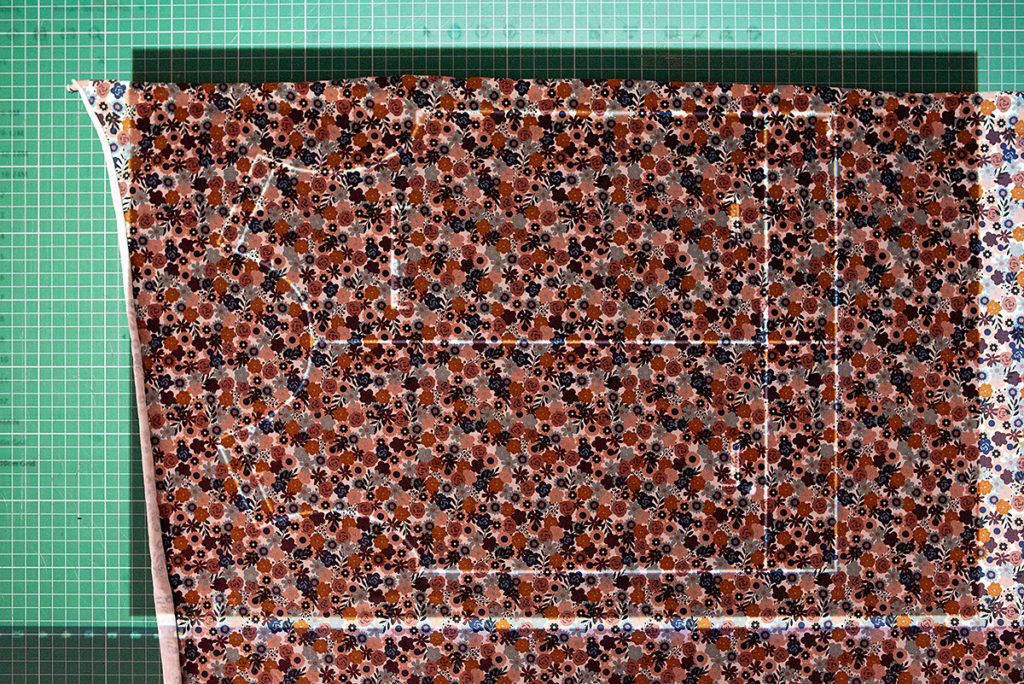
If you are working with a dark coloured fabric or a busy multicoloured print, then black lines may be difficult to see. The photos below show the different this can make. I chose a ditsy print with several different colours. In the first photo you can barely see the pattern lines.

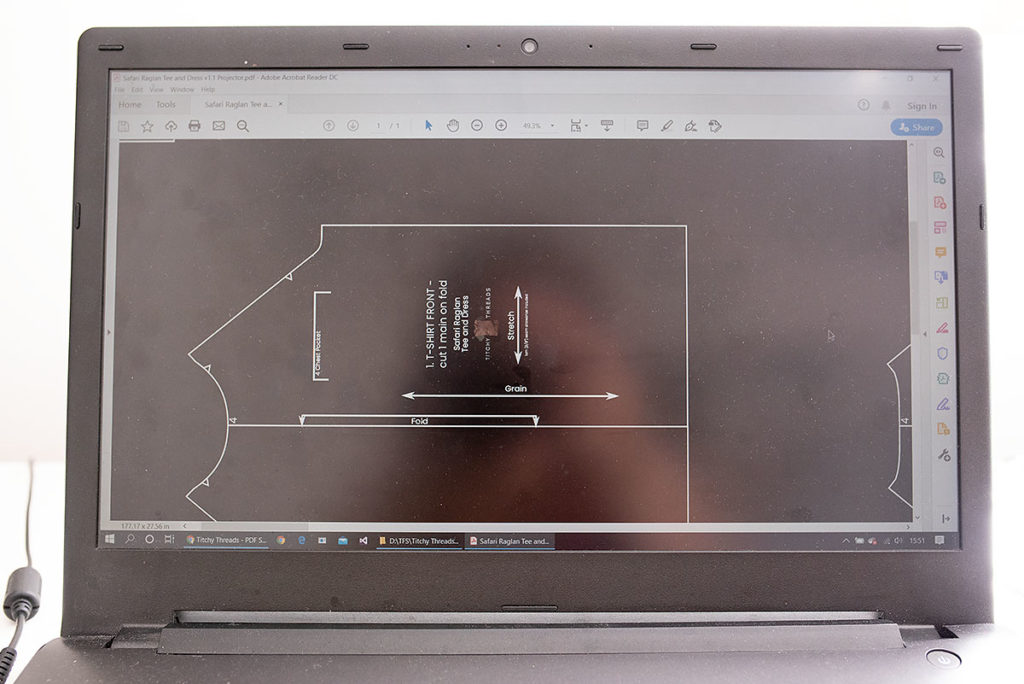
There is an option to invert the colours, so instead the background is black and the lines are white. With the colours inverted it becomes a lot easier to see and cut the pattern pieces. It’s clearer in person than the photo shows as well.
There are a couple of ways to do this in Adobe Acrobat Reader. I’ve shared both ways in the video below, in case you come across a file where one method doesn’t work. I’ve had this happen before and it resulted in me finding the second method. It doesn’t matter as long as you’re aware of the second method.
I’ve also written out the steps below.
Method 1
From the Edit menu, select Accessibility, then Setup Assistant.
- Leave the first window as it is and click ‘Next’.
- On Screen 2 (shown below), tick the box ‘Use high contrast colours for document text’. Change the drop down menu from ‘Green text on black’ to ‘White text on black’. Click on ‘Next’
- For the Screens 3 and 4 click on ‘Next’ without changing anything. For Screen 5 click on ‘Done’.
Your screen should now look like it does below.
You will need to revert back to the previous settings to undo this.
Method 2
- From the Edit menu, select Preferences. Go to the ‘Accessability’ menu on the left.
- Tick ‘Replace Document Colors’ and make sure the ‘Page Background’ colour is black, and ‘Document Text’ colour is white. Click on ‘OK’.
Your colours should now be inverted, as for Method 1. You will need to untick the ‘Replace Document Colors’ box to undo this.
Other tips and tricks
These are some other ways that help you to make the most of the software, or improve your efficiency further. The last two are some ways you can use your setup with more creative projects.
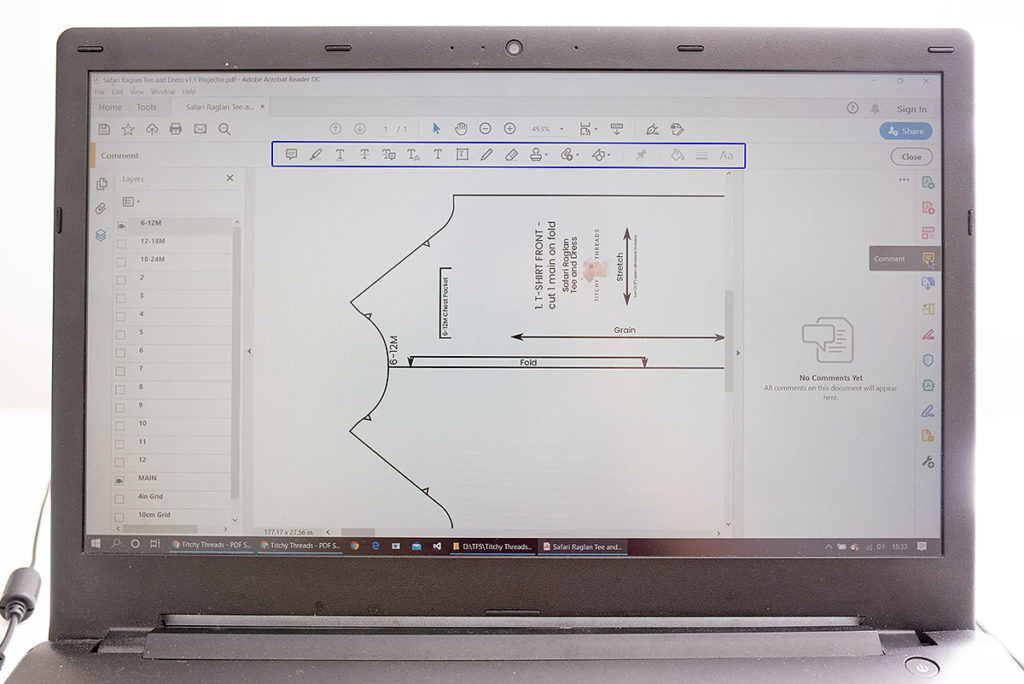
SIMPLE EDITING IN ADOBE – there are some additional features within the free version of Adobe Acrobat Reader that allow you to make simple edits to a pattern. For example, you can add shorten / lengthen line, draw lines to blend sizes . These will be especially helpful if you have to adjust a pattern.
1. With the right menu bar minimised, select the ‘Comment’ tool, as circled.
2. This will add an extra menu bar at the top, giving you a few simple ways to add details.
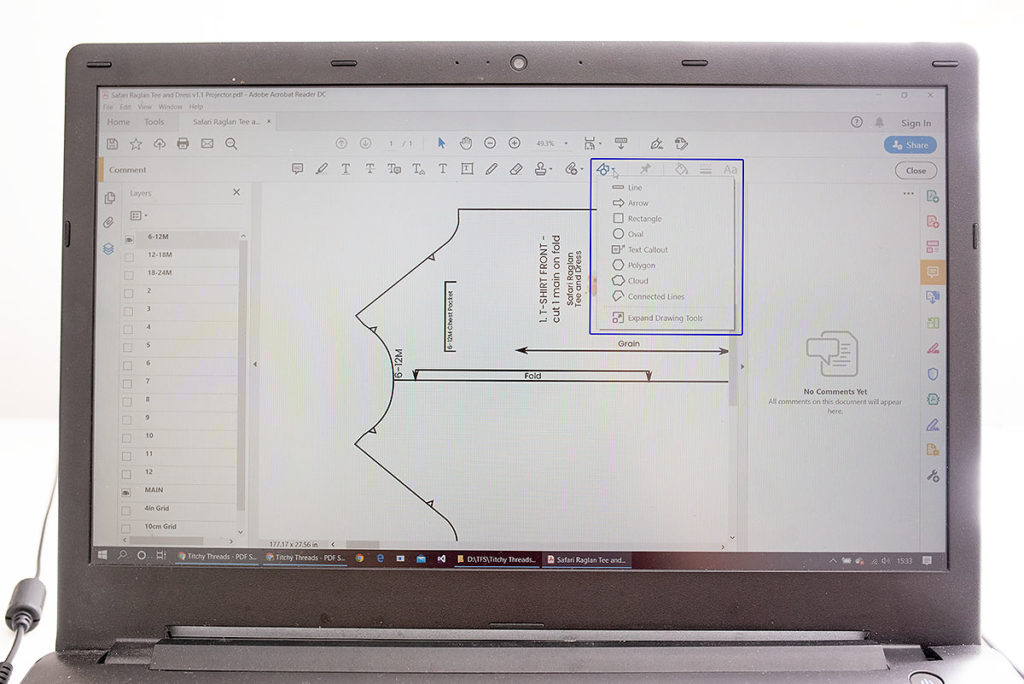
3. The drawing tools are found here. In this case I am going to select ‘Line’.
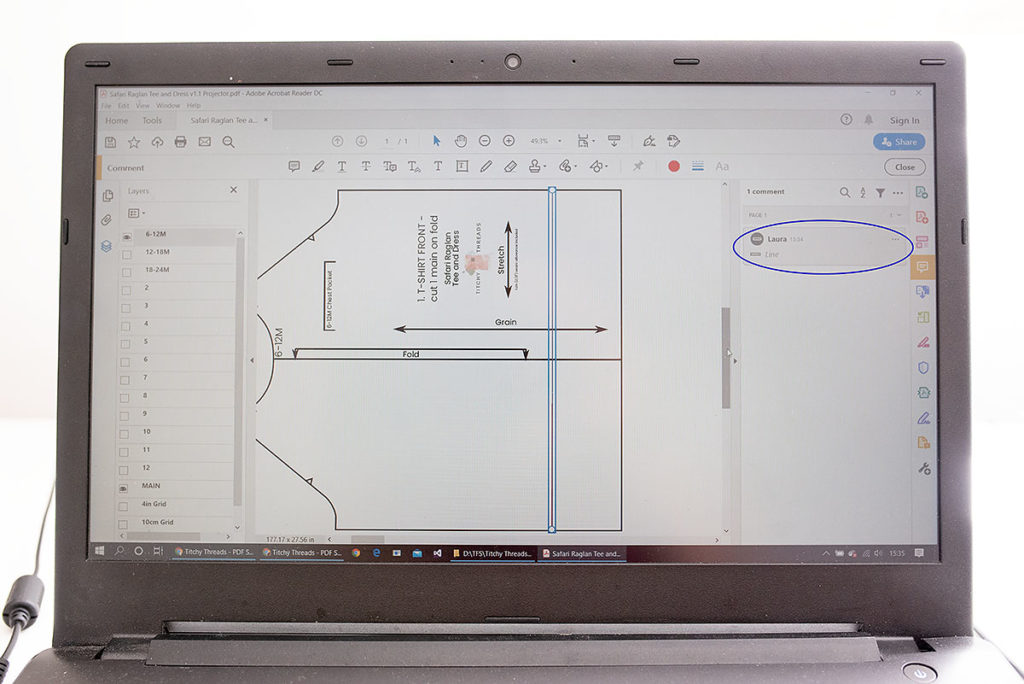
4. Draw a line wherever you want to on the pattern. For example, in this case I’ve drawn a line on the pattern to shorten it. You can also double click where my name is to add a comment on the edit you’ve made.
CUTTING EFFICIENCIES – you may find you can reduce your cutting time further. For example, on the Rowan Tee for children, the front and back body pieces are the same, except for the necklines. Now that the pieces are full sized, I can cut two backs, then quickly recut the neckline for the front.
CUTTING MULTIPLES – when the pieces are full size, instead of on the fold, it makes it easier to cut more than one at a time. This adds efficiency if you’re making several of the same size.
SCREENPRINTING – I recently used the projector to help me with a screenprinting design I’m working on with my son. I displayed the design on the front of the t-shirt, to check the size and placement before I finalised the design. Once I was happy I measured the size before cutting out the stencil. You can also use it if your screenprinting design includes multiple layers, to ensure the correct alignment of each layer.

COPYING IMAGES BY HAND – this is similar to the screenprinting tip above. Start by projecting a chosen image onto your cut pattern piece. Adjust the zoom until you are happy with the size. You can then draw straight onto the pattern pieces with your fabric pens.
I’d love for you to let me know if you’re considering adding a projector to your tools for sewing. It may seem unnecessary when you first hear about this but really can’t imagine sewing without one now. It saves me so much time and paper. I love to see new ways we can use technology to improve our sewing experience, and wonder what the next big thing might be!