
Hello! So have you all managed to finish Day 1? If you haven’t then I’d recommend doing that before you continue onto today’s tutorial.
If you’ve only just joined the Sew Along then the previous posts are:
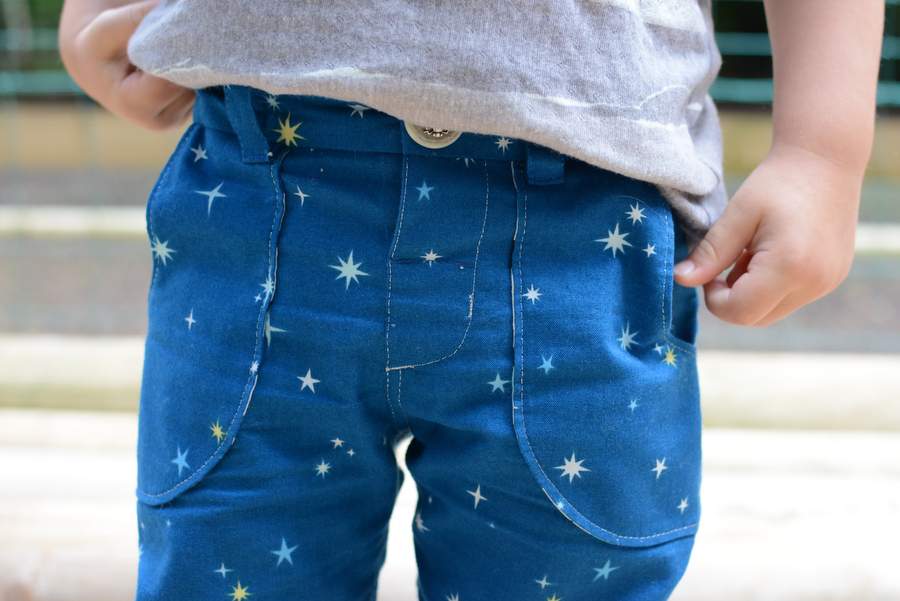
Today we’re covering the half fly. This is just what I’ve been calling it so I’m not sure if it’s the official term. It gives you a functional opening fly without having to sew a zip fly. My eldest in particular doesn’t like a zip fly in his trousers so I can use this option to keep him happy while ensuring any slim fitting trousers will fit over his hips. This tutorial doesn’t just apply to the Small Fry Skinny Jeans – you could apply it to any trousers pattern that includes fly extensions.
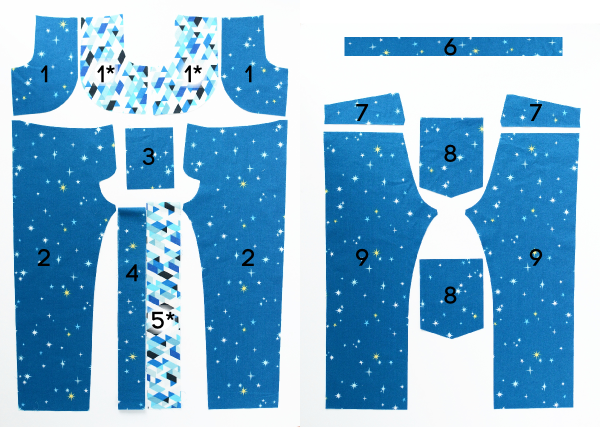
For today’s tutorial you will need your front leg pieces (2) with front pockets (1 and 1*) sewn on. You will also need the fly guard piece (3)
HALF FLY
The main instructions given below are for boys’ trousers. If you are making these for a girl then reverse whenever the left or right is given in bold and underlined.
IMPORTANT: If you haven’t already, interface both fly extensions and half of the fly guard as shown in shading on the pattern pieces. Also, make sure you have transferred the following markings:
- Seam marking and the dot (line marking B on the pattern piece) to the wrong side of the right leg piece.
- Fly stitching and dot (from line marking B) to the right side of the left leg piece.
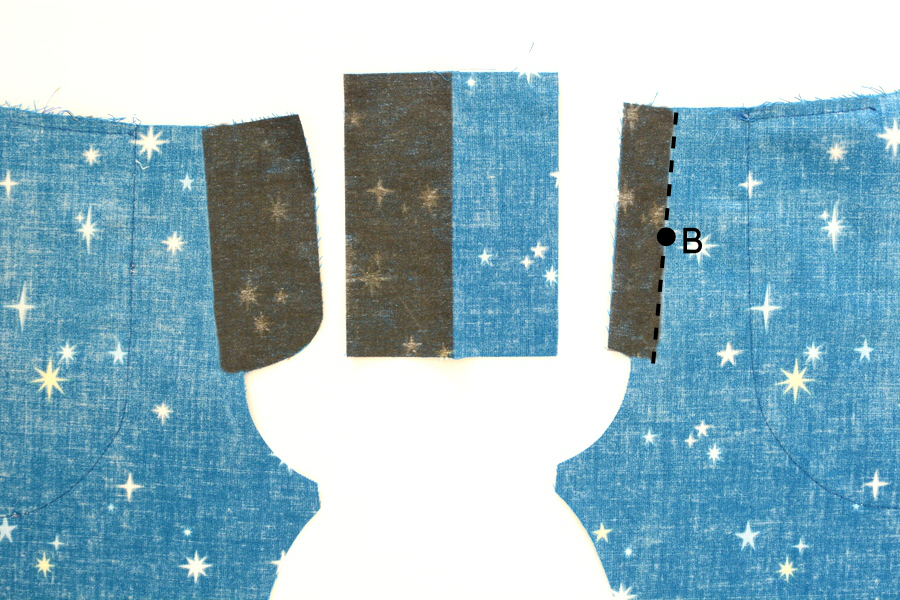 |
1. Take the front right leg piece and trim the fly extension using line marking A on the pattern piece. This will now be referred to as the small fly extension.
If you are using a different pattern then you need to trim the fly extension so that the width of the remaining interfaced area is equal to twice the seam allowance. |
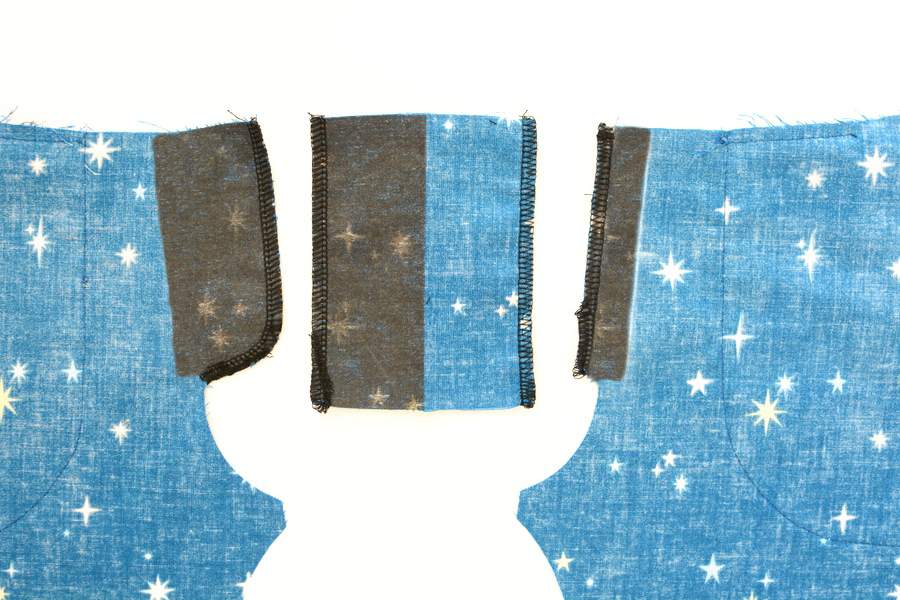 |
2. Finish both fly extensions and the sides of the fly guard, as shown. Use a serger, mock overlock stitch or zigzag stitch. You will be able to finish the seam allowance below the fly extensions later. |
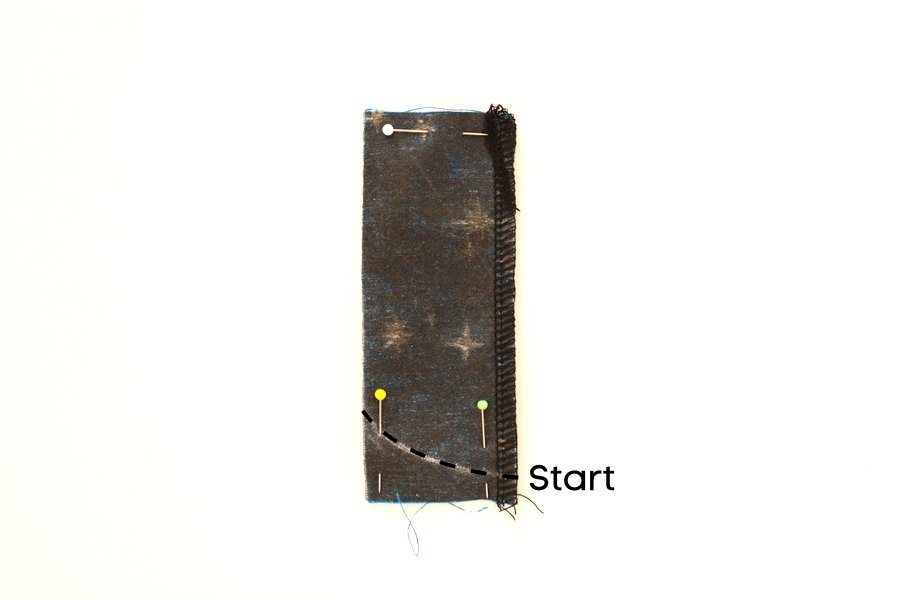 |
3. Fold the fly guard in half with right sides together and the interfaced side facing you. Start at the open (finished) edge with a 1cm (3/8”) seam allowance and stitch as shown, so you are curving up towards the fold. Backstitch at the start and end. |
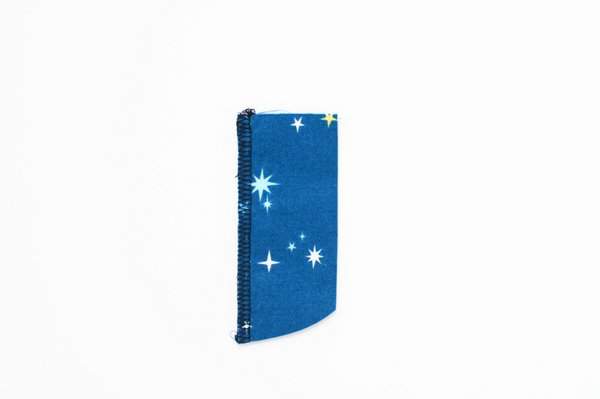 |
4. Trim the seam allowance to about 3mm (1/8”). Turn to right sides out and press. |
 |
5. Place the front leg pieces with right sides together and pin. You want the right front leg piece to face you. Sew with a regular stitch length from the bottom up to the dot you marked (in the middle of the fly). Back stitch then switch to your longest stitch and baste up to the top on the marked line. |
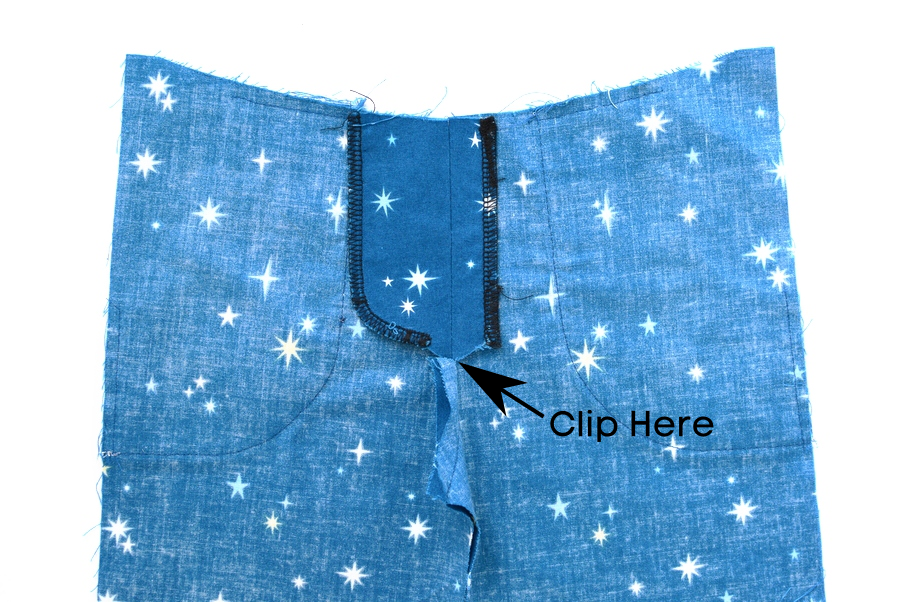 |
6. Clip the seam allowances just below the fly extensions. Press the fly extensions open.
The seam allowances below where you clipped should be finished (using a serger, mock overlock or zigzag stitch) and then pressed towards the left leg piece. |
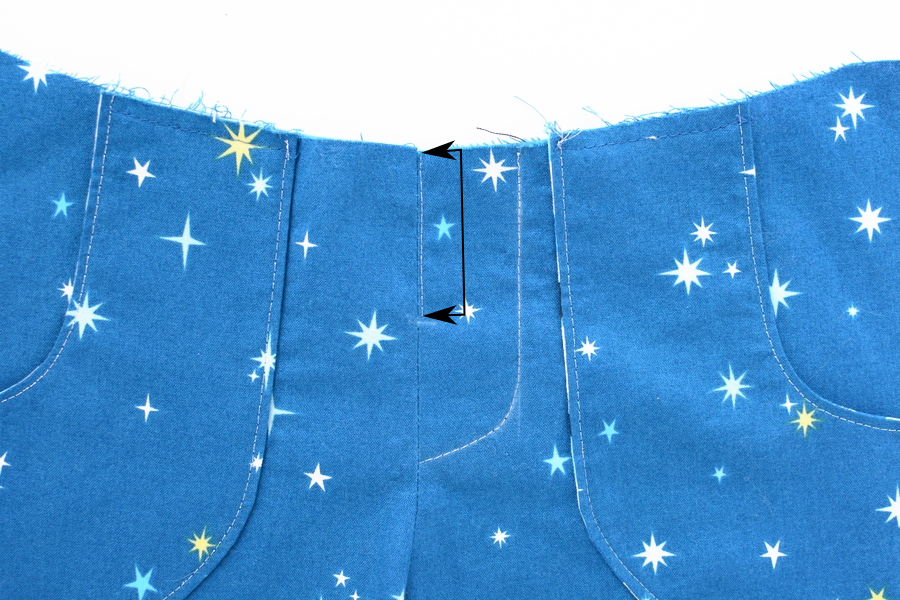 |
7. Turn to the front and make sure the fly extensions are still open so the small fly extension stays out of the way. Edgestitch from the top of the left front leg piece down to the dot you marked (i.e. between the arrows). Sew close to the edge of seam through the leg and large fly extension.
TIP: If you are moving your needle then make a note of the setting. Next, use the fly stitching pattern markings that you transferred earlier on the left leg. Topstitch through both the leg and large fly extension, making sure the small fly extension is out of the way. OPTIONAL – add another row of fly stitching 5mm (3/16”) to the left. |
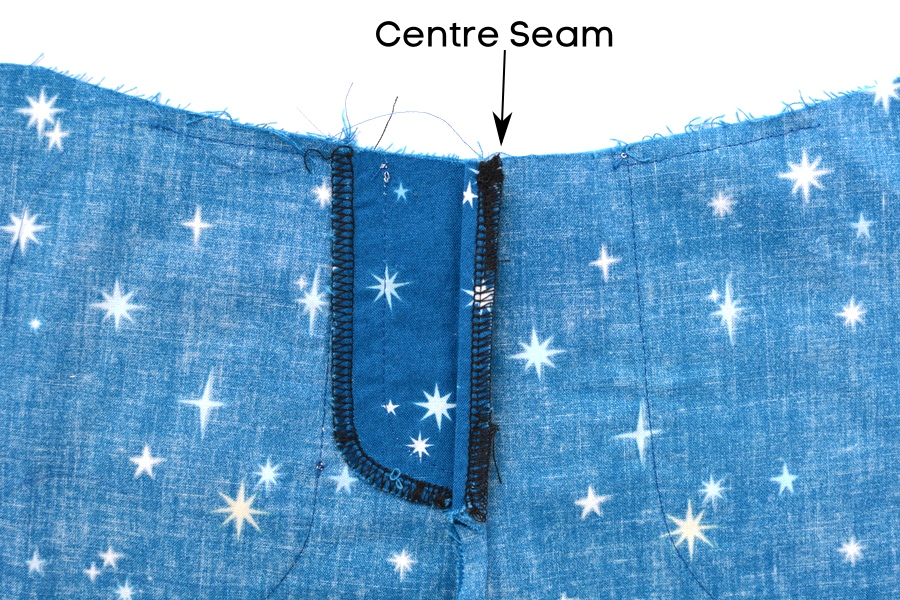 |
8. Turn the pieces so wrong side is facing you. Fold the smaller fly extension over so the edge now meets the centre seam. Press well. |
 |
9. Arrange the legs so the wrong side of the left leg is facing you and the legs are folded together. The smaller fly extension you pressed in half should be to the right with nothing below it. Pin the prepared fly guard underneath this. Arrange so the top of it is level with the top of the jeans and the seams of the fly guard meet the seam of the fly extension.
Stitch close to the edge of the fold from the top to the bottom of the extension. Back stitch to secure. |
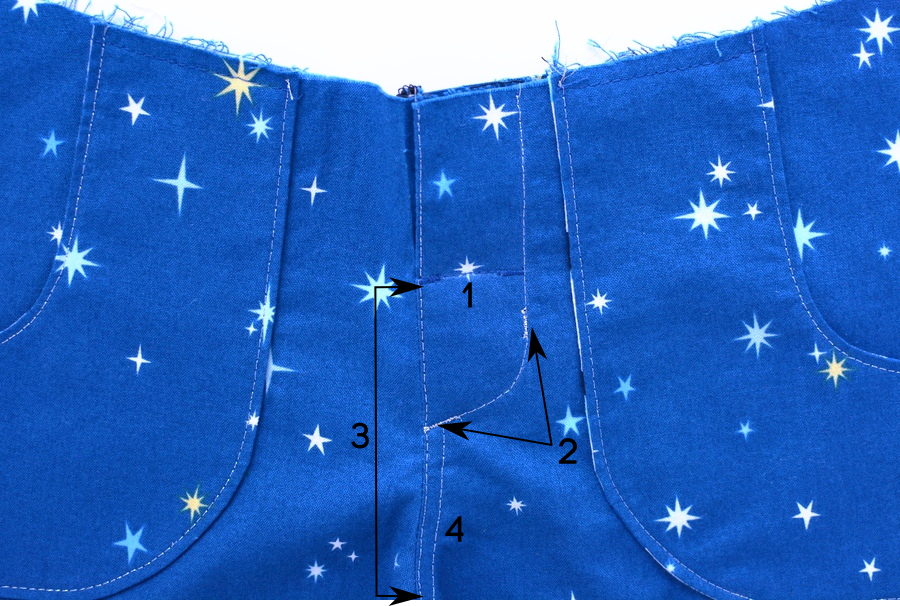 |
10. To complete the half fly open out the centre so the fly guard is below the left leg piece
(1) Sew a row of stitches across the width of the fly in line with the dot (i.e. where the fly opens to). Secure at each side with a bar tack. Unpick the basting stitches to the middle of the fly. (2) Stitch the fly guard to the left leg by sewing one or two bar tacks over the existing stitches. (3) Finish the topstitching close to the middle seam, stitching from the dot in the middle of the fly to the bottom of the seam. (4) OPTIONAL: sew another row of stitches about 5mm (3/16“) to the right of the original stitches. Sew from the bottom of the fly this time. |
We are finished for the day now. I’d love to hear how your getting on and, as with every day, let me know in the comments if you have any questions. We have a relatively easy day tomorrow sewing the leg seams – see you then!


Finished up a few steps today, put some awesome lightning on the back pockets! 🙂 Cant wait to finish and show you.
Done with today’s steps. I think they’re going to be “not so skinny” jeans on my little one (she’s more of an 18mo size than a 2T). But she’ll grow into them. I think I’ll be lining up to nab the pattern as soon as its ready 🙂
Step 8 is confusing to me… I am doing them reverse (girl-style) but I just can’t figure out what the picture means.
“8. Turn the pieces so wrong side is facing you. Fold the smaller fly extension over so the edge now meets the centre seam. Press well.”
folding the smaller fly piece to the centre seam? Right sides together or wrong sides? Is the serged edge up against the centre seam with right sides together, or am I folding it under so the wrong sides are together.
Hi. I’ve only just found this comment. You are folding the serged edge up against the centre seam with wrong sides together. I hope you haven’t been delayed too much.
Thank you! I had a look at several pairs of jeans and figured it out! (maybe you could include a full zip fly with the complete pattern too! Doesn’t look a whole lot harder…) 🙂
Glad to hear you worked it out. I already planned to include the full zip fly option so it’s good to know you’d like it 🙂