
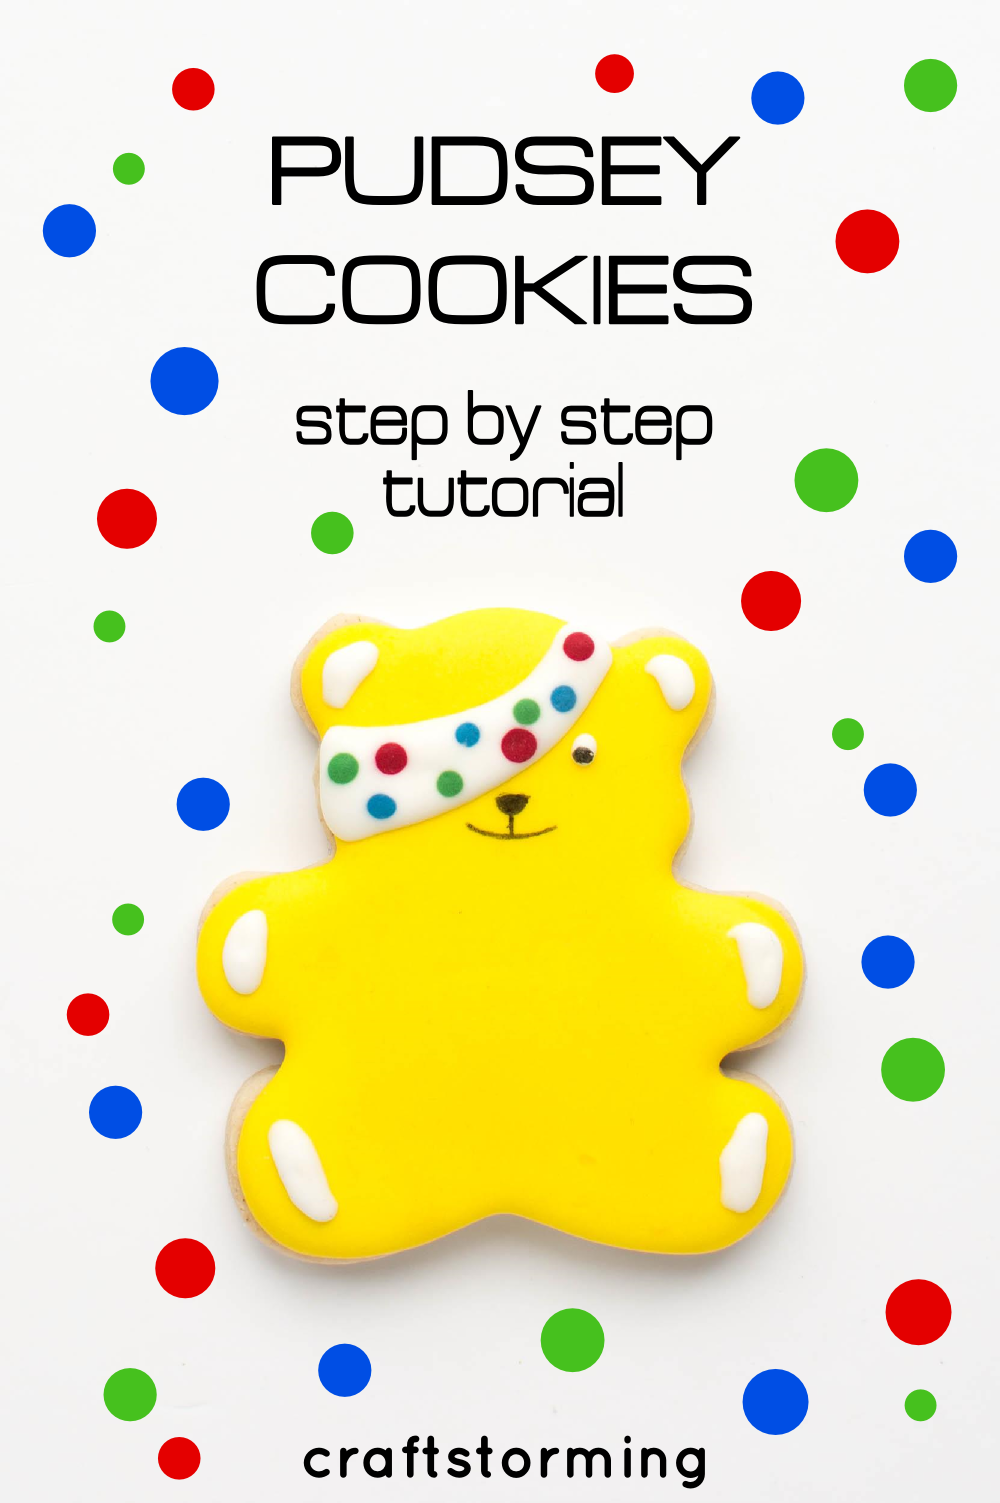
Today I am going to show you how to decorate Pudsey Cookies. For those of you who are not sure who Pudsey is, he is the mascot of an annual fundraising event run by the BBC called Children in Need. It has raised over £600 million since 1980 and includes an annual telethon.

It’s very common for schools to run bake sales to raise money and these cookies will be a very popular donation. This year the event takes place on the 14th of November, so you have just over a week to make these.
SUPPLIES:
– bear shaped cookie cutter (this is the set I have)
– cookie dough from your favourite sugar cookie recipe
– royal icing
– edible food colours (yellow, red, green, blue and black)
– piping nozzles and bags
COOKIE TIPS
Make sure you chill the dough before you roll it out. I also chill the cookies after cutting them and before baking. This helps to stop them spreading as they bake.
Bake your cookies and allow them to cool. While they are cooling prepare your royal icing. You will need at least half of your icing to be yellow, with small amounts of white, red, green, blue and black. Once everything is ready the decorating can begin.
ROYAL ICING TIPS
Make your royal icing the day before. This will give any air bubbles a chance to rise to the surface. Leave in a large bowl and cover well with some cling film touching the top of the icing to prevent it drying out.
Add the colour before you blend the icing to the right consistency. I prefer to use concentrated paste colours.
To get the right consistency add a tiny bit of water at a time. I aim to have it thick enough to pipe the outline but thin enough to use as the filling as well. This saves time and prevents a noticeable outline when the cookies are finished.
DECORATING THE COOKIES
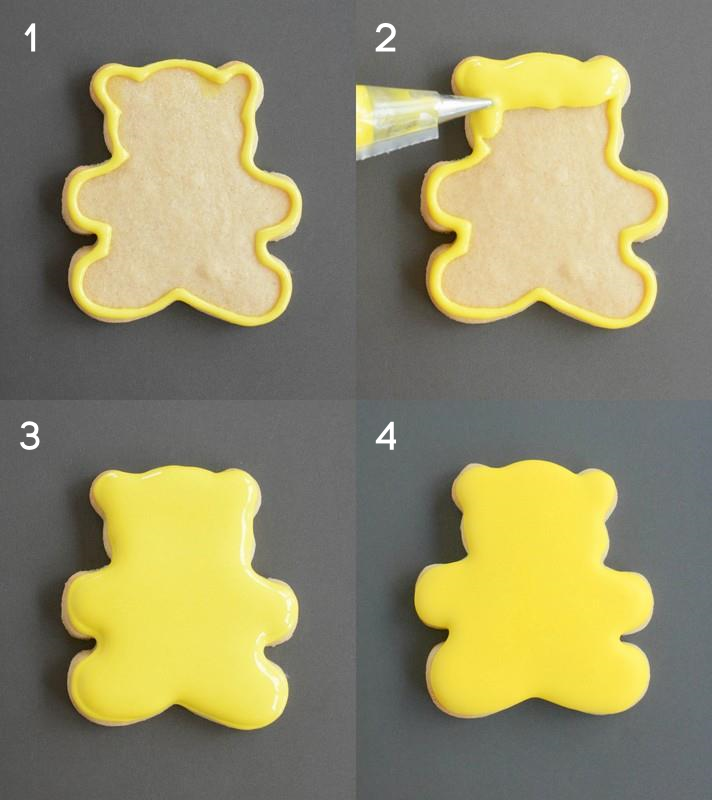
1. Take a bear cookie and outline with yellow icing. I like to use a size 2 nozzle for this. 2. Use the same icing to fill the cookie straight away. Make sure to keep the tip of the nozzle down in the icing, this helps to prevent air bubbles. 3. Continue until the outline is all filled in – take care not to overfill otherwise the icing will start to flow over the sides. 4. Leave the cookie to dry.
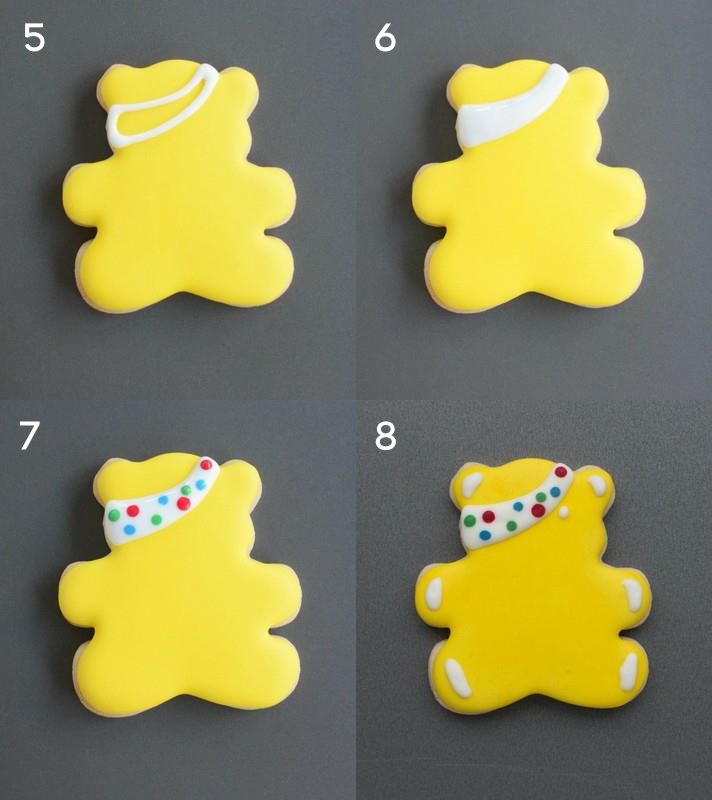
Before you begin make sure you have your white, red, blue and green icing ready to go.
5. Outline Pudsey’s scarf with white icing. 6. Fill the outline in straight away with white icing. Don’t fill quite to the top as when you add the other colours the icing might overflow. 7. Immediately add small dots of the red, blue and green icing. Hold the nozzle vertically and use a gentle pressure. 8, Add any other details you would like using the white icing. Leave to dry.

9. Use black icing with a very fine nozzle or a black edible writing pen to add the final details.
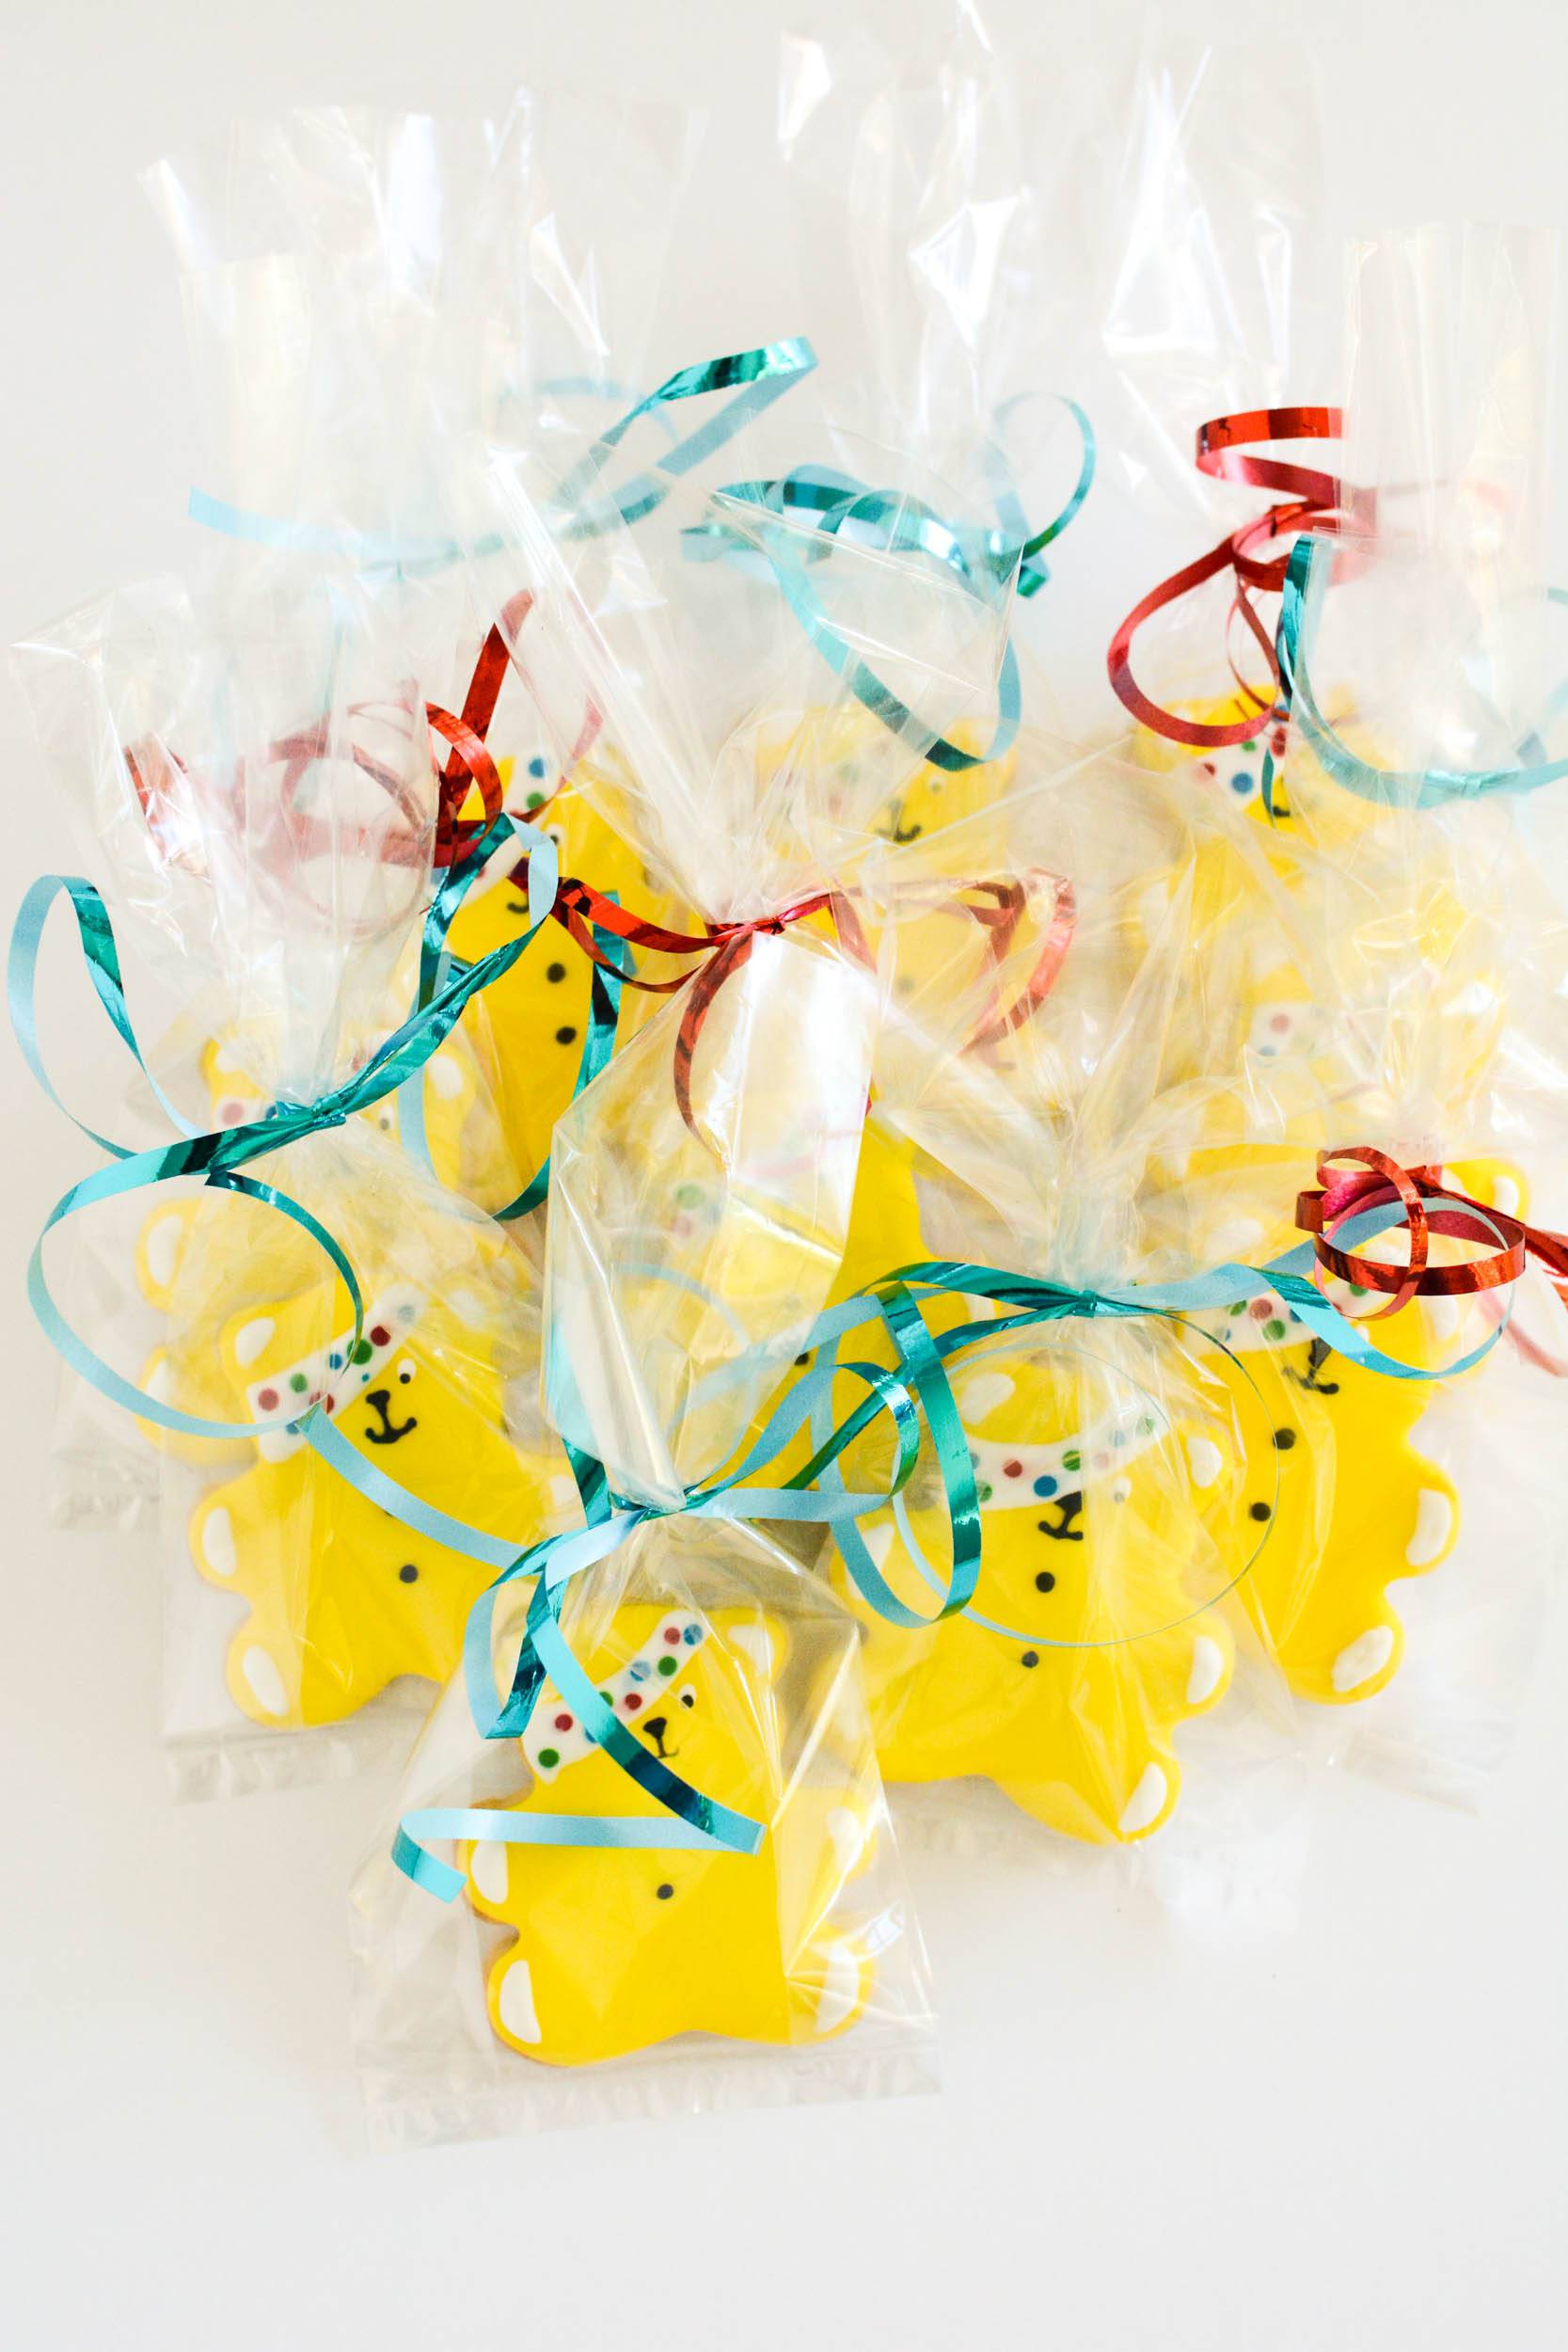
Your cookies are now ready. Package them up and help raise some money for Children in Need.


These are amazing!! You’re a rockstar, seriously these are perfect and crazy cute!! <3
Remind me never to show you anything I decorated. Actually I will just say it was the kids that did it because that is what it looks like, ha. These are amazing!!
Stinking cute Laura! I love them xx
off to share the love