
Welcome to Day 1 of the Skinny Jeans Sew Along. I hope you’re all ready and raring to go.
If you’ve only just joined the Sew Along then the previous posts are:
Today we will cover:
– Front patch pockets
– Sewing back yokes and back leg pieces together
– Back patch pockets
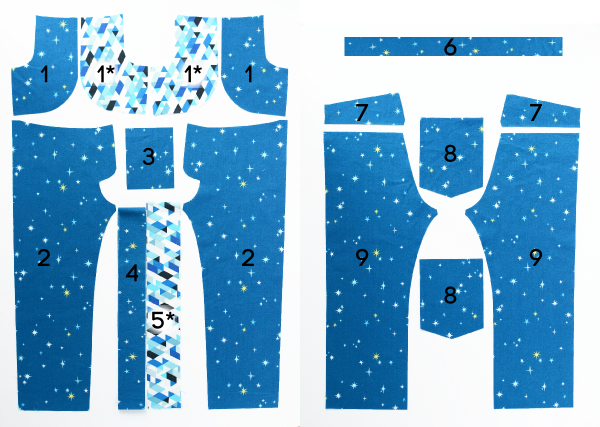
To cover these steps you will need your front and back leg pieces (2 and 9), front patch pockets and lining pieces (1 and 1*), back yokes (7) and back patch pockets (8).
FRONT PATCH POCKETS
 |
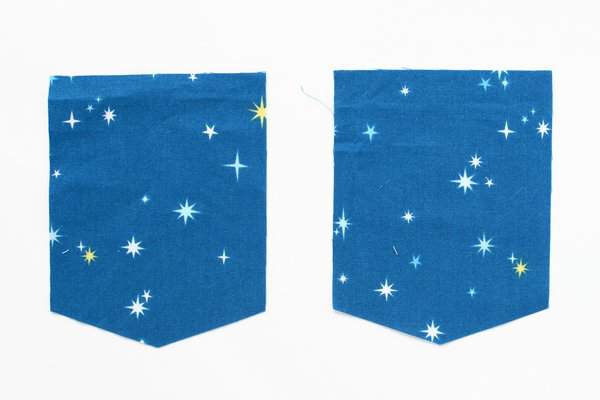
1. Take a front pocket piece and the lining piece. |
 |
2. Place the pieces with right sides facing. Pin and stitch both curved seams with a 6mm (1/4”) seam allowance. Repeat for the other pocket. |
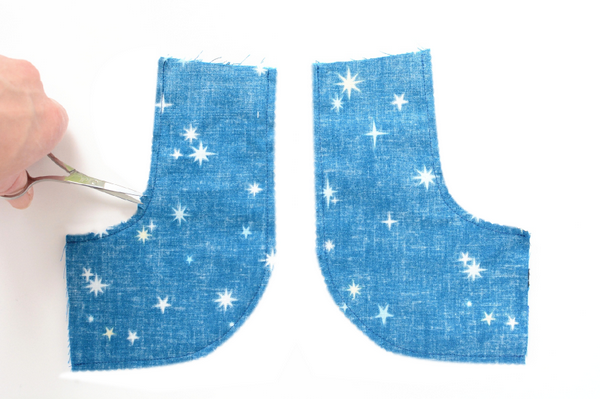 |
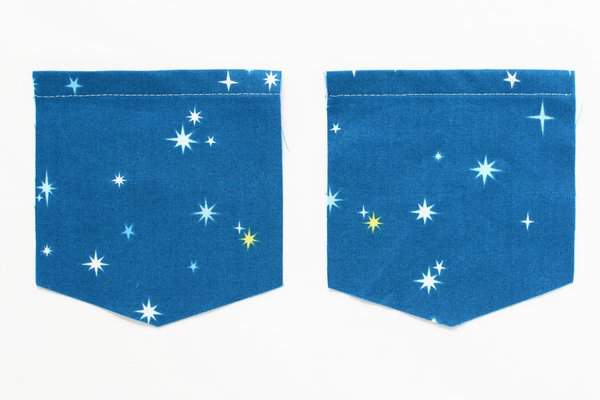
3. Clip curves (cut into the seam as far as the stitching but take care not to cut the stitches). |
 |
4. Turn the pockets right side out and press the seams well. It can help to use a chopstick to push the seams out.Topstitch the curved seam at the top of the pocket. Stitch about 3mm (1/8”) from the edge. I prefer to use a slightly longer stitch for any topstitching (about 3.5 or 4). You could do a second line of topstitching 5mm from the first. |
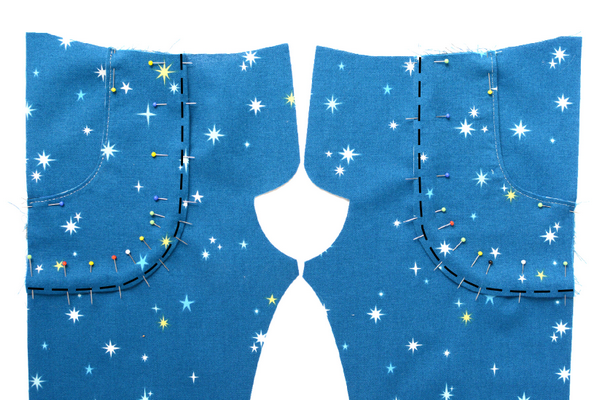 |
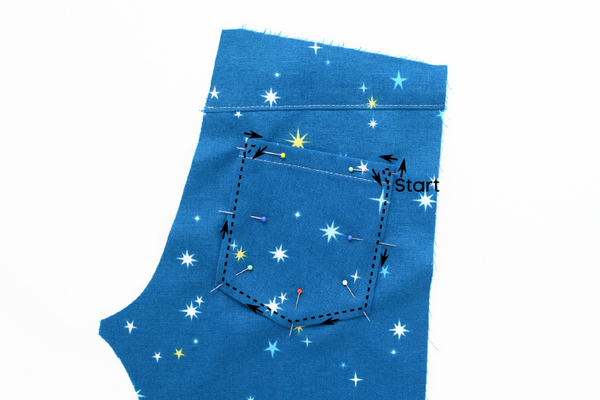
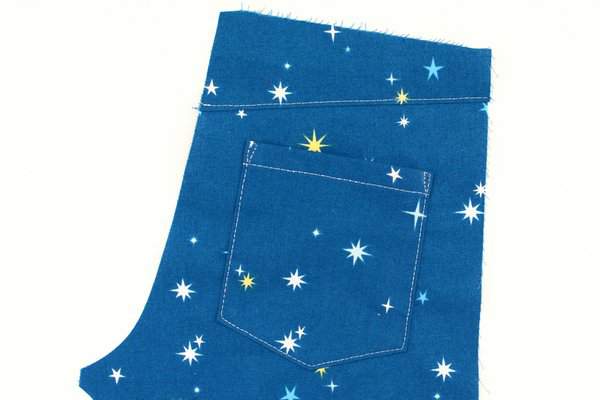
5. Arrange the pockets on the front leg pieces using the pocket marking on the front leg pattern piece. Line up the tops and sides. Pin in place. |
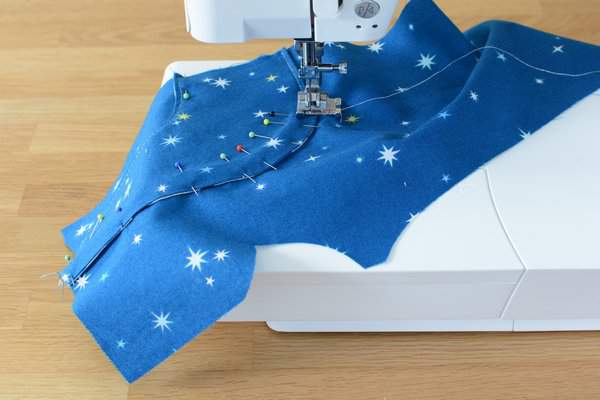 |
6. Stitch the bottom curved seam of the pockets to the front leg pieces. Stitch about 3mm (1/8”) from the edge. |
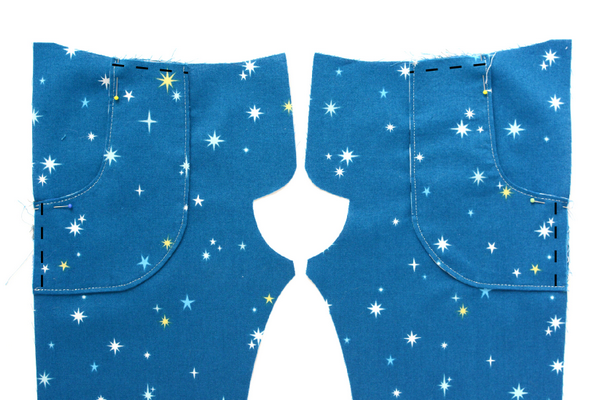 |
7. Baste the pockets to the leg pieces at the top and side using your longest stitch length and a 6mm (1/4”) seam allowance. |
SEW BACK YOKES TO BACK LEG PIECES
 |
1. Take a back leg and a back yoke piece. Pin and sew the seam with a 1cm (3/8”) seam allowance.
Finish the seam allowances together using a serger, mock overlock or zigzag stitch. |
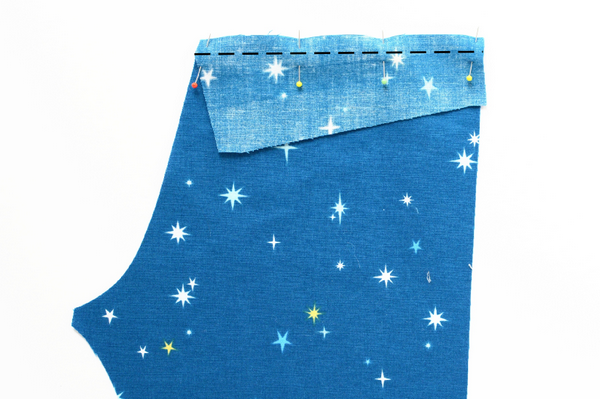
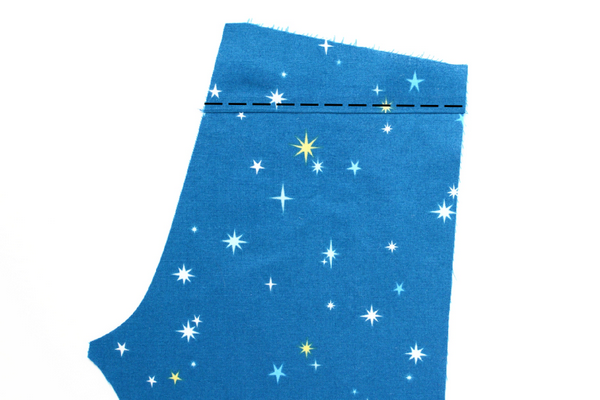 |
2. Press seam allowances up toward the yoke. Topstitch about 3mm (1/8”) from the edge of the seam. You could do a second line of topstitching 5mm above the first. |
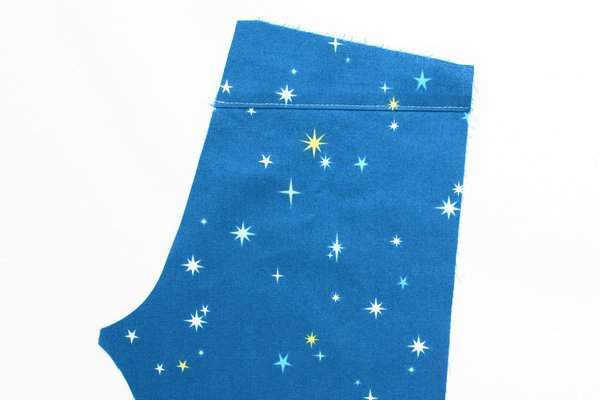 |
3. Your back leg will now look like this. Repeat for the other leg. |
BACK PATCH POCKETS
 |
1. Take the back pocket pieces. Fold the top edge over 12mm (1/2”). Press then fold over another 12mm (1/2”) and press again. |
 |
2. Stitch across the top of the pocket. You can either sew from the right side with a 1cm (3/8”) seam allowance or edgestitch the bottom pressed edge from the wrong side. |
 |
3. Turn the pocket so the wrong side is facing you. Fold the side and bottom edges over by 1cm (3/8”) and press well. |
 |
4. Pin in place on the back leg using the pattern markings. Stitch about 3mm (1/8”) from the edge. I like to sew triangles at the top of each side to reinforce the stitching.To do this start on the right, level with the existing line of stitching. Sew towards the top of the pocket, pivot (with the needle down), stitch across for a few stitches, pivot again and stitch down to where you began. Sew all around the pocket, pivoting at each change of direction then go to the top left and finish with another triangle. |
 |
5. Repeat for the other leg. |
OK, that’s it for the sewing today. If you have any questions then please add them in the comments and I’ll reply there. That way everyone will be able to see the answer.
I’ve decided to have a sale on my Fancy Pants Leggings pattern while the Sew Along is going on. It’s a very versatile pattern and a great introduction to sewing with knits. For the rest of this week you can get 20% off with the code SEWALONG20.
I will return tomorrow to cover sewing the half fly.


I am loving this. I think mine are looking so cute! I can’t wait to finish them. I’m stalking for the next steps. I really want to finish them tonight (in Aus). Clearly patience is not my strong suit 😉
Hi Kerry, I’m so pleased to hear you’re enjoying it. The day 2 tutorial is now available so you don’t have to wait any longer 🙂
You’re a star 🙂 off to put my little miss to bed then I’ll check it out
Weeee I have finished Day 1, I’m a little behind but they’re looking cute!
http://www.max-california.com/2013/08/pastel-tribal-jeans-small-fry-skinny.html
Eeek! So happy you’re sewing along Max 🙂