
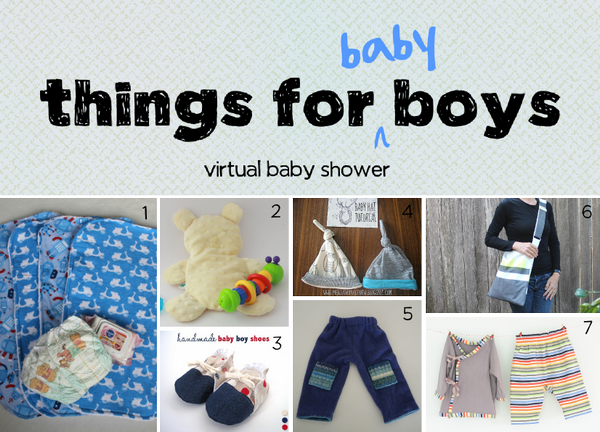
Today a few bloggers, including myself, are throwing a virtual baby shower for Abby from Things for Boys. She is expecting her second baby very soon and we have made a few things for her and her new little boy. The gifts we made were:
1: Baby Change Mats by Ros from Sew Delicious
2: Flat Teddy by Narelle from Cook Clean Craft
3: Handmade Baby Boy Shoes by Janelle from Emmaline Bags
4: Baby Hats by Jenny from Mend and Make New
5: Upcycled Cashmere Baby Pants by Dara from Coffee and Lilacs
6: Nappy / Baby Bag by Jo from Bubala
7: Little Kid Kimono Set by Laura from Craftstorming
Make sure to visit the other blogs I’ve listed above. Everyone who took part is sharing a tutorial on their blogs today showing you how to make their gift.
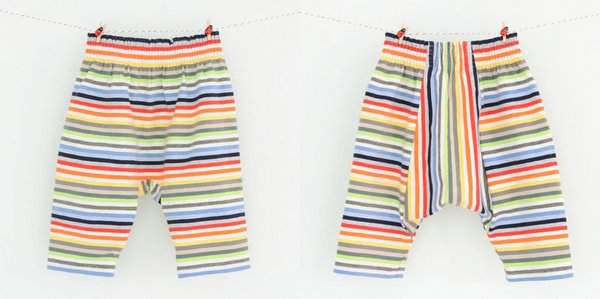
So here is a close up of my gift – a cosy knit kimono top and trousers.

You can download the PDF pattern and tutorial for the kimono top and trousers (in size 0-3 months only) for free over here at my pattern website Titchy Threads. I’ve also shared the tutorial for the trousers later on in the post. Allow me to be a bit soppy first though. One of the best, and most unexpected, things to have come out of blogging is meeting other bloggers. Some have become really good friends even though I’ve never met them in person. It’s so good to be able to talk about sewing with someone who is as obsessed about it as I am. Abby was the first friend I made and we have so much in common. We even have the same sewing machine. If you haven’t visited her blog already you definitely should – she’s a crafting whirlwind. We chat almost every day and I really hope that one day we’ll be able to meet.
When I started thinking about what to make for Abby’s new baby I remembered some of the virtual baby showers that I’ve seen on baking blogs. I thought it would be fun to organise one for Abby but with sewing instead of baking, so we could actually send the gifts to her. I stalked Abby’s blog for comments to work out which other bloggers she was good friends with. Nearly everyone I contacted got back to me and was really excited to join in. We didn’t really discuss exactly what each of us would make but some how we all managed to cover a wide range of items. Ros from Sew Delicious lives near Abby, so we all sent our gifts to her and today she is meeting up with Abby to deliver them. If we can’t celebrate her new baby in person then a virtual baby shower must be the next best thing. I’m looking forward to seeing some pictures of her new little boy soon.
So do you want to make your own Little Kid Kimono Set? The free pattern is only available in size 0-3 months, although I might make a paid version with more sizes at some point. The trousers have a baggy, relaxed fit and a shirred waistband to provide comfort for a wide range of waist sizes. There is also a bum panel in the back so you can mix in a contrast print. There are only two pieces to join with just a few seams so they’re very quick to sew. Here is a front and back view…
So are you ready to make some? Let’s begin…
You will need:
- The pattern pieces (go here to download)
- 0.45m (0.5 yards) jersey knit fabric
- Elastic thread
- Co-ordinating thread
The PDF has a lot more detail including tips for sewing with knit fabric and tips for shirring as well as a size chart and finished measurements.
Lay your pattern pieces out as follows…
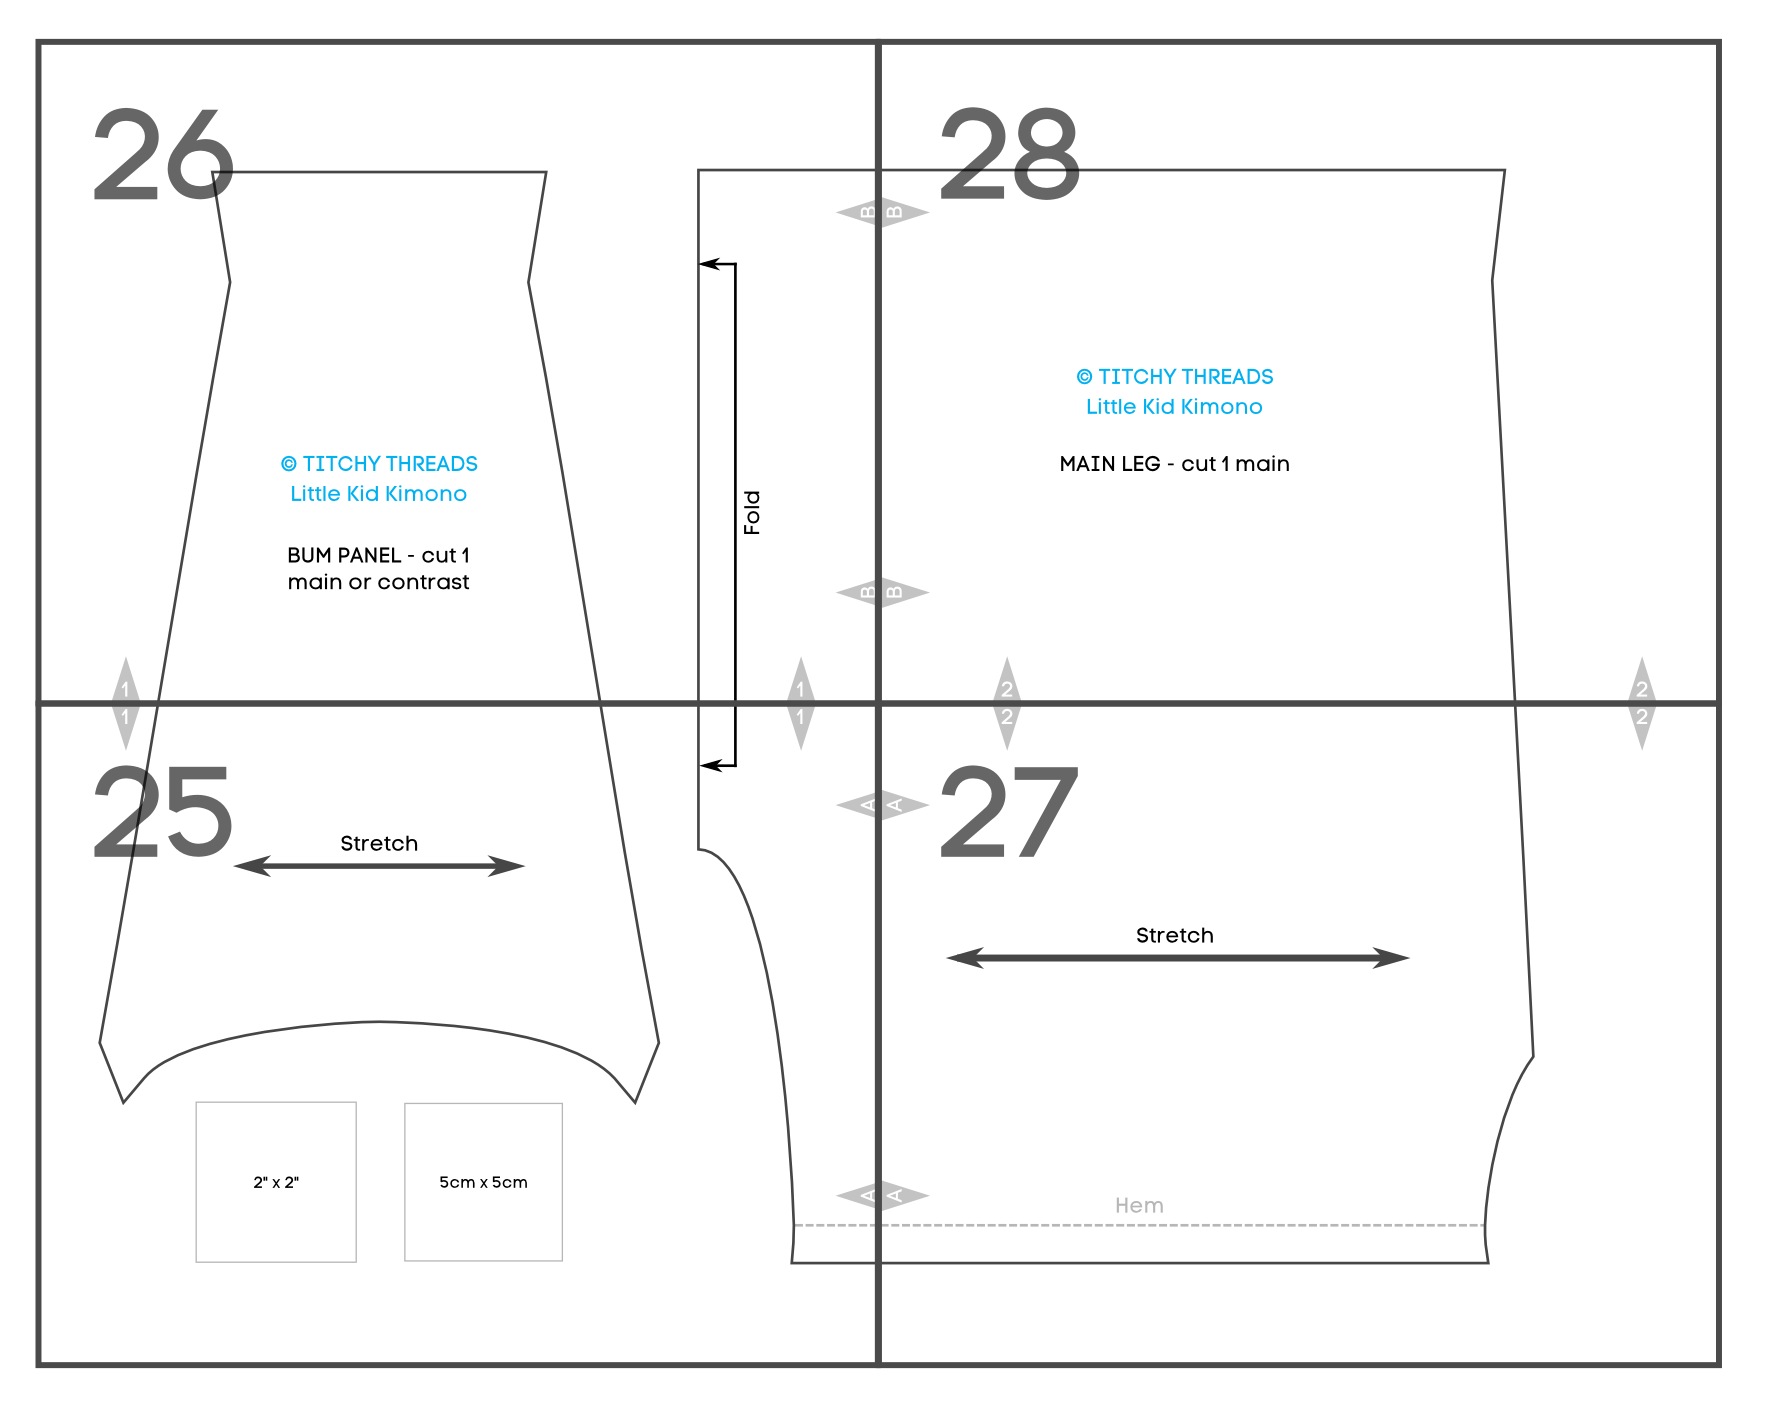
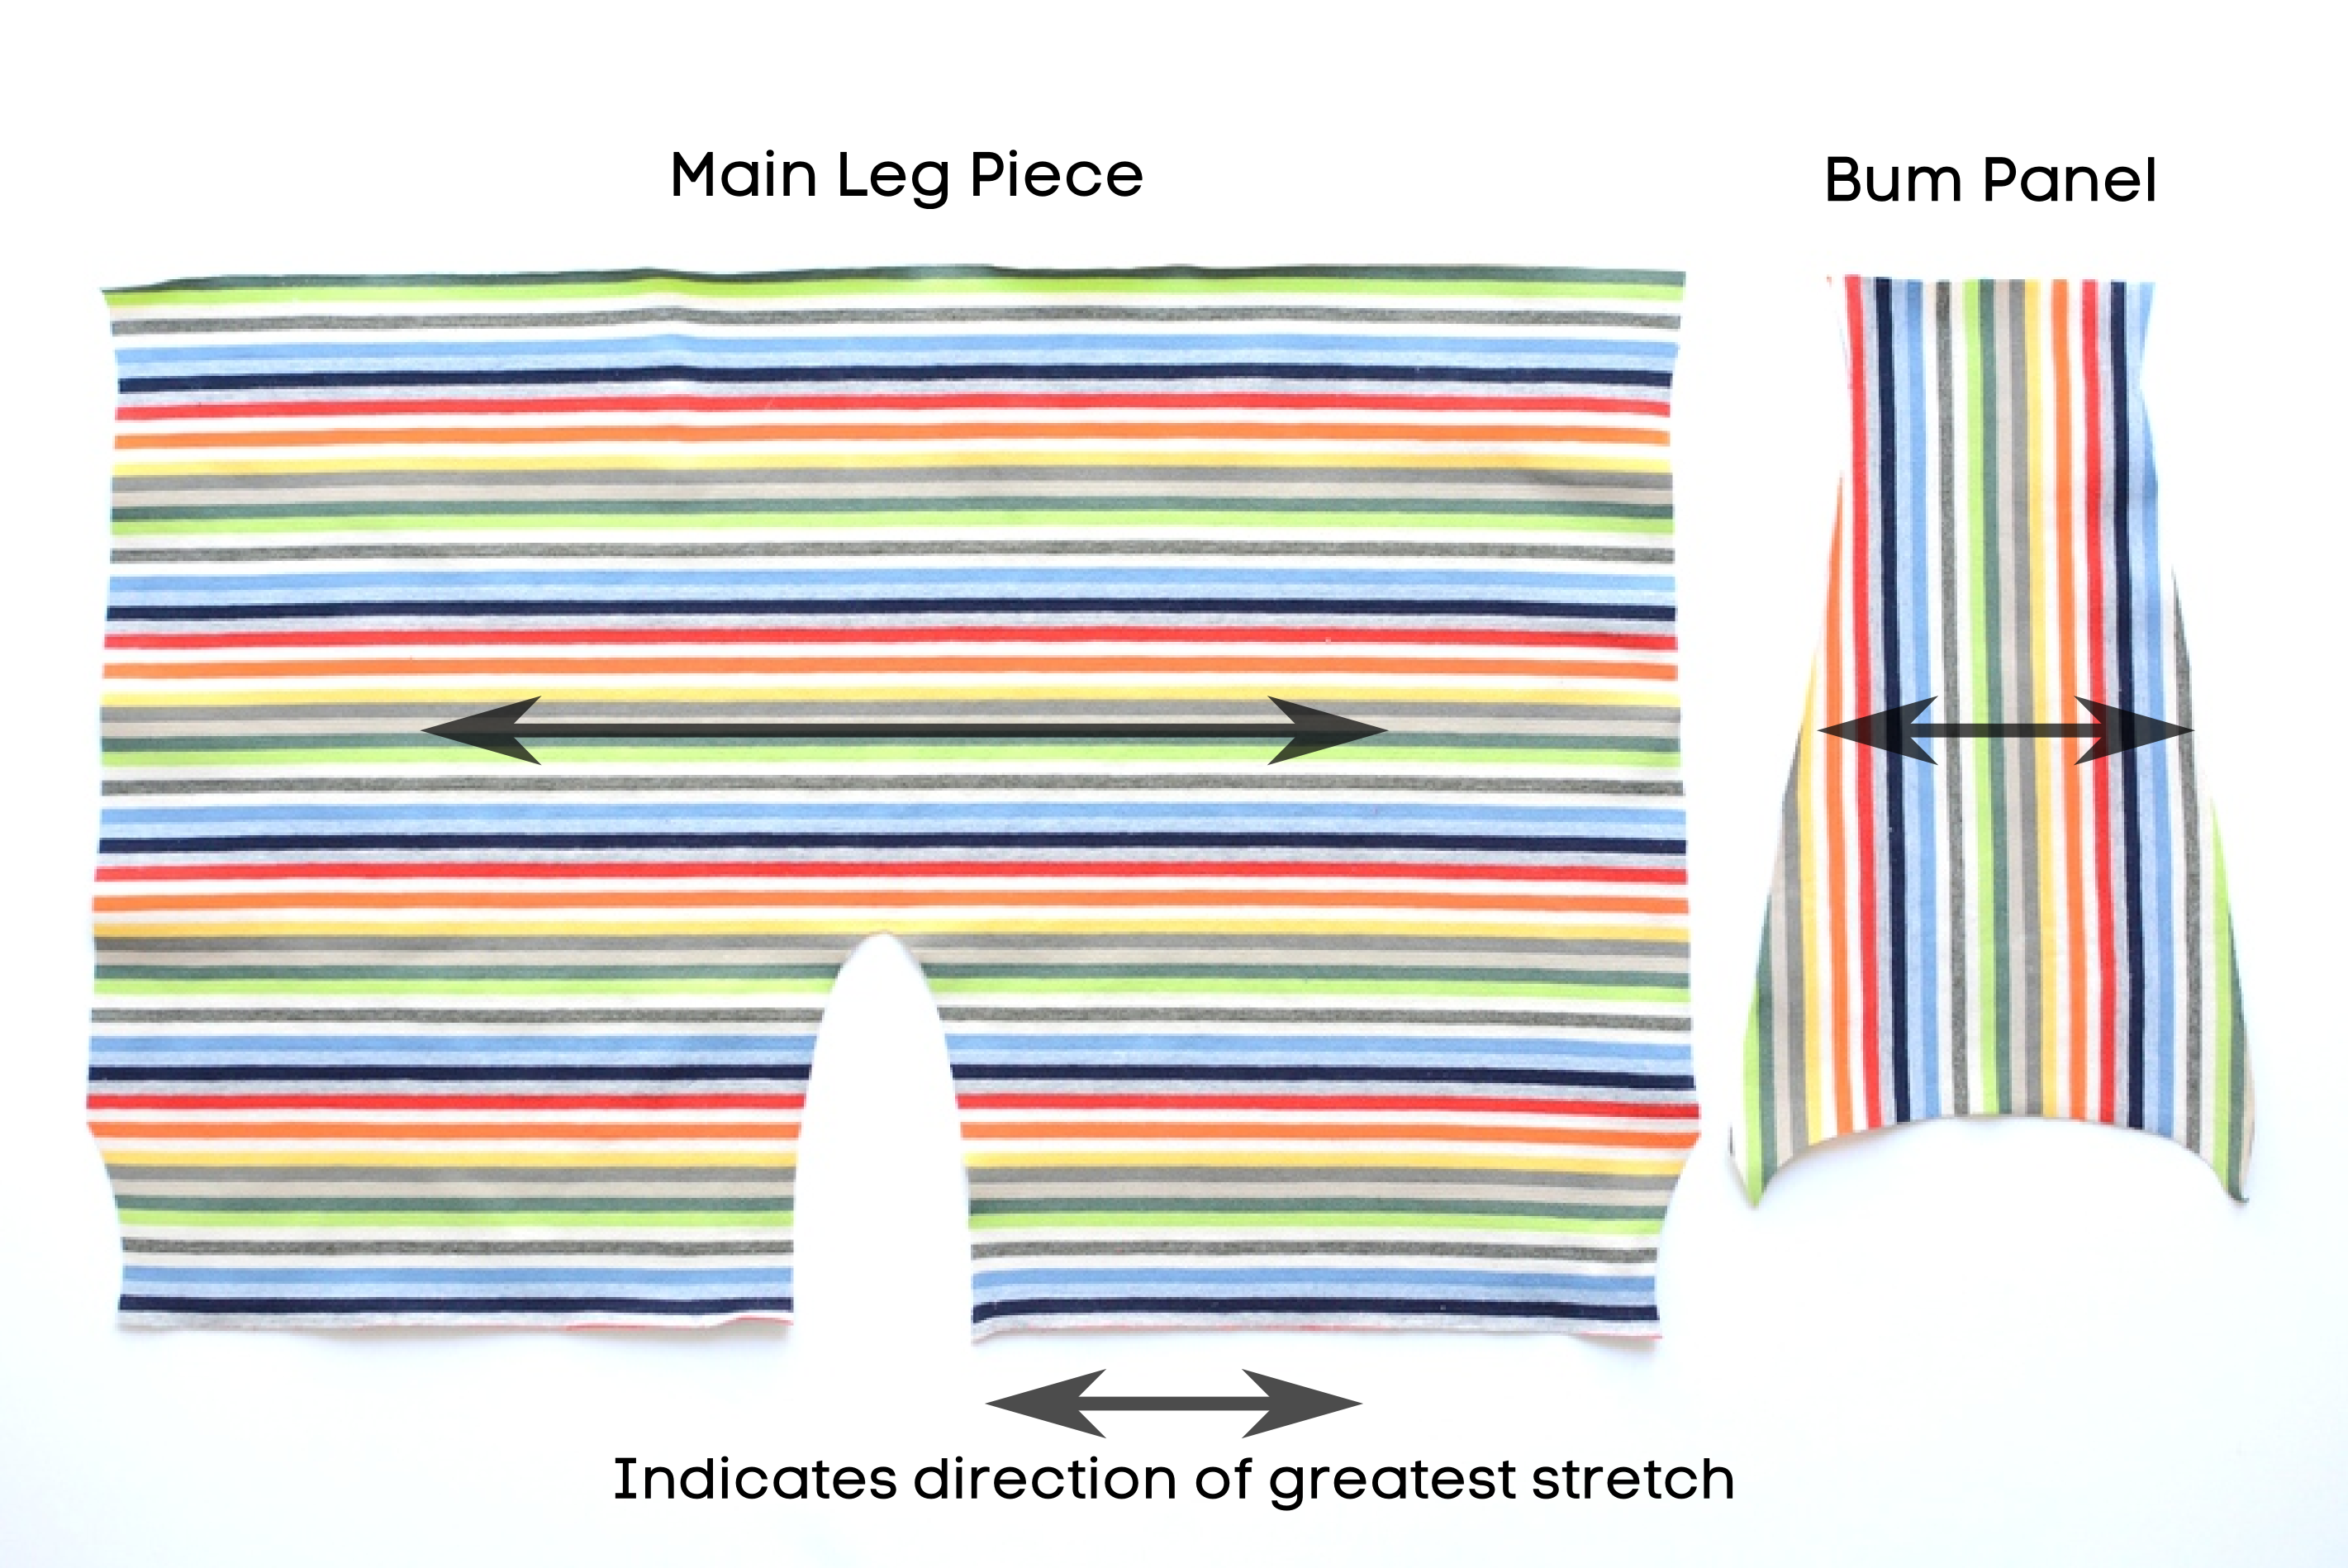
Cut the main leg piece on the fold and cut one panel piece, as shown in the picture below…
You are now ready to start sewing.
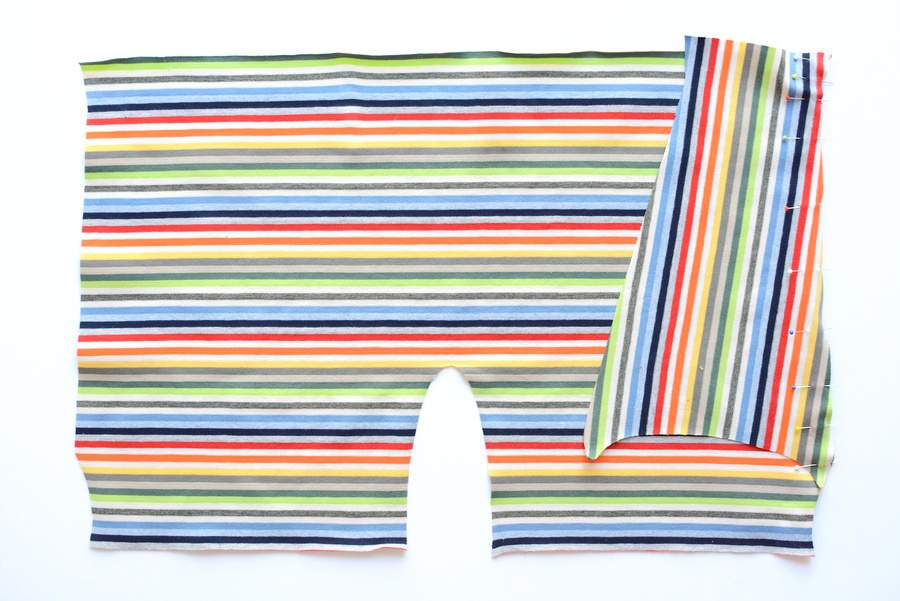 |
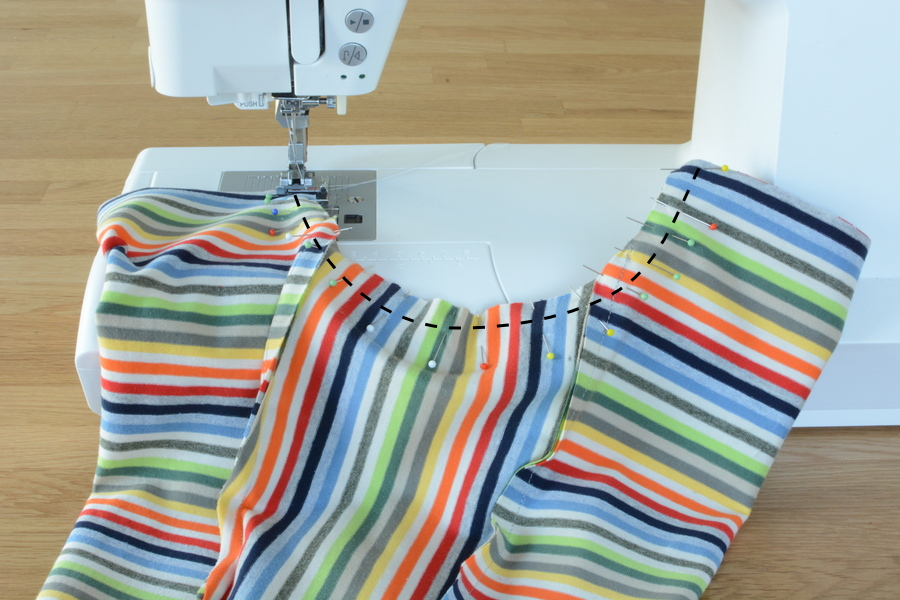
Place the main leg piece with right side facing up. Place the bum panel on top with right side facing down so that right sides are together.
Line up the long edges and pin. The panel should be wider at the bottom where it meets the leg curve. |
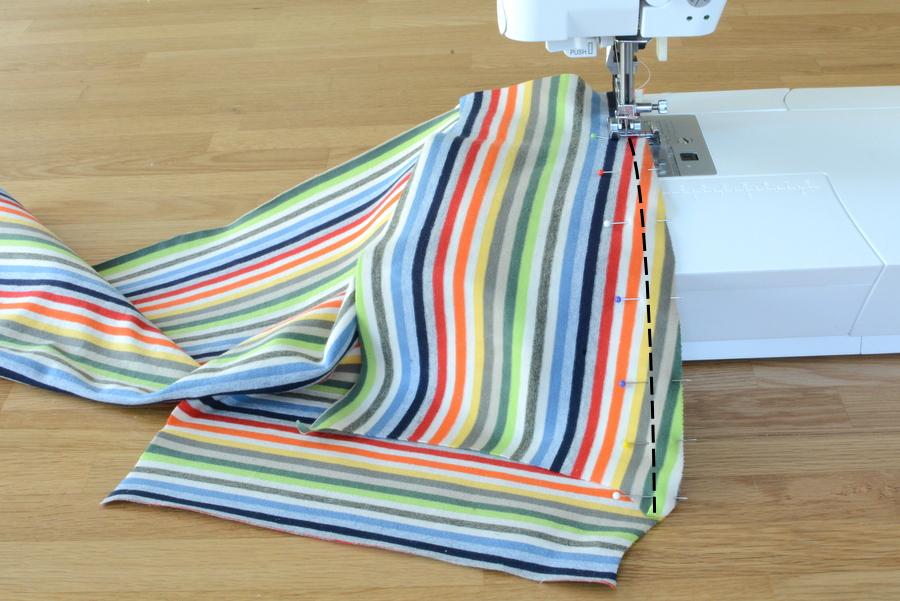 |
Stitch or serge the seam as shown with a zigzag stitch and a 1cm (3/8”) seam allowance.
Stitch down to the point of the v at the bottom of the bum panel. |
 |
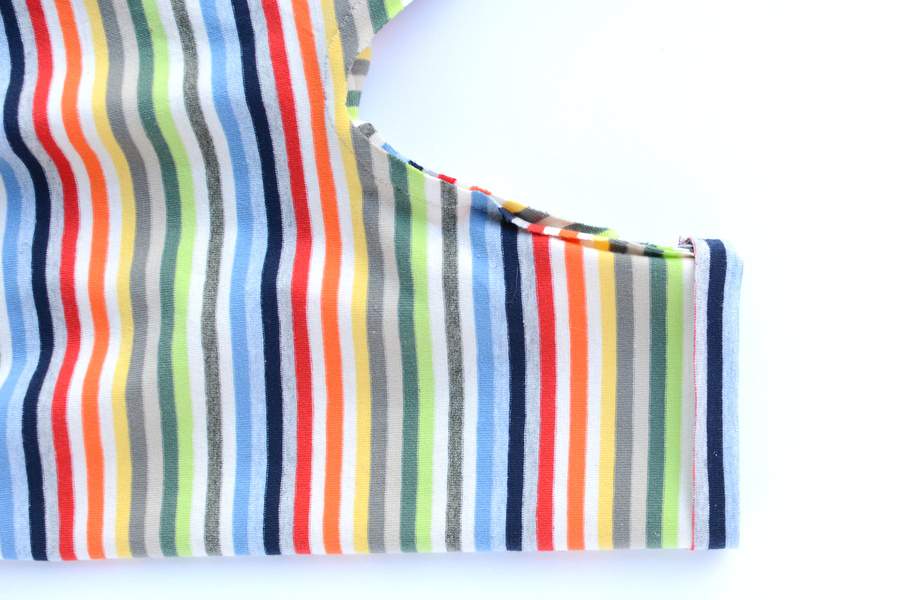
Arrange the pieces so the other long edge of the panel is lined up with the other long edge of the main piece, with right sides facing. Stitch or serge the seam as before. Press both seam allowances towards the panel.
OPTIONAL: Top stitch close to the edge of the |
 |
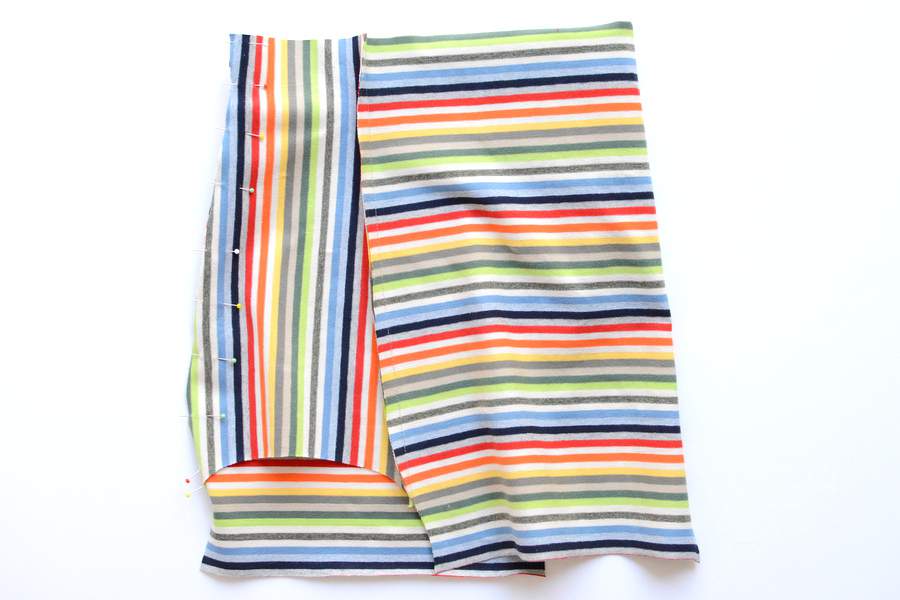
Arrange the trousers so the leg seams are lined up with right sides facing. Pin the inside leg seam. |
 |
Stitch the seam with a zigzag stitch and a 1cm (3/8”) seam allowance. |
 |
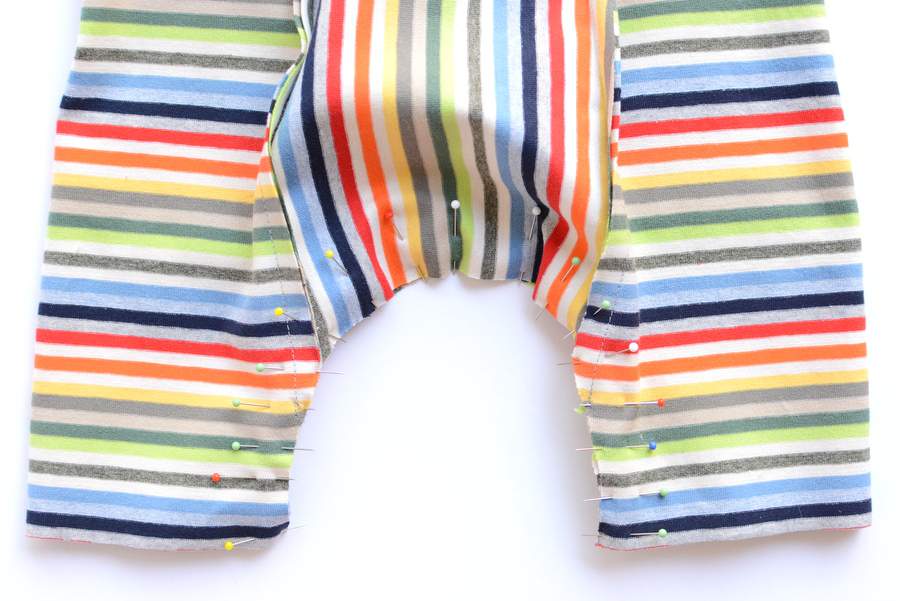
Keep the trousers so they are wrong side out.
Turn both ankle hems up 1.2cm (1/2”) and press. |
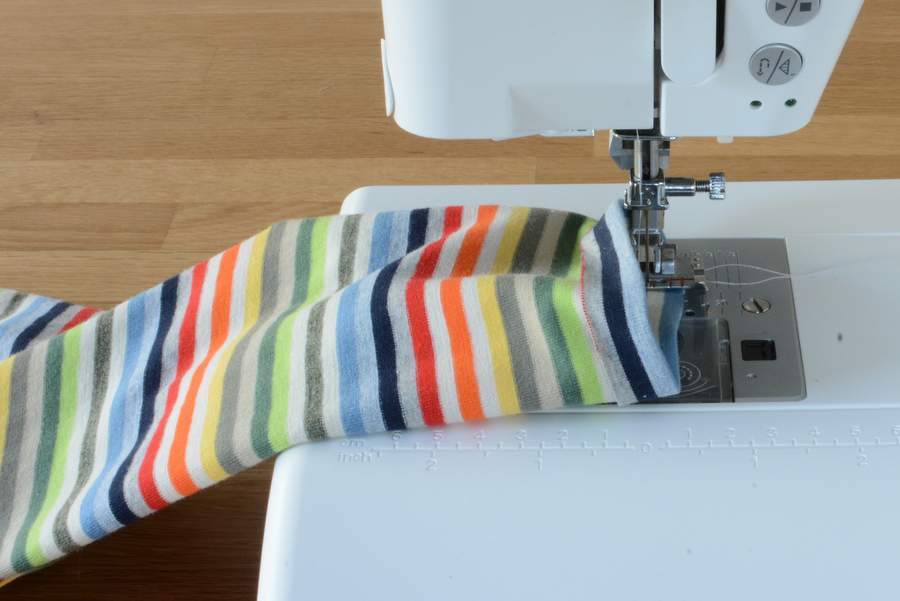 |
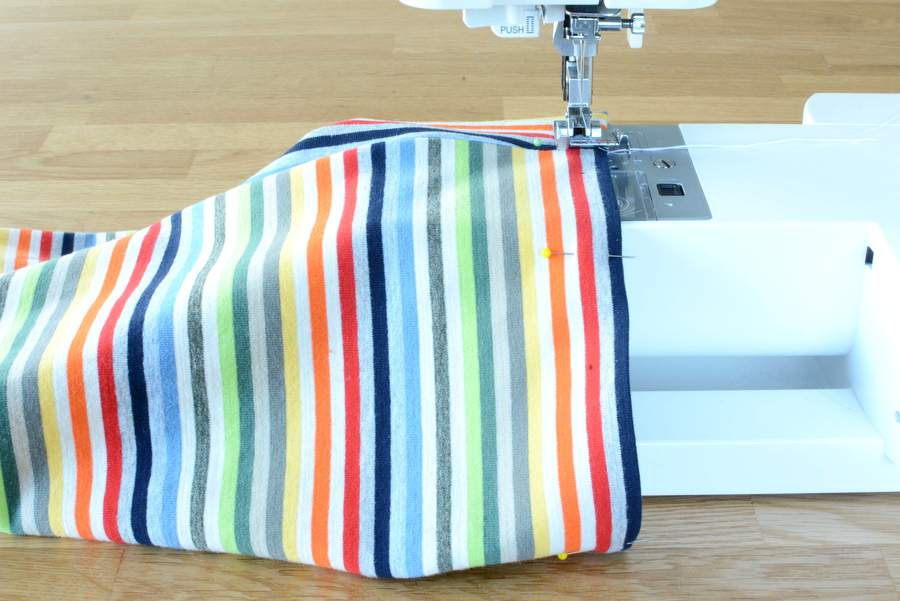
Arrange the leg on your machine as shown.
You are sewing into the leg, so your top stitch will sew on the right side of the leg. Begin at the inner leg seam. Sew with a 1cm (3/8”) seam allowance using a zigzag stitch, stretch stitch or twin needle (recommended). Repeat for the other leg. |
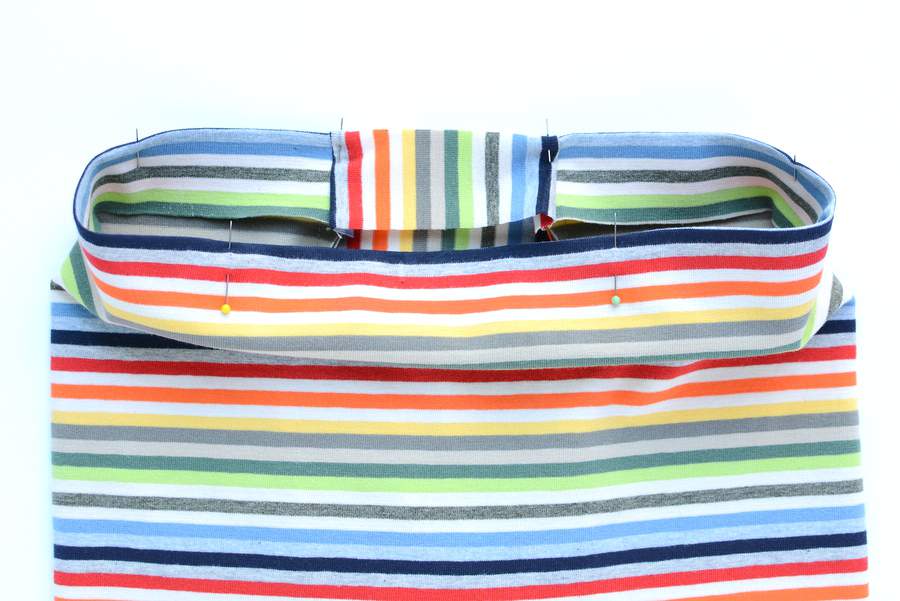 |
Turn your trousers right sides out. Fold the waistband over 3.5cm (1⅜”) and press. |
 |
Shirr the waistband. Use a straight stitch and the free arm if your machine has one. Start and finish at one of the panel seams. Make sure to sew a couple of times back and forwards at the start and end of each row.
Sew the first row with a scant 6mm (1/4”) then use the first row as a guide for the next. Continue until you have sewn five rows of stitches. |
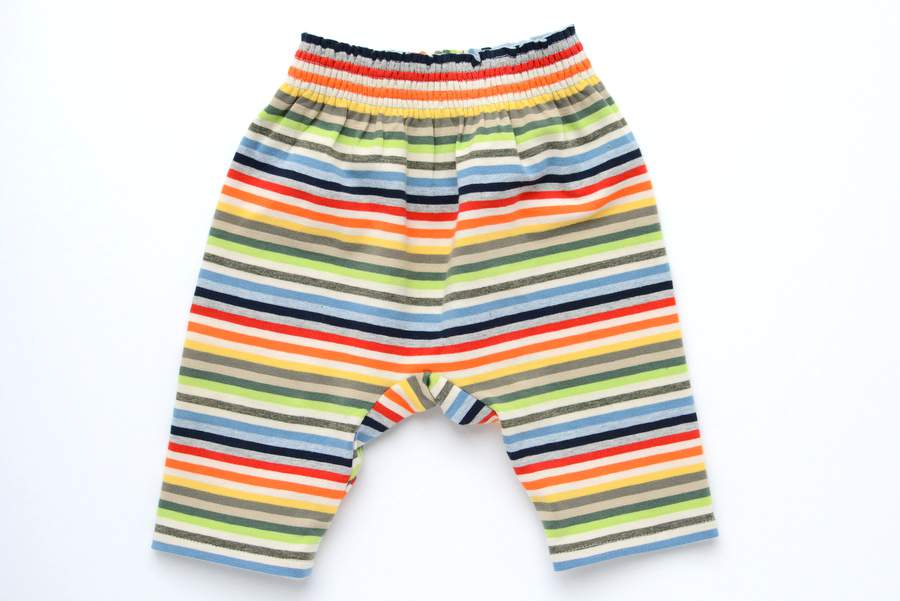 |
Your Teeny Tiny Trousers are now finished. |
For the kimono top tutorial download the free PDF.


They are SO gorgeous – and I can vouch for that because I’ve seen them in real life!! We both let out a little squeal when Abby opened your parcel 🙂
Thank you again for organising the virtual baby shower – it was so lovely to be a part of it! Being the gift deliverer was a highlight! Wish you could have been there! xx
A virtual baby shower? That is only the radest idea ever. Love this little stripey set, just beautiful.
Laura, such a fun idea!! Love love this little itty baby pattern too! 🙂 I will definitely hold on to this for an future friends with babies!
You are the best bloggy friend ever! This is the sweetest idea ever. My SIL just had a baby girl last night, I might just make her a kimono set.
what a cool idea! your kimono set is adorable, and that stripey fabric is wonderful!
Laura! This was an AMAZING idea. Abby is the best! She totally deserves to be spoilt and it looks like she has. She has been such a lovely support to my new little blog 🙂 Love the set you sewed up, its beautiful! x
Such a lovely idea and gosh the set is adorable! Well done x
How super cute. WHat a lucky baby and Mama. WOuld love to know where you got the rinbow stripe jersey from. I am a sucker for cute stripes
Awwwww! This set is gorgeous! Lucky Abby 🙂 Thanks for sharing the tutorial…. my bub is due in August, so this will come in handy I think 😉
Cass
OH!! I love this! So over the top adorable, can’t wait to try out the pattern! Thanks for putting it together!
Celina is right, you ARE the best bloggy friend ever!! I can’t thank you enough for organising this and the gorgeous set. I feel so loved and special and so lucky to have such awesome crafty friends! Best surprise ever!!
This is gorgeous, just seen it on craftsy.
Never sewn with jersey before, but would love to give this a bash!