
Today’s guest is Cheryl from Sew Can Do, one of the most friendly and encouraging bloggers around.

Her blog is full of fantastic projects and brilliant tutorials. Some are practical and others are lots of fun – like this chocolate playdough. She was recently featured in Stitch magazine with her adorable fuzzy hedgehog tote and pillow and also holds the popular Craftastic Monday Link Party. Cheryl is sharing a fun sewing tutorial with us today but you’d be forgiven for thinking she’d baked.
***
Hello Everyone! I’m really thrilled to be part of “Sew Yummy” here at Craftstorming. Sewing and treat making are my two favorite types of crafts, so this is my kind of series!
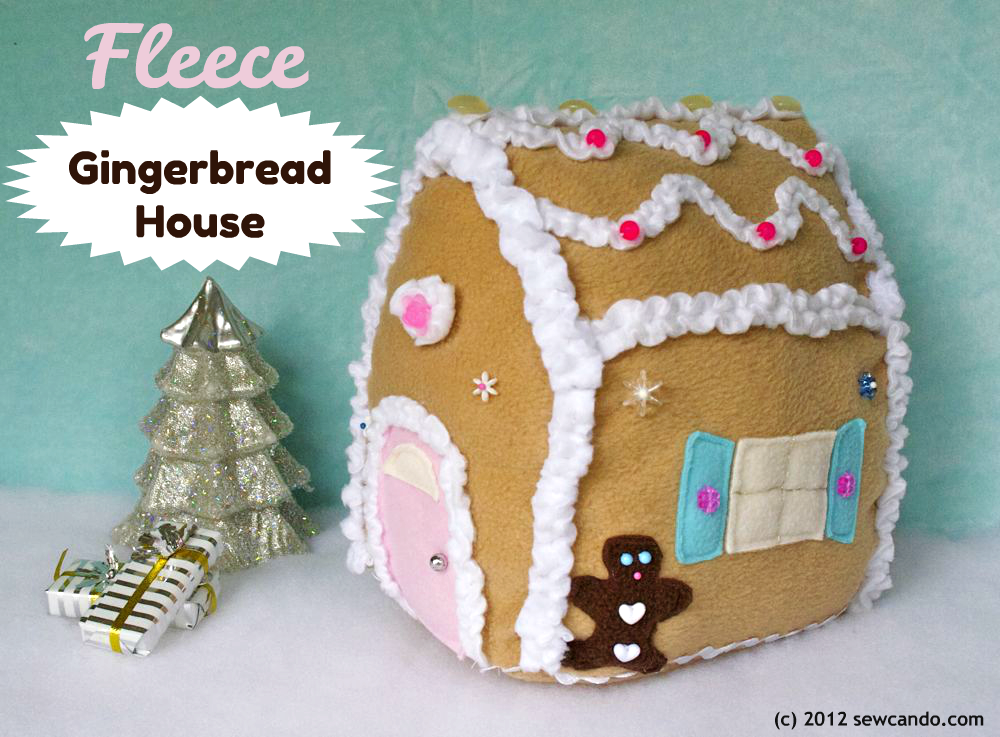
I’ve always loved gingerbread houses. They look so tasty & magical during the holiday season, yet every time I’ve made one, it has not looked all that tasty. Mostly sloppy in the details and nothing like what I’d pictured in my mind while making it. I’m pretty good at sewing, but as far as frosted treats go….I’m better at eating them than making them. So I figured this was the best way to combine my two loves: a Fleece Gingerbread House. Here’s how to faux food this classic tasty treat.
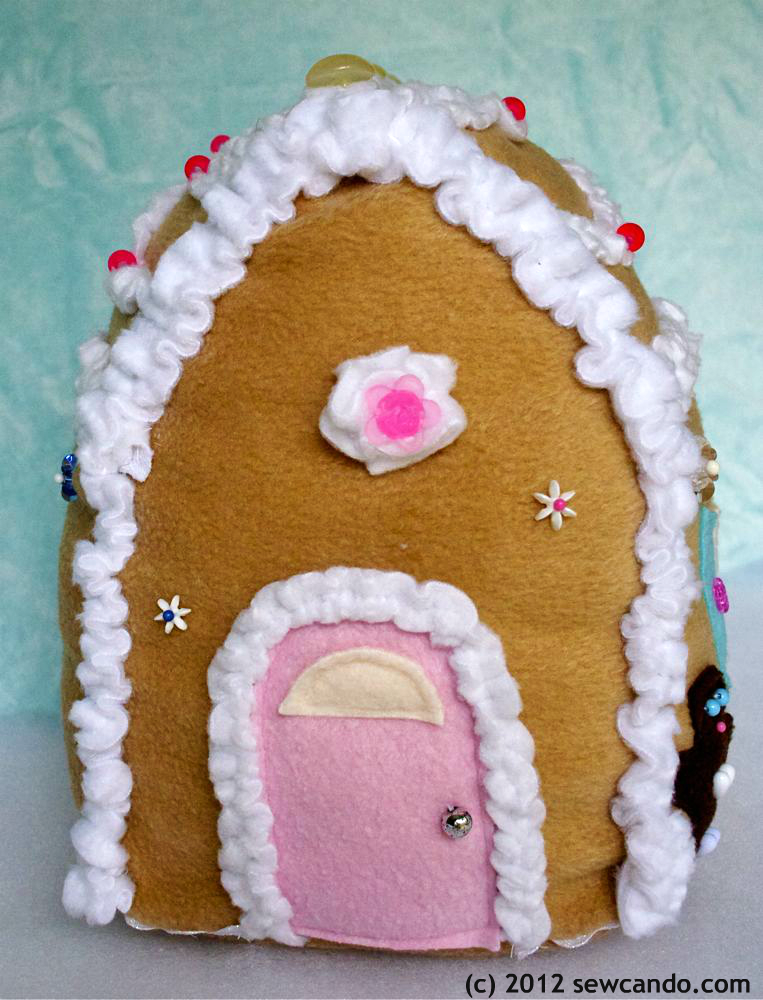
“Frost” it with ruffles of fluffy, white fleece:
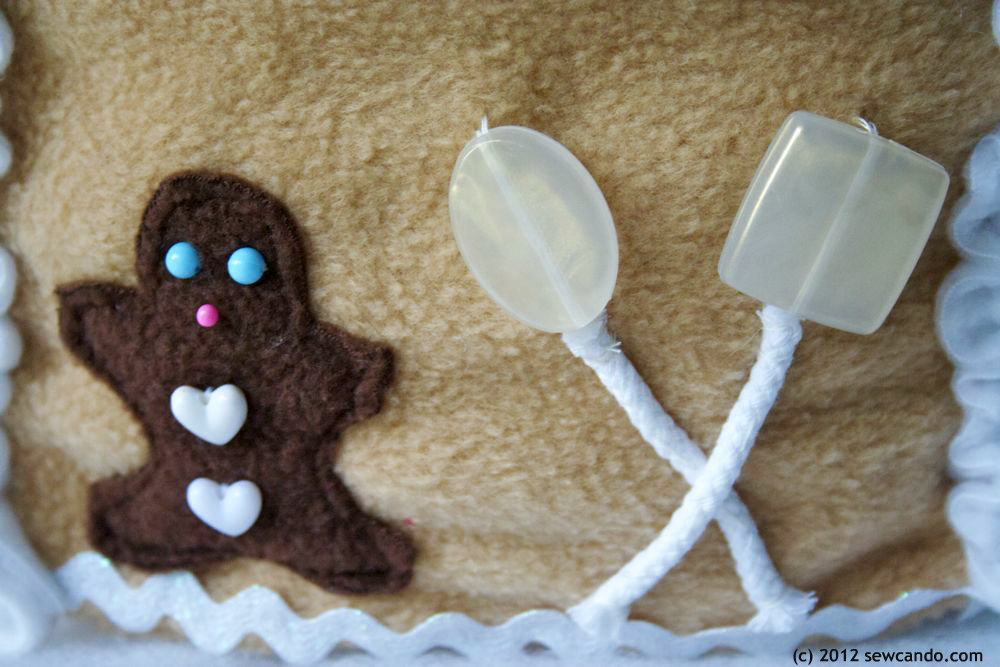
Add some dolled up gingerbread men and some yummy “lollipops” made from beads and cotton cording:

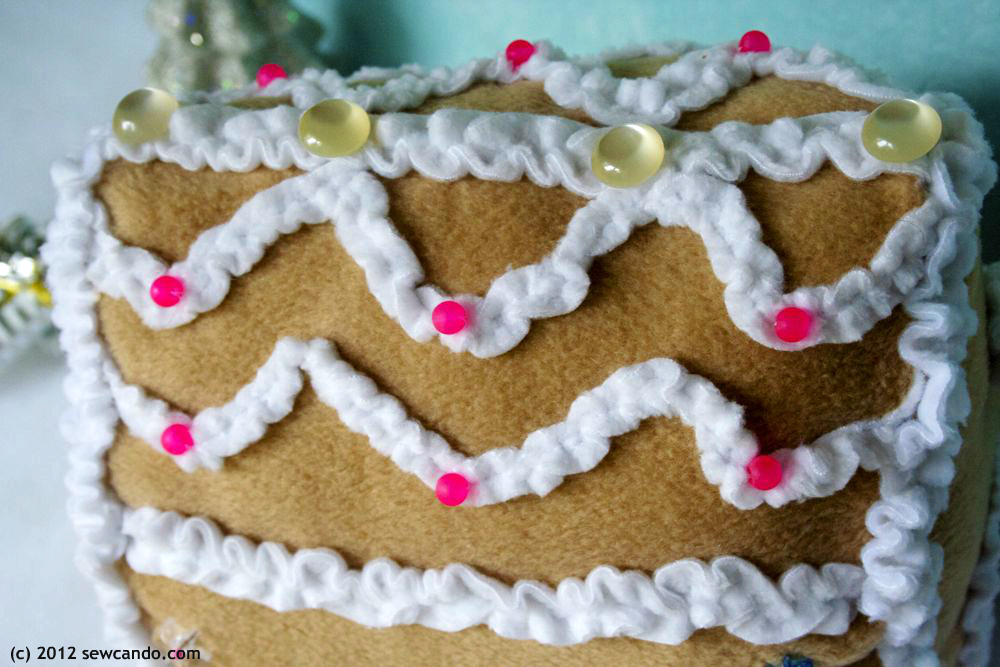
Decorate it with “candies” made from frosted beads & decorative pins to look like hard candies & shaped sprinkles:

Add a little sparkle with silver embroidery floss:
And some “gum drop” buttons for the roof:

Oh, and some shiny heart beads that looked like tasty sweet tarts. Can you ever have too much candy on a gingerbread house?!? I say no.

The entire thing is made from just two pieces of fabric and involved a mix of machine & hand sewing. The bonus of this kind of gingerbread house is the kitchen will not get messy and it will look just as fresh & tasty when displayed again next year.
For the “cookie” part, cut a piece that had the peaked ends, sides and bottom from a 1/2yd piece of tan fleece. Cut another piece that matched the length of the sides and the height of the peaks for the roof. Add a 1.25cm seam allowance to all sides and notched the corners, so it makes it easy to stitch them all together.

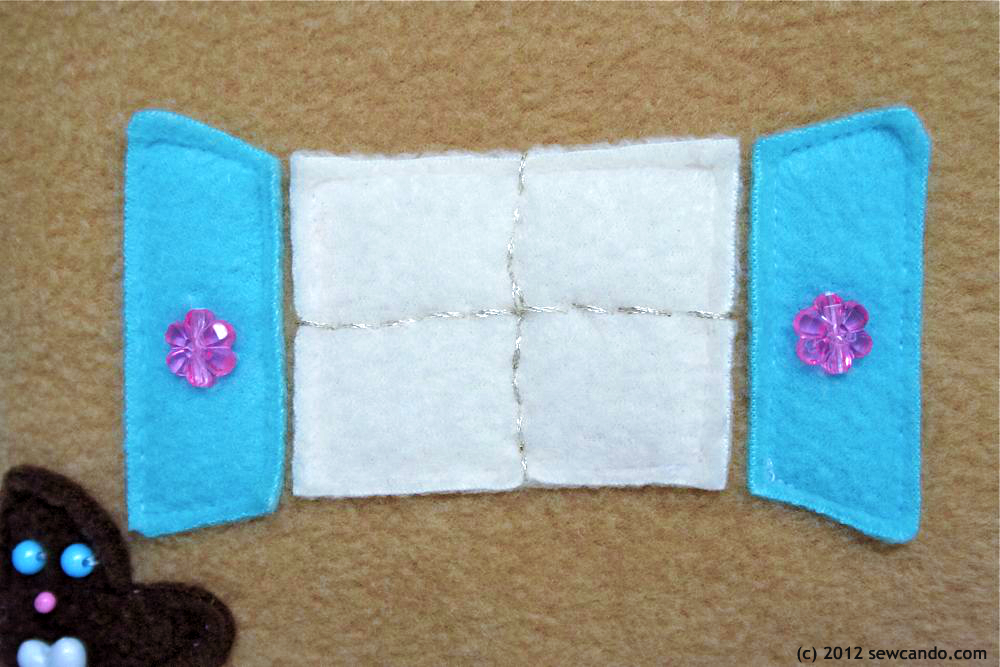
Try to lay out and machine stitch on as many elements as possible before stitching up the house:

To make the frosting, cut strips of white fleece between 1.25cm and 2cm wide and and double the length of the areas to “frost”. Baste stitch them down the middle and pull the bobbin threads to get the piped icing look. Pin looped & straight rows on the roof and machine stitch them on. Hand stitch the ones on the edges once the house was sewn up & stuffed.
Also machine stitch on the gingerbread men. Hand stitch the beads into place, so all the knots would be hidden on the inside. I used a tub of assorted craft beads that were full of all kinds of candy-like colors and shapes, plus some old buttons for added embellishment.
After getting most of those doodads sewn on, with right sides together, stitch the tops of the sides to the sides of the roof piece and then stitch the peaked sides. Then sew together the open sides so the house shape is all in place and then sew the bottom edges onto the sides, but leave a 7.5cm gap to turn it right side out. Stuff with polyfill and slipstitch the gap closed. Finish by hand stitching the frosting on the edges of the roof and sides.
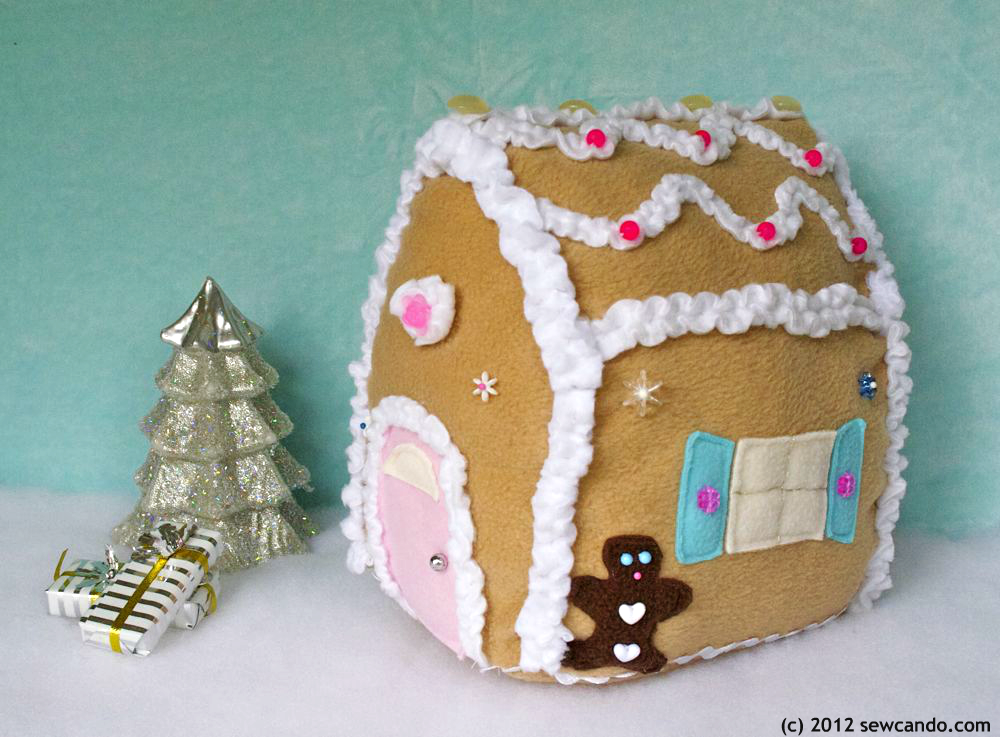
I’m pretty pleased with how it turned out and hearing my kids and husband say they wanted to eat it told me my mission was accomplished.
Thanks so much for having me visit Laura and I can’t wait to see what lovely creations come up next!

***
What a sweet idea. A gingerbread house that can be used year after year. Thank you to Cheryl for the inspiration and excellent tutorial.
There’s still time to enter the fantastic fabric giveaway from The Village Haberdashery. Enter here if you don’t want to miss it.


I love this! So many of the embellishments look exactly like lollies!! This is on my Christmas to do list.
“Sew” cute! I REALLY love your hedgehog too!!!
Thanks so much everyone and thanks for having me join you Laura!
So so cute! I totally pinned this for the holidays