

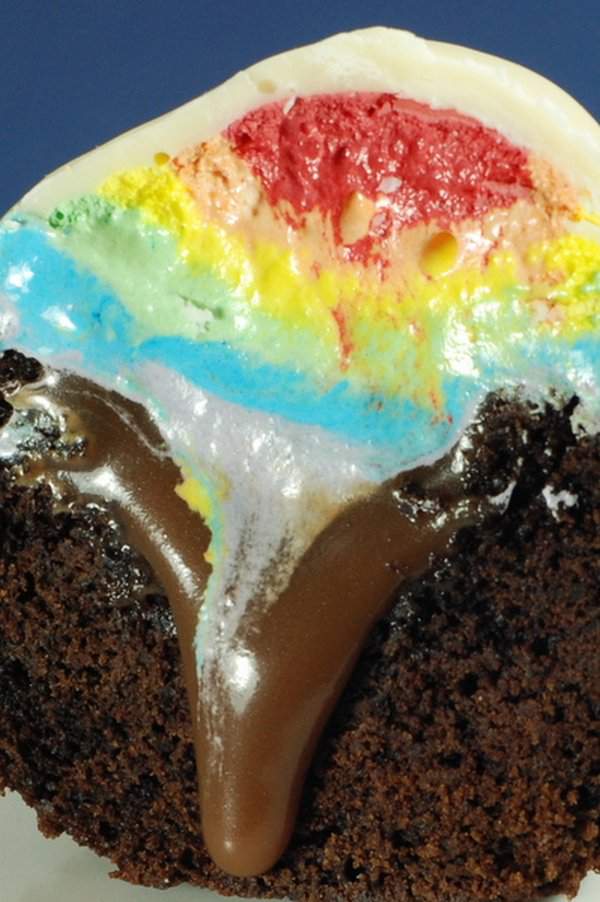
Happy St Patrick’s Day everyone. Even though I’m not Irish I do love rainbow colours and particularly love rainbow cakes so I couldn’t pass up an excuse to make these. Below the white chocolate shell is a fluffy rainbow of marshmallow icing and hidden below that is a pot of ‘gold’ caramel. Continuing with all things Irish the dark chocolate cupcakes contain whiskey.
I followed the same steps as I did the first time I made Hi Hats, the icing stage just took a lot longer this time.
1. Make your cupcake
The recipe I used is from the fantastic book ‘Tea with Bea‘. On my last trip to London one of her cafés and the cakes were so amazing I bought the book immediately. I chose the ‘espresso Bourbon cake’ (page 98), which made around 24 large cupcakes and a few mini ones. The results are fantastic and the recipe is really easy to follow, using melted butter and two different sugars for a deep dark toffee like flavour.
After my cupcakes had cooled I cut out a small circle in the middle and filled the hole with salted caramel. Even if you stop now these cupcakes are amazing.
2. Make your icing and pipe
I used an Italian meringue for the icing, which I made using this recipe;
Ingredients
400g caster sugar
150g water
160g egg whites (at room temperature)
2 tsp vanilla extract
This makes enough to ice all of the cupcakes.
Method
1. Place the caster sugar and water in a saucepan and bring to boil without stirring. At the same time as putting this on, start to gently beat 80g of egg whites to soft peaks using a mixer.
2. When the temperature of the syrup reaches 105°C increase the speed of the mixer. Once the syrup hits 115°C remove the saucepan from the heat and pour in a thin stream into the beaten egg whites. Continue beating the meringue for 10 minutes so that it cools.
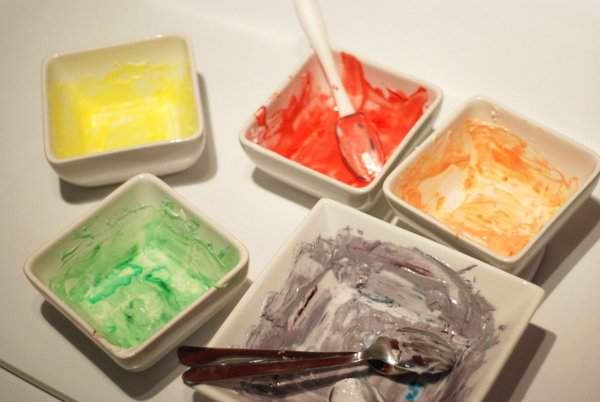
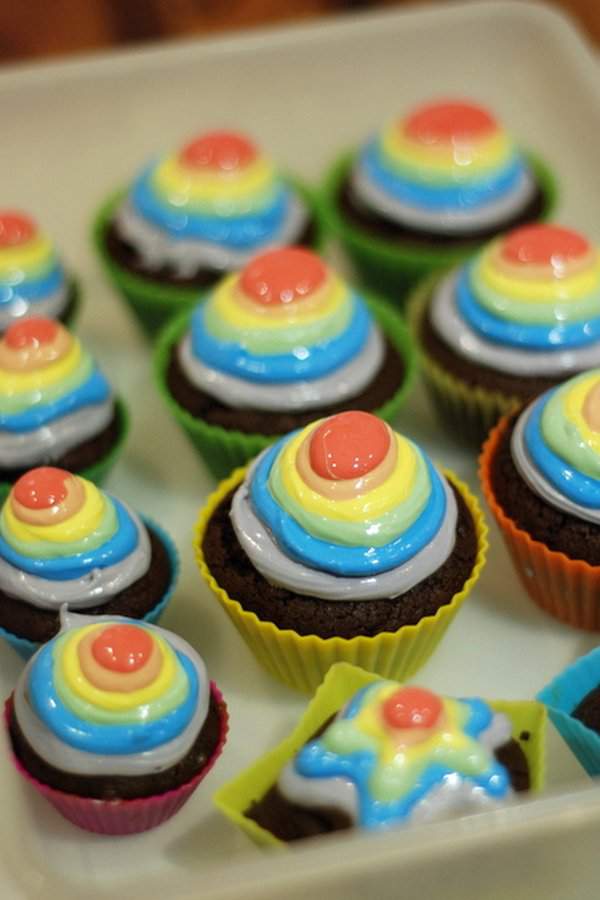
Once the icing is ready you can pipe it as it is or colour it. If you do colour it then it does deflate the icing somewhat so your Hi Hats won’t be quite as high as they would otherwise. I used powder colours but paste colours should work well too. You’ll need a lot more of the top colour than the bottom one. I piped mine using quite a small tip but if you’re not using different colours then a larger tip would be fine.
Once you have finished place your cupcakes in the fridge for at least half an hour to set the icing. You can speed this up by placing them in the freezer for a few minutes instead.
3. Dip in melted chocolate
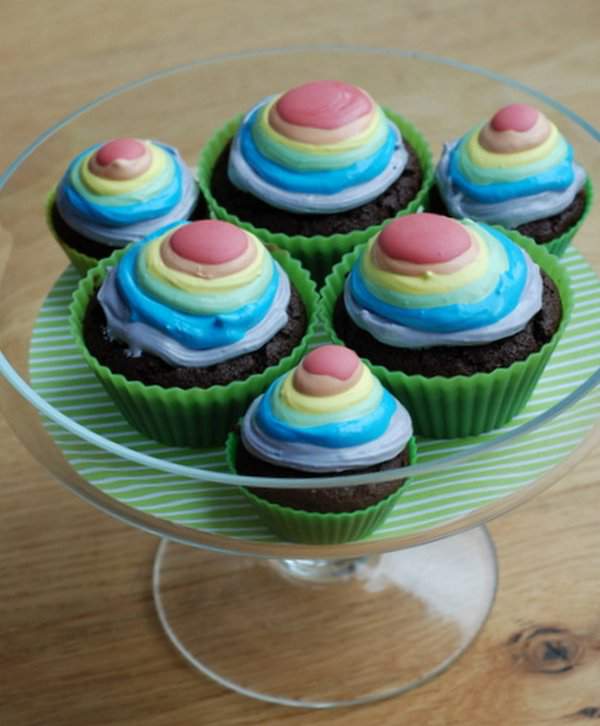
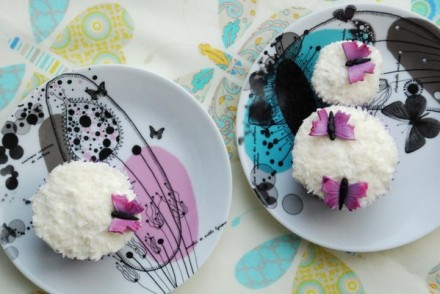
If you don’t want to dip them in chocolate then finish here and your cupcakes will look like this;
I used tempered white chocolate here but you could add a little oil to melted chocolate (about 3 tablespoons for 400g of chocolate). You do need quite a lot of chocolate here to make dipping easy. I made some white chocolate and toasted coconut bark with the remaining chocolate. You can see that the rainbow was peeking out after just one coat of chocolate so add another coating if you would prefer it not to show.

Eat and enjoy them!


Wow how lovely. I love the idea and the crock of gold is inspired
Wow, AMAZING either way! Well worth the effort!
Thanks Sue 🙂
These are amazing!! And so creative!