

My friend first introduced me to Tia Maria and orange juice a few years ago. I was slightly dubious but once I tried it I was completely converted. It is reminiscient of an alcoholic orange smartie, not especially sophisticated I know but nor am I. Amaretto and orange also work really well together in my opinion. I had been planning to use the combination of Tia Maria and orange in a truffle but decided to use it for Hi Hats instead as I have wanted to make these for a while. These Hi Hats have been a big hit – it is like having a large chocolate truffle and a cake at the same time, so I preferred the mini ones but the larger ones definitely have their merits. Obviously you can mix up the flavour combinations to whatever you want but I’d definitely recommend trying these.
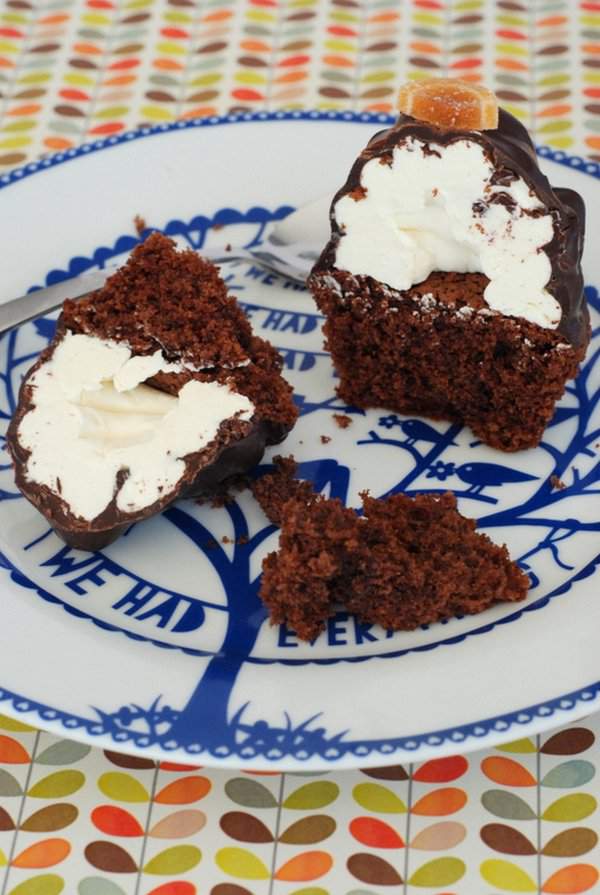
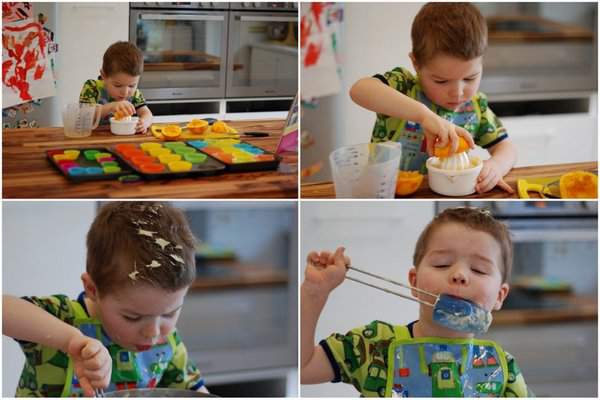
I started by making an orange cupcake from the ‘Cupcakes from the Primrose Bakery’ book. All previous recipes that I’ve tried from this book have been a great success but these were horrible with the texture of scones and no discernible orange flavour. Unfortunately my previous confidence in the book had led me to make a double batch so I shall be freezing them and my children will be having ‘scones’ for several weeks. Casper helped me make these and he was actually very helpful to start with. After we had finished scooping the mixture into the cases I gave him one of the spoons to lick. I turned my back for about five seconds and when I looked back he had the bowl upside down on his head. He got in such a mess he had to have a shower afterwards.
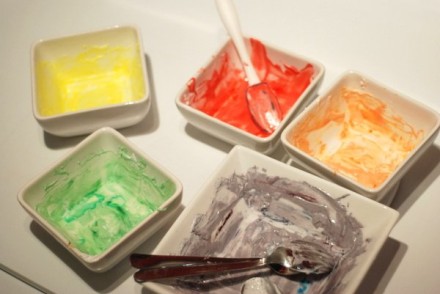
For my second cupcake attempt I stuck with the same book but chose a recipe I’ve made before – the ‘Chocolate and Orange’ cupcakes. Fortunately these ones are delicious and make the perfect base for the Hi Hats. The icing I used is an Italian Meringue Buttercream flavoured with Tia Maria and orange blossom water. Another option is to use an Italian Meringue without adding any butter for a lighter fluffier filling.
There are three separate stages to making the Hi Hats;
1. Make your cupcake of choice
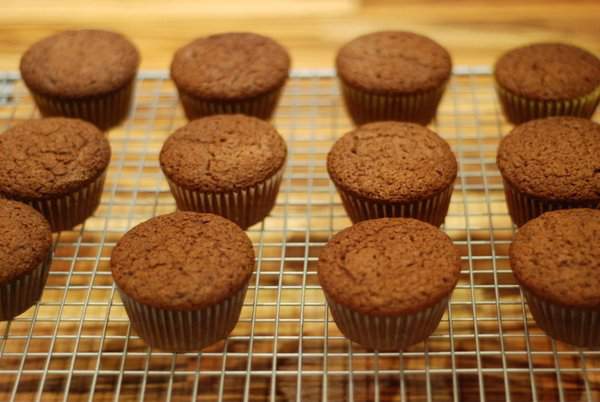
If you want to add some extra flavour consider brushing your cakes with a flavoured sugar syrup once they have cooled.
2. Make your icing and pipe
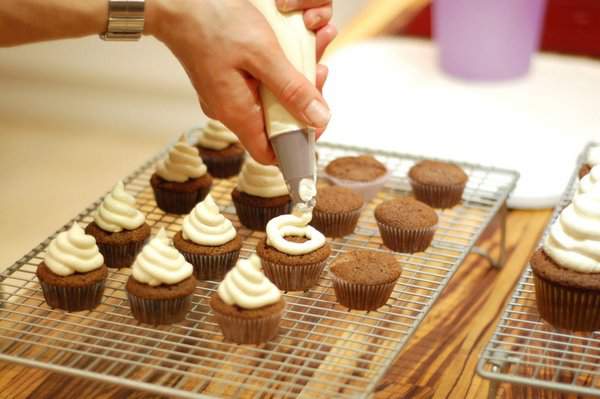
Wait until your cupcakes have cooled completely before piping. For my icing I followed the recipe from the bottom of this post and replaced the brandy with 2 tablespoons of Tia Maria and ½ a teaspoon of orange blossom water. You can leave out the butter if you prefer.
Once you have finished place your cupcakes in the fridge for at least half an hour to set the icing. You can speed this up by placing them in the freezer for a few minutes instead.
3. Dip in melted chocolate
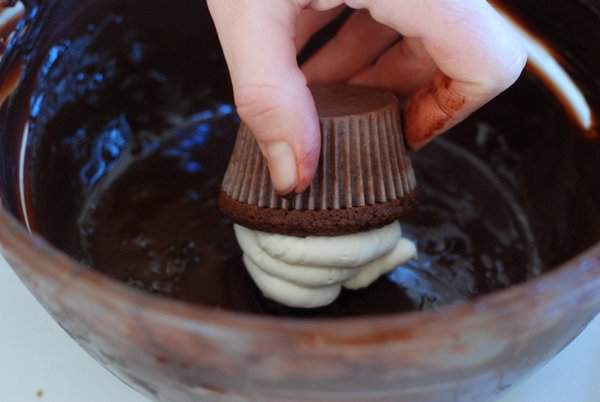
Dipping is a lot easier if you put your chocolate in a tall thin container. I didn’t and had to tip my bowl to cover all of the icing. For any bits that are difficult to coat use a cocktail stick to apply some chocolate.
You do need a lot of chocolate – at least 400g for 12 cupcakes. I tempered my chocolate but an alternative is to add some vegetable oil to the bowl with your chocolate before melting, about 3 tablespoons for 400g of chocolate.
Sit down and enjoy!


I’m not the biggest cupcake fan but I lOVE the idea of high hats – they look amazing! All that frosting and chocolate…yum. I’ve had a bit of a hit and miss experience with that book too, although anything involving chocolate usually comes out ok. Great post – thanks for the inspiration!
Thank you. Good to hear it’s not just me then, it might put me off trying another new recipe although their carrot cake recipe that I made recently was amazing.
Wow I have never seen such wonderful hi hats before! I’m hungry now!! I’ve never heard of Italian meringue buttercream before either. thanks for the inspiration!
Thanks Lauren – definitely try the buttercream, I’ve only been using it for a year but there’s no going back now 🙂
These look amazing! Photography great, I spot a bit of Orla Kiehly and the boy! Always makes me smile when I come on your site. Just to tell you I have began my second bag of nibs today. Have been savouring them. Are you able to join on the 10th? If not, what about the 28th April? Let us know. Hope all is well with you guys. x
Thanks Tina. Pleased to hear you are enjoying the nibs. I won’t be joining you on the 10th because I am going snowboarding for the weekend! Only book it yesterday and very excited. Have a good one and hopefully I’ll see you all in April.
Hello, I’ve given you a Liebster blog award! For more info check out my site.
Thank you Caroline, it’s lovely of you to think of us.
These look absolutely delicious! And so pretty! 🙂
Thanks Helena, they were delicious 🙂