
It’s the last tutorial for the sew along today! Are you excited to finish your skinny jeans? Have you all been following along ok? I am really excited to see some pictures from you all. I’ll have a post up tomorrow with the link party, so you can start adding your jeans. It will be open until the end of August for a chance to win a copy of the final pattern.
If you’ve only just joined the Sew Along then the previous posts are:
- Pattern Details and Supplies
- Free 2T Pattern and Prep
- Day 1 – Pockets and Back Yoke
- Day 2 – Half Fly Tutorial
- Day 3 – Leg Seams
This tutorial could be applied to any trousers pattern you are using. I often adapt patterns to include this adjustable waistband. It doesn’t add a lot more time and might mean your trousers you slaved over get a lot more wear, especially if you think they will be worn by siblings later on.
What you will need today:
- Belt loops that we prepared during Day 3
- Waistband
- Interfaced waistband facing
- Skinny jeans – with pockets sewn on and legs sewn up
- 3 buttons – 1 for the main front button – approx. 20mm (3/4″), 2 smaller flat buttons for the adjustable waistband – approx. 12mm (1/2″)
- Buttonhole elastic
- Fabric marker
- Wondertape (optional but recommended)
The waistband method I’m using here has no topstitching on the waistband. Instead it is sewn down by stitching in the ditch along the waistband seam so the stitches are barely visible on the outside. The waistband facing is designed to be wider than the waistband to allow this. The finished pattern will include an option for topstitching as well but if you really want to add some topstitching now I will tell you when to do something differently in the instructions. Note that when I mention the top and bottom of the waistband and facing this is to help if you have a directional print.
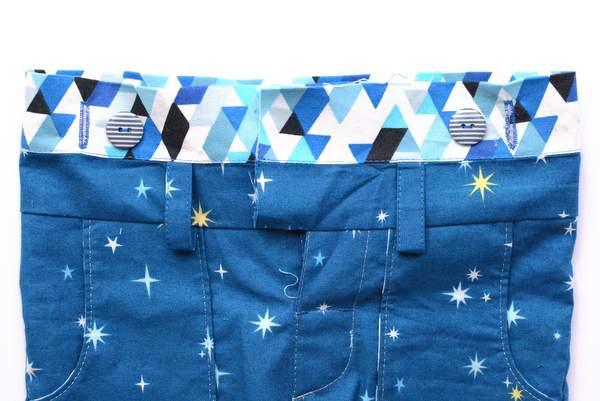
ATTACH BELT LOOPS AND WAISTBAND
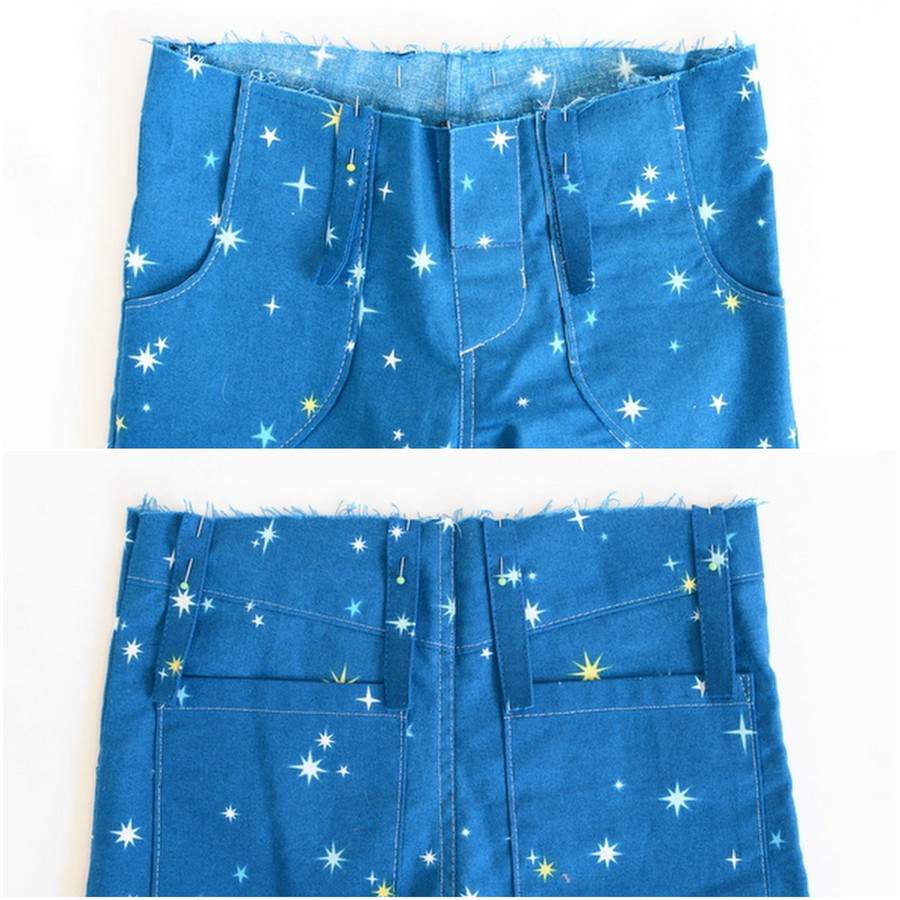 |
1. Pin one raw edge of each of the belt loops to the top raw edge of the skinny jeans. The right sides of the belt loop should face the right side of the jeans. Line up the middle of each belt loop with the notches marked on the front leg and back yoke pattern pieces. Pin in place. |
 |
2. Pin your main waistband piece to the jeans – the waistband piece will overlap the jeans at each end by 12mm (1/2″). Line up the bottom raw edge of the waistband with the top raw edge of the jeans. Make sure to open the half fly up and keep the two parts that overlap at the fly separate from each other. |
 |
3. Sew the seam with a 1cm (3/8″) seam allowance. I recommend backstitching a couple of times at each of the belt loops and taking care to remove the pins you used to attach the loops once you’ve sewn a little way over the loop but before you reach the pin. |
 |
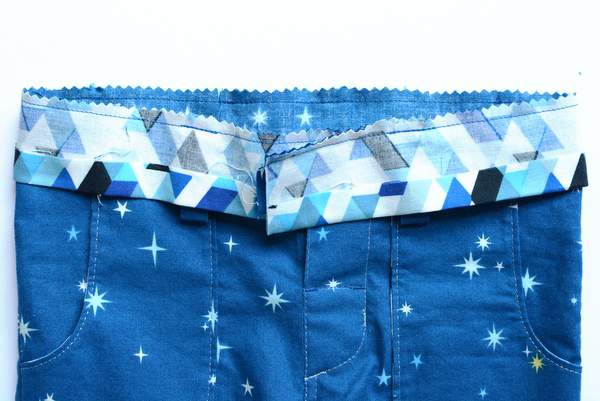
4. Press the waistband and seam allowances upwards, away from the jeans. Fold the belt loops upwards and pin so that the raw edges of the loops are lined up with the raw edge of the main waistband.
The belt loops are wider than the waistband so they won’t be pulled tight. The bottom fold of the loops will be below the waistband. NOTE: If you wish to topstitch the waistband then don’t fold the belt loops up here – instead pin them to the legs of the jeans so they are out of the way. |
 |
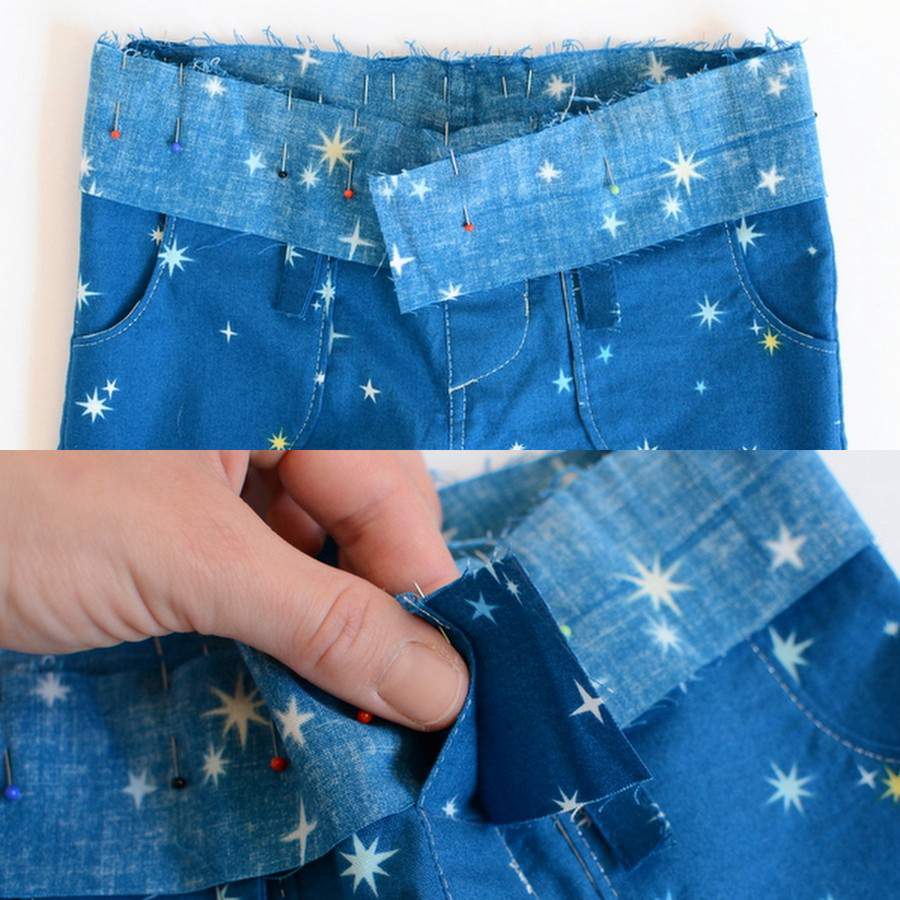
5. Make sure you have interfaced your waistband facing. Press the bottom long edge 1.6cm (5/8″) to the wrong side.
Pin the top (unfolded) raw edge of the waistband facing to the raw edge of the main waistband. The ends of the facing should meet the ends of the waistband. |
 |
6. Sew the long seam around the waistband with a 1cm (3/8″) seam allowance. Backstitch at each of the belt loops if you have pinned them up.
Trim the seam allowances to 6mm (1/4″). |
 |
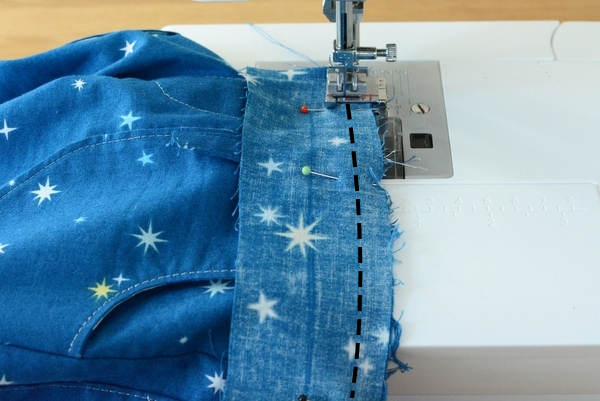
7. Press the waistband facing up and the seam allowances towards the waistband facing. |
 |
8. Understitch the seam allowances approx 3mm (1/8″) from the seam.
If you intend to topstitch the waistband then this is not necessary. |
ADD AJUSTABLE-NESS
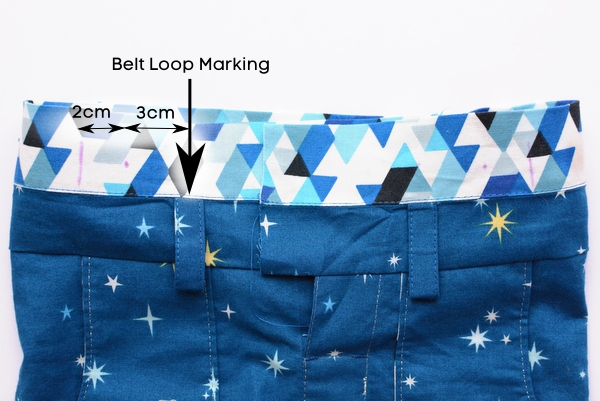 |
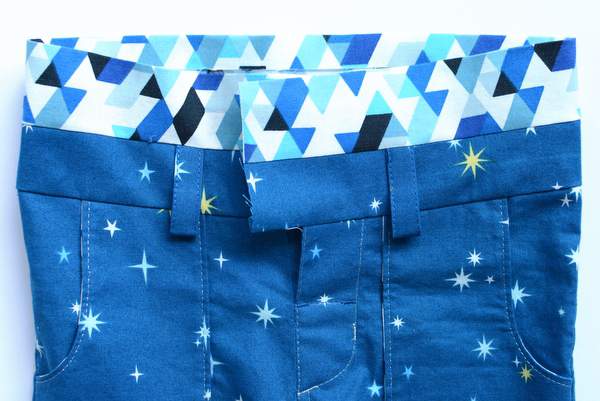
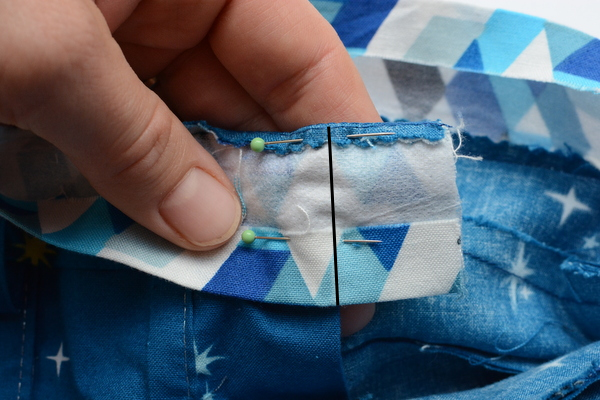
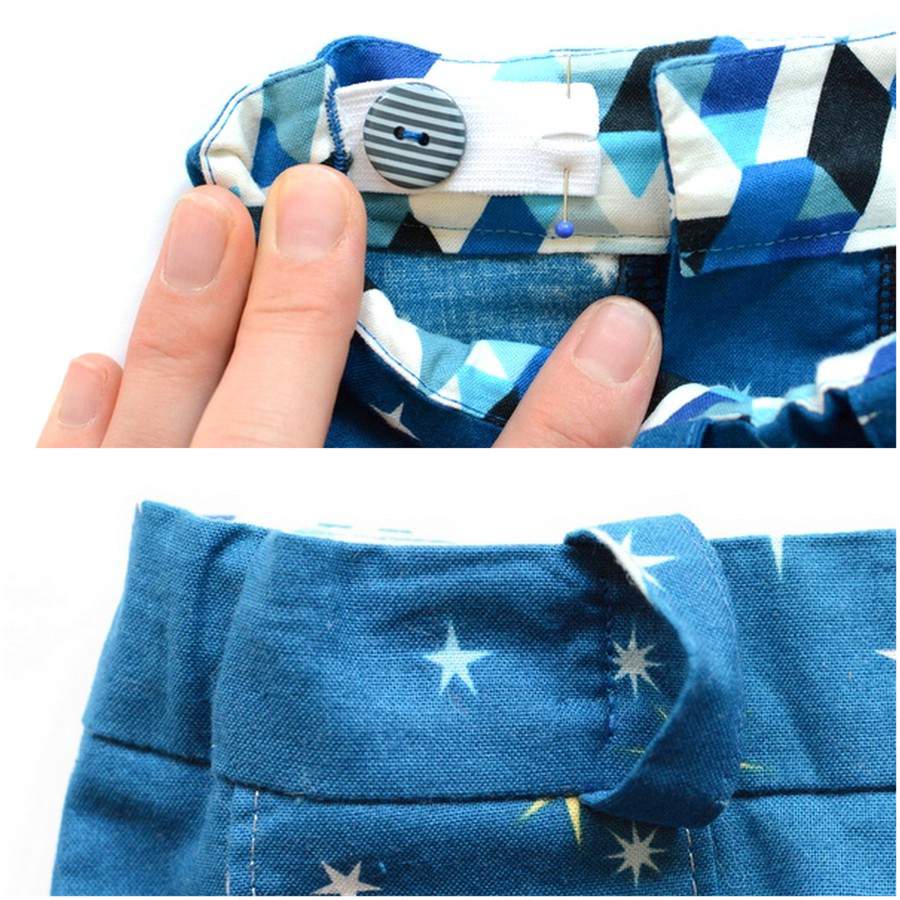
1. We now need to mark where to sew the buttonholes and buttons onto the waistband facing. You will be sewing the elastic down underneath the front belt loops so make marks on the facing in line with the centre of the front belt loops.
The centre of the button should be 3cm (1 3/16″) away from the belt loop marking (in the direction of the side seams). The buttonhole should be 2cm (2″) from the button. The distance between the edgestitching and the stitching at the bottom of the facing will be about 3cm (1 3/16″) (a little less if you are topstitching the waistband) so make sure the buttonhole markings are roughly central within this. |
 |
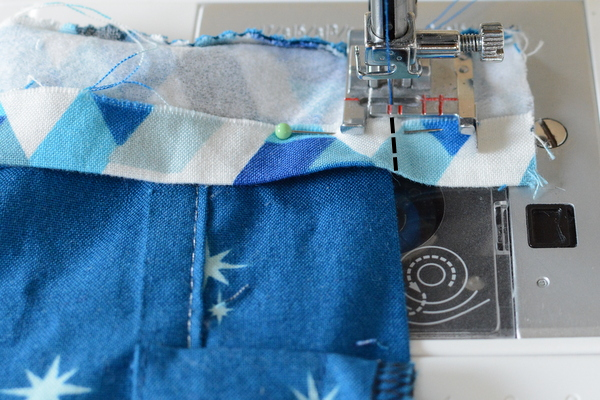
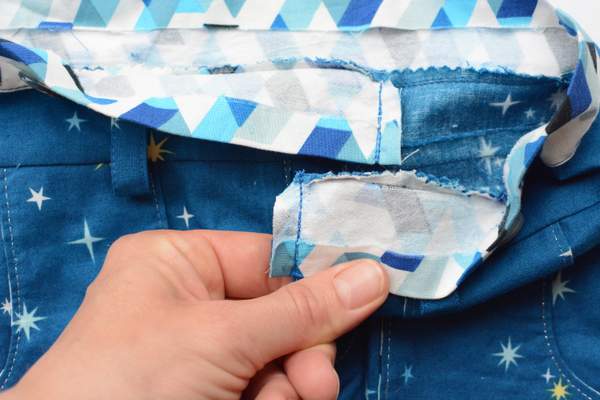
2. Sew buttonholes and buttons on where marked. Sew a practice buttonhole to make sure the buttonhole elastic will fit through. I need a button approximately 18mm (11/16″) big to get a hole that is a bit over 20mm (13/16″) to fit the elastic I buy.
Note that you could use a different button to sew the buttonhole to the ones you sew on the facing – you will not need the button to fit into the buttonhole. You just need the buttons to be the right size to attach the buttonhole elastic to – test before you sew them on. Open up the buttonholes – place a pin at one end and point your seam ripper towards the pin so you don’t push through the end of the stitches. Press the waistband facing down to the inside of the jeans. |
FINISH WAISTBAND
 |
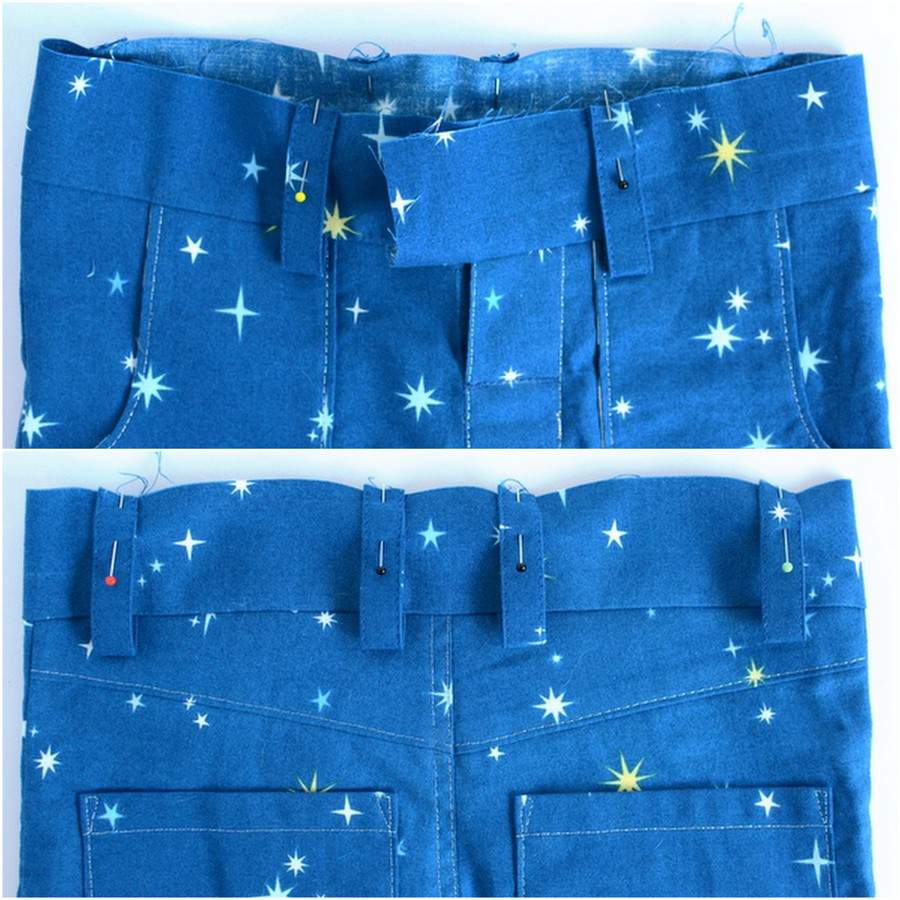
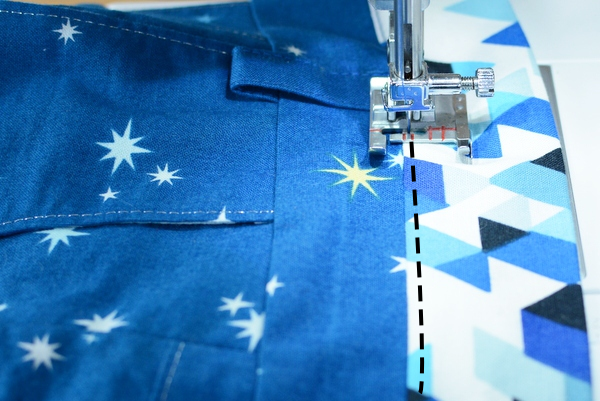
1. Fold the waistband facing over so the right side faces the right side of the main waistband. The waistband facing will be 6mm (1/4″) wider than the main waistband. The amount you pressed over for the facing means that the raw edge should meet the raw edges from the waistband seam.
Pin and (if necessary) mark a straight line that is directly in line with the edge of the fly guard for the right leg and the edge of the centre seam for the left leg. The seam allowance should be 12mm (1/2″) here but the marking is worth it for a clean finish. |
 |
2. Stitch the ends of the waistband and facing with a 12mm (1/2″) seam allowance. Sew and backstitch a couple of times. |
 |
3. Cut the corner and trim seam allowances. |
 |
4. Turn the waistband facing out and gently push the seams to turn corners out. Don’t push into the corner itself as you may find you push through the fabric.
I used a bamboo point turner for the first time with these jeans and was really impressed. I used to use the end of a chopstick. |
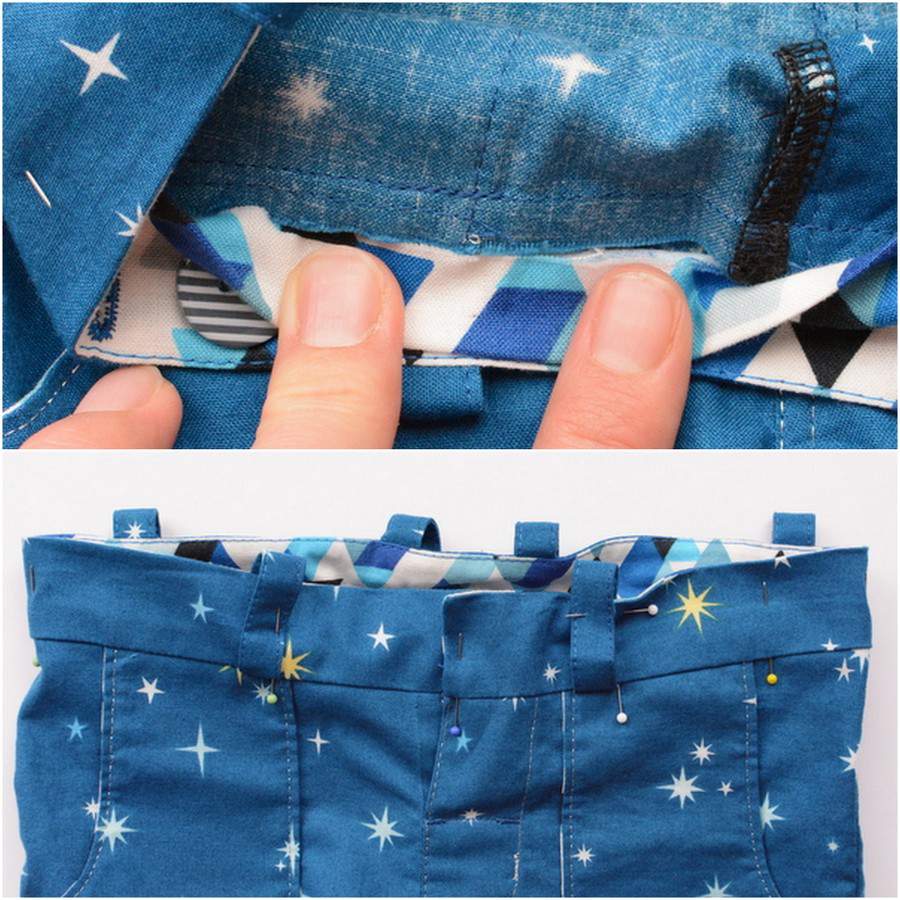 |
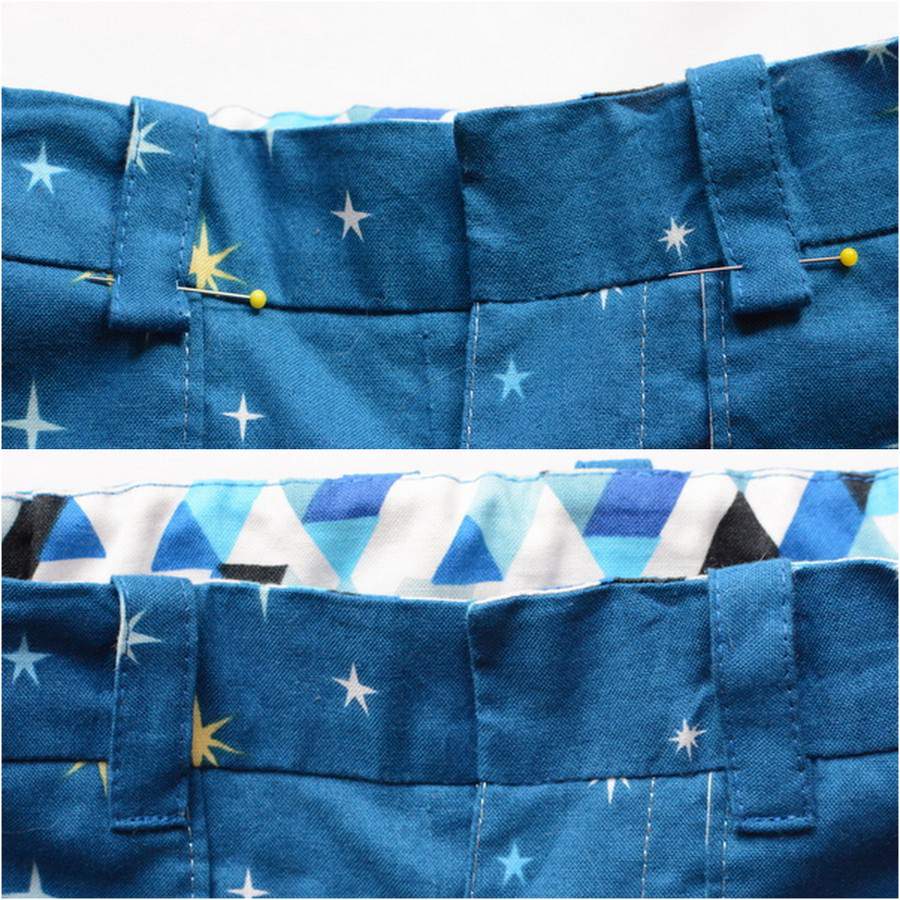
5. Turn the facing back to the inside of the jeans (so the wrong sides of the waistband and the waistband facing are together) and position so the raw edges of the two pieces line up. I like to use Wondertape to hold in place. The photo shows me lining it up before I turn the edge of the facing down. If you are pinning then I’d recommend pinning from the right side of the jeans.
Pin the belt loops up so they don’t get in the way when you are sewing. |
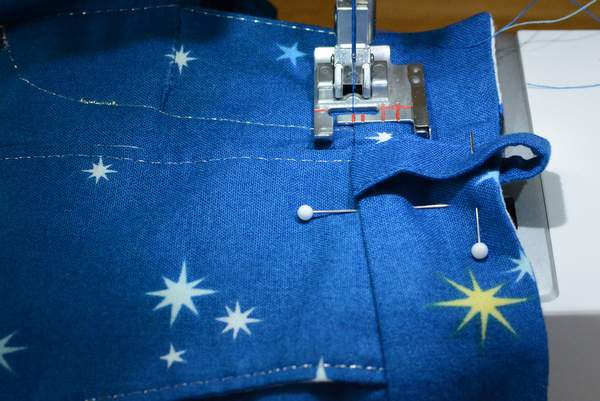 |
6. From the outside of the jeans stitch in the ditch. This means sewing into the seam of the waistband. The stitches won’t show on the outside and there should be a row of stitches 6mm (1/4″) up from the bottom of the facing on the inside.
If you are topstitching the waistband instead then do that here. Make sure you don’t stitch too far from the edges so you leave enough width for the elastic to fit through. After topstitching fold the top edge of the belt loops over by 1cm (3/8″) and press. You may want to trim the part that is folded over down to 6mm (1/4″) after pressing. Align with the top of the waistband and stitch down in line with your topstitching using a bar tack, triple stitch or narrow zigzag stitch. |
FINISHING STEPS
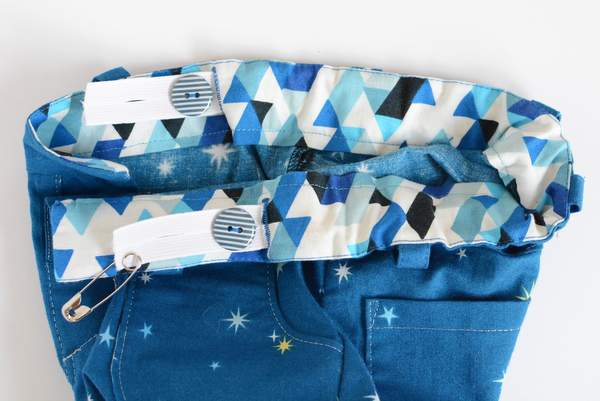 |
1. Take your elastic and attach to a button on one side. Pull all the way through using a safety pin. At this point it is worth checking fit on your child and adjusting the length of the elastic if necessary. |
 |
2. Stitch down each end of the elastic in line with the front belt loops, holding the loop out of the way. I stitched from the facing side. |
 |
3. Press the belt loops so the bottom sits flat. Stitch the bottom of the loops using either a bar tack, triple stitch or a zigzag stitch. |
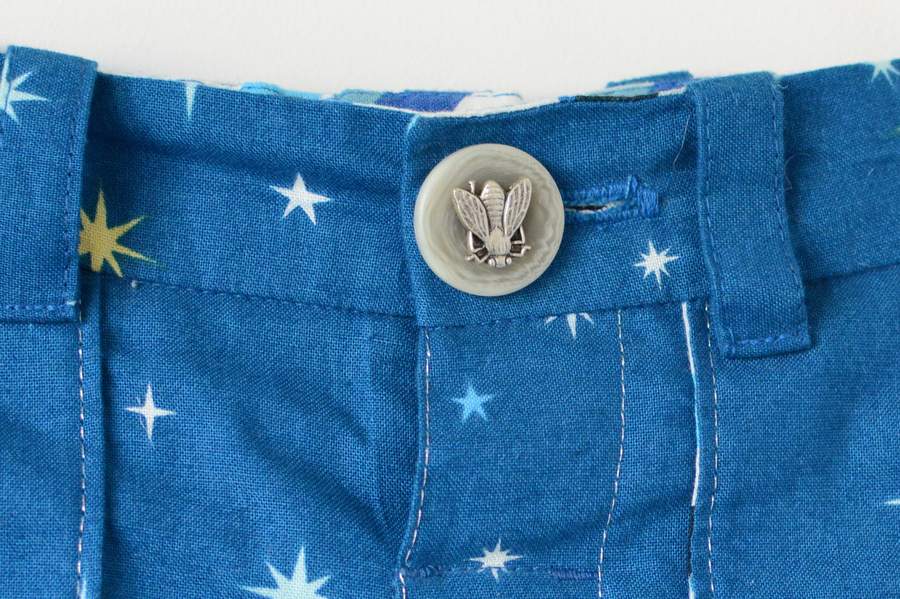 |
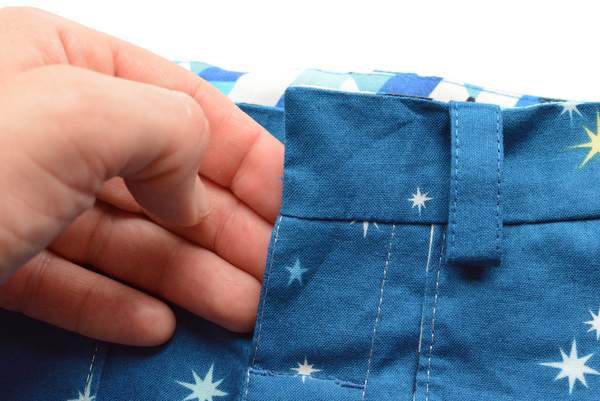
4. Sew the buttonhole and button onto the front of the jeans. You want to position the button over (towards the side seam) from centre of the buttonhole as when the jeans are on it will naturally sit to the edge of the buttonhole. If you sew it central to the buttonhole the fly will end up slightly open. You can see in the photo that I didn’t quite sew mine far enough over. |
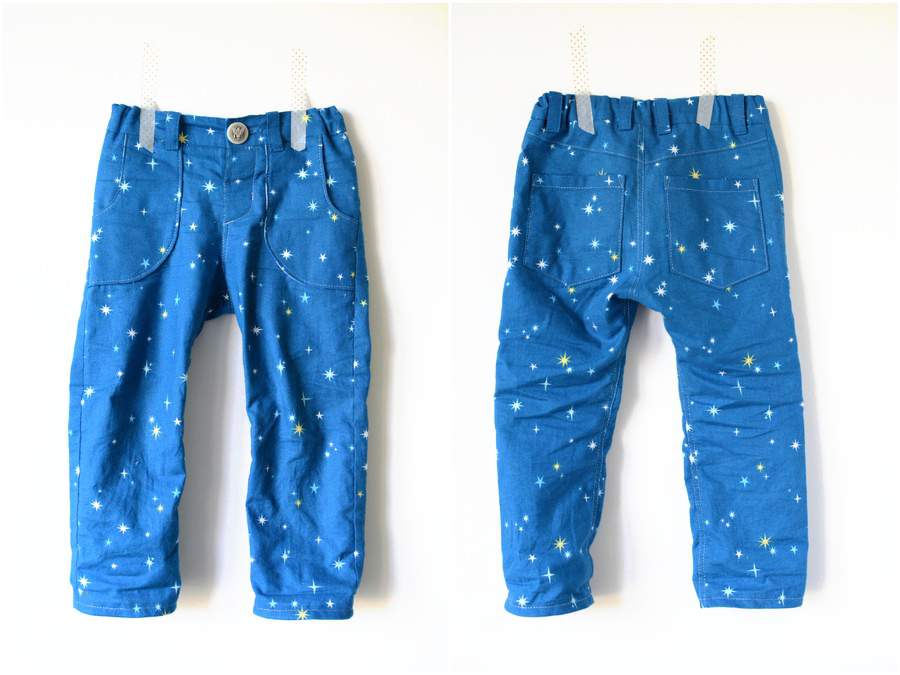 |
5. Stand back and admire your waistband and finished jeans. |
OK, that was a lot to take in for today. Just take it one step and at a time and take an extra day or two if you need it. Let me know if you’ve got any questions at all. I would love to know what you thought of all of the tutorials and if there is anything you think could be improved. Thank you to everyone who has sewn along and got this far – I am excited to see your creations tomorrow. If you do upload your photos to Flickr so you can add them to the link party then I’d love it if you added them to the Titchy Threads Flickr group too. See you tomorrow!


Okay so I may not have been as dedicated to the sew along as I should have been, in my defense this is my first one. I am going to whip these out today and then I am going to upload them to the flickr group. Thanks again for a great pattern and tutorial, I am going to use my pants for PR&P sew along.
With Love,
Scary
You can take as long as you need, it’s great to have you sewing along. Which PR&P week will you use them for? I’m still trying to decide which ones to go for.
Well now I really wished I had a 2 year old. Everything looks amazing and so easy to follow. The photos are great too. You rock!!!
Thanks Celina! I can’t wait to see what you do when the pattern is ready in bigger sizes 🙂
Finished!! And I love them, fit perfect on my 3,5 year old! Thx for this easy to follow sew along!
I have everything all finished except the button holes and elastic. I Haven’t gotten a chance to go up and get the elastic yet. What width of elastic did you use? You probably have it written in the pattern but I don’t know what I did with the supply sheet.
These are seriously too cute. I’ll be posting pics on my blog as soon as it’s finished. 🙂
Hi Lee. My elastic is 18mm (so just under 3/4″) wide. Looking forward to seeing your jeans!
Thanks! For some reason button elastic is scarce where I live. I managed to find some over the weekend though so I finished it up today. WooHoo! They are adorable! I’m going to have a little mini photo shoot with my little man in them and post pics tomorrow. 🙂
Nearly done! Lots of buttonhole issues though. My Babylock usually does perfect buttonholes but it’s had trouble feeding for all of them on this project. Probably because of the varying thicknesses. I ended up using a zigzag stitch to manually do the inner buttonholes.
Any tips for putting in the main buttonhole on the front of the pants?
Hi Laura. Sorry to hear you’re having trouble. My machine is fine on the inner buttonholes but it did have trouble with the main one on the front. In my case the bulk in the layers caused the lever that drops down for buttonholes to be pushed too soon. I ended up using a regular foot but with a buttonhole stitch. I marked the length I required on the jeans then manually pressed the level when it reached the right length. I haven’t quite perfected this method yet – if and when I do I will do a tutorial. Otherwise I’d just suggest doing it manually.
Discovered this blog and pattern yesterday via Pinterest….decided to cut out pattern pieces tonight….but then I couldn’t stop! And now, apart from sewing on the front button, it is done!! And I love it! My son had his 2nd bday on Monday….Cannot wait to put it on him tomorrow!! Thanks for brilliant pattern and lovely tutorial and help…it was a fun sew
I started to sew clothes for my 2 years old girl, and the first thing i want to make was a pair of jeans, thanks to you i found a free pattern to do it, im from argentina and buy pattern cost me twice the price, so thank you so much, the jeans fit perfect, look perfect and i adore them haha, im going to start the second pair in a corduroy fabric, hope that results beautifull like the first one.
saludos desde argentina…