
I am so pleased to have Abby from Things for Boys here today with the first sewing creation of the ‘Sew Yummy’ series.

I first found Abby’s blog when her baby sleeping bag tutorial was featured on Grosgrain. It was around the same time that I had posted about the sleeping bag I made for Rowan (although I never did manage a tutorial) and Abby’s son is called Roman. I thought the coincidence was funny so I emailed Abby and we’ve been in contact ever since. She is a multi-talented crafting whirdwind and full of creative ideas and useful tips. Some of my favourite things she’s made include her fold over cuffs or mittens tutorial, blinged up baubles and this modern monogramming T-shirt. Today she has sewn a very stylish but practical item for baking.
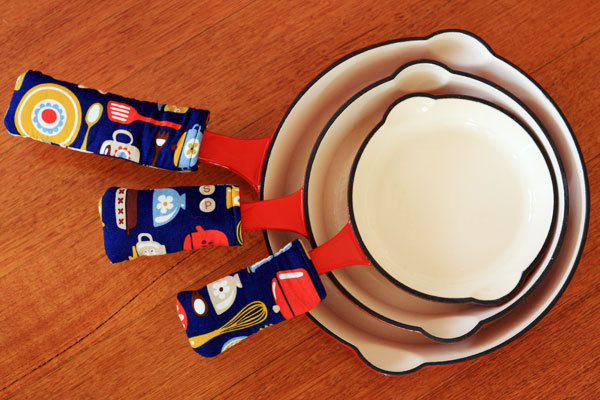
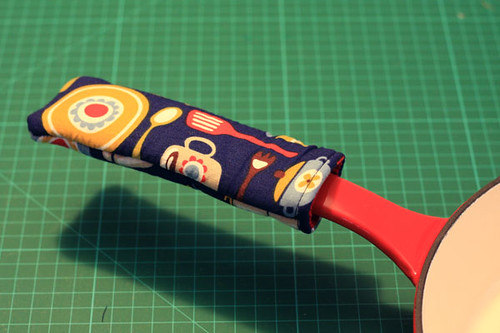
I love my Cast Iron skillets. They cook food beautifully and look cute sitting in a little stack. The handles can get pretty hot though! I don’t like using a tea towel to grab them because the tea towel is usually wet so I burn myself or I use too much tea towel to grab the handle and set the tea towel on fire!! Little mitts or cozys for the handles are perfect! They are a great scrap busting project and come together really quickly. Here’s how you can make your own.
Saucepan Handle Cozy
- Insul-bright batting or wool batting or a wool blanket
- Lining fabric
- Outer fabric
- Sewing supplies
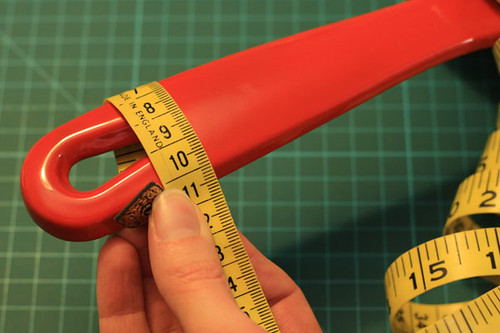
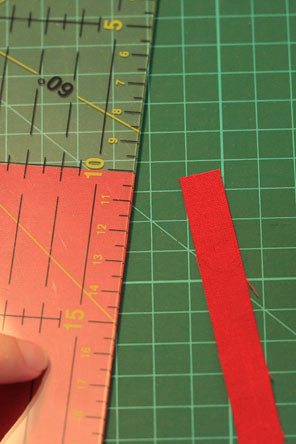
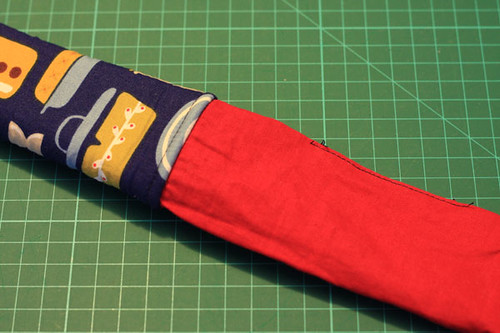
To start, measure around your handle to get your width. Take your measurement and add 2 cm (1″) for ease to allow for the batting thickness and another 2 cm (1″) for seams. My width measurement is: 10 + 2 + 2 = 14cm

Measure along your handle to get the length you want. Add 2 cm (1″) for seams. My length measurement is: 15 + 2 = 17cm

Cut a piece of your outer fabric, batting and a piece of your lining using your width and length measurements. I am using an old woollen blanket for my batting. If using a blanket, make sure it’s 100% wool.
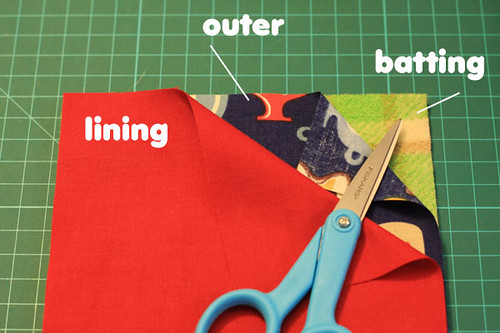
Layer your fabrics. Place the batting on the bottom, the outer fabric on top with the right side facing up and the lining on the top with the right side facing down. Your outer and lining will be right sides facing.
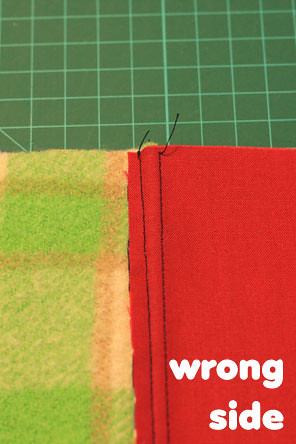
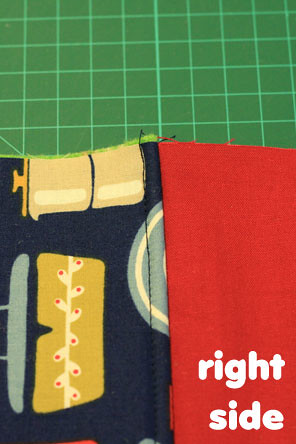
Working with the batting uppermost, stitch a seam along the width (so in my case one of the 14cm sides) using a 1cm (1/2″) seam. Press the seam towards the batting and then top stitch the seam to the outer fabric and batting, using a 5mm (1/4″) seam.
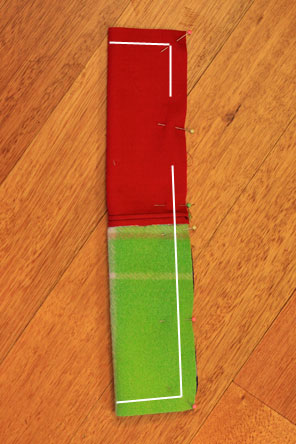
Trim 1cm (1/2″) from the end of the lining. This will stop the end seams from laying on top of each other.
Fold in half along the length and pin together the open sides.
Stitch all the way around to close it all up, leaving an opening about 5cm (2″) in the side of the lining for turning.

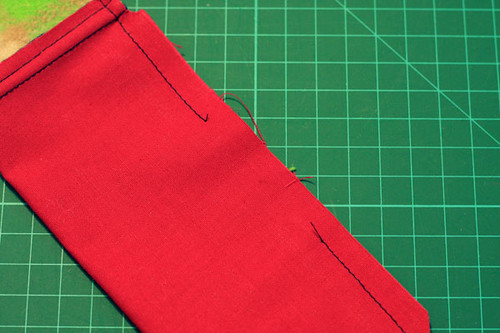
Trim the seam allowance of the batting down and clip all the corners. Turn the cozy right side out.
Sew the opening in the lining closed nice and close to the edge. Push the lining inside the cozy and you’re done! Let’s celebrate with some Warm Buttered Apple!
That’s such a great fabric to use for a cozy. I could certainly use one or two in my kitchen, it might have stopped me burning me hand last year. Thanks for sharing this Abby, I wish I could pop round for some warm buttered apple and a chat.


So cute and so practical! Love the fabric!
thanks for this tutorial, I desperately need some of these!!
Oh my god… I have been trying to make one of these for ages and could never get the end thickness through my sewing machine. Grr! I never thought to do it this way! You’re a life saver… thanks for posting this 😀
This is just what I’ve been looking for!!! Christmas is around the corner, and I make all my gifts! Thank you so much for the great tutorial and project idea!!!
I just burned the beejeesus out of my hand the other night, after I forgot that the frying pan on my stovetop had recently been in the oven. I need one of these PRONTO! Thanks for sharing the tutorial.
Absolutely Mrs Ninja. I feel your pain and I’m certainly very glad for Abby’s tutorial.
Is there a pdf for downloading?
Great pattern. Thanks
There isn’t Francine. Abby gives instructions in the post on how to get the measurements you need for you pieces to fit your saucepan. Let me know if I can help at all.