
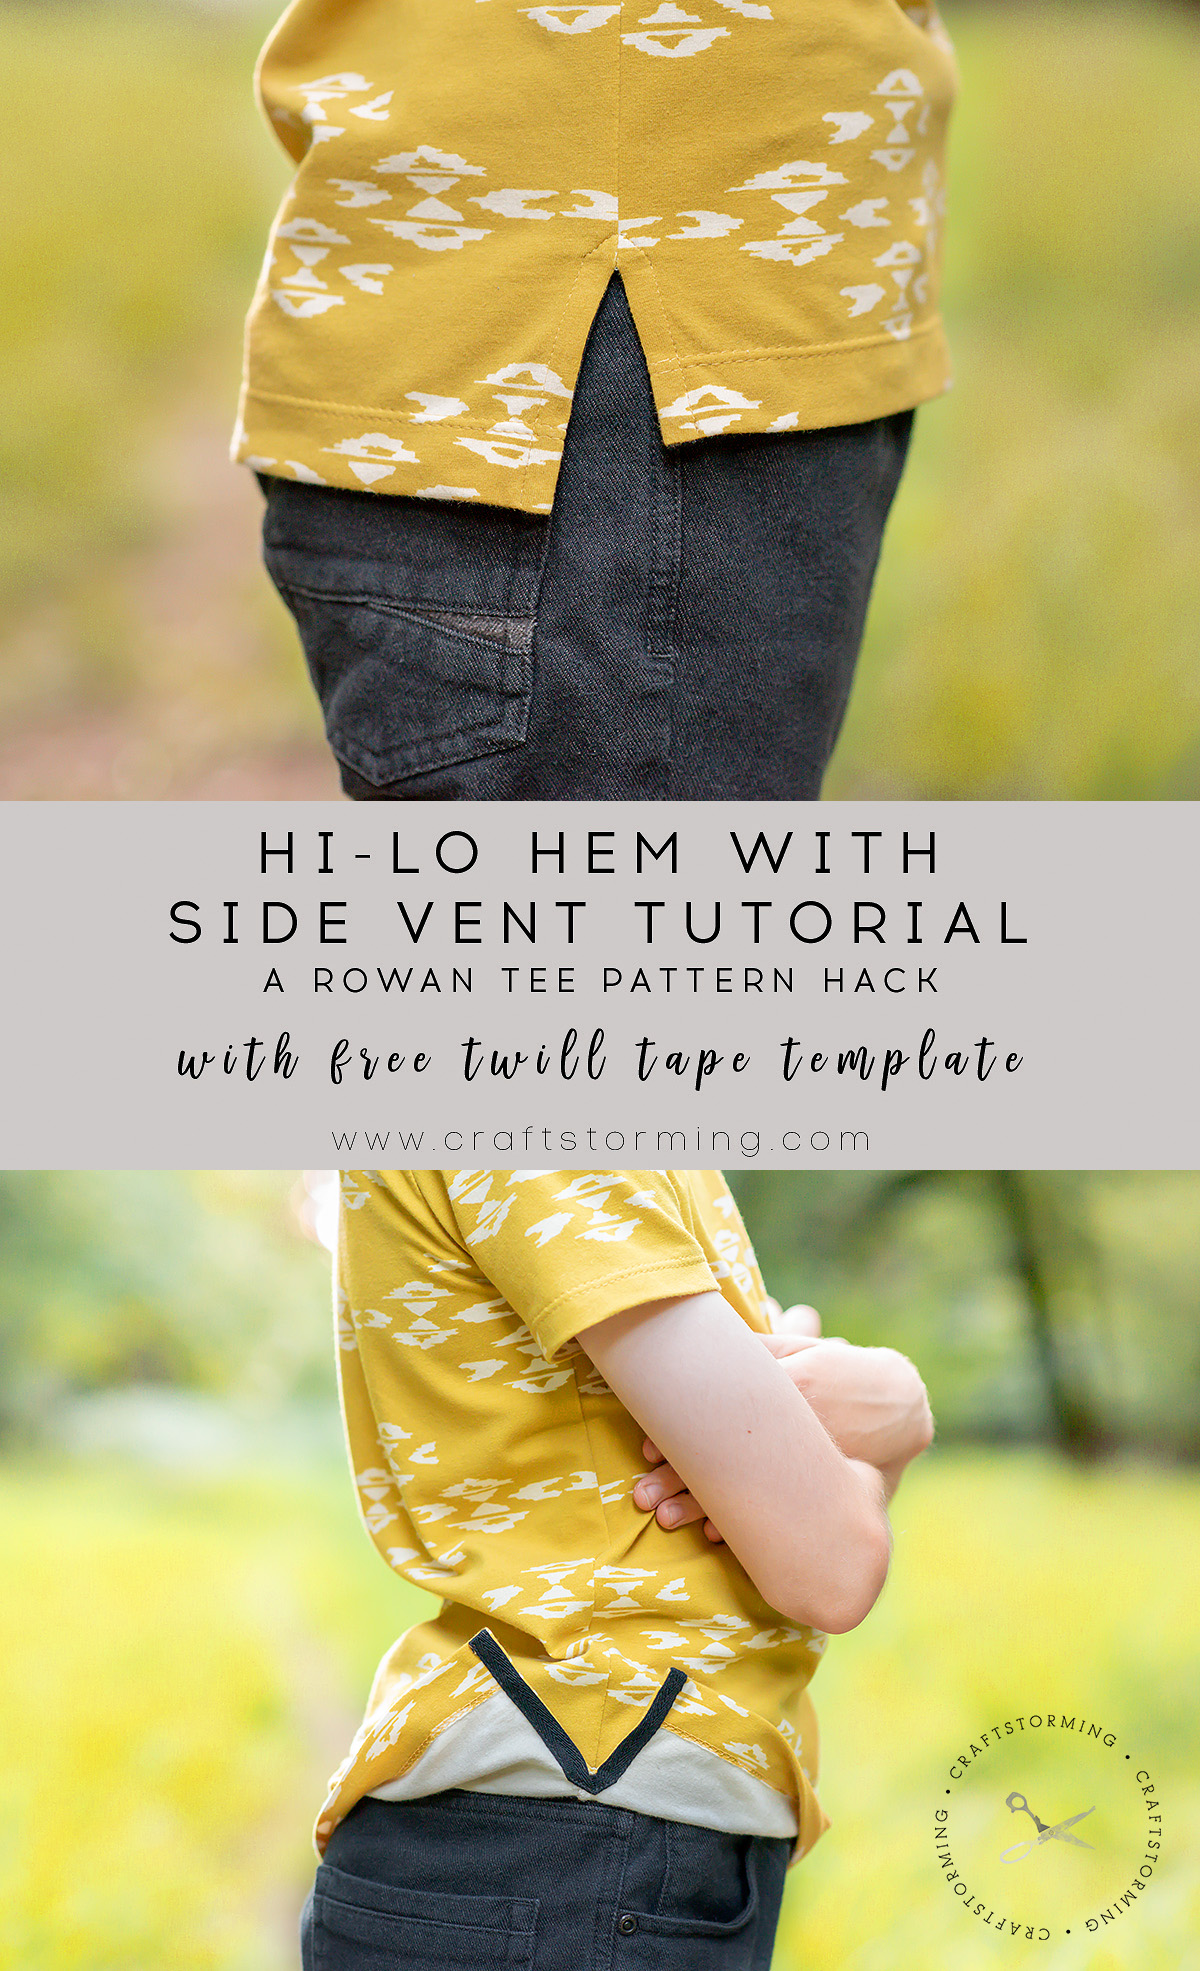
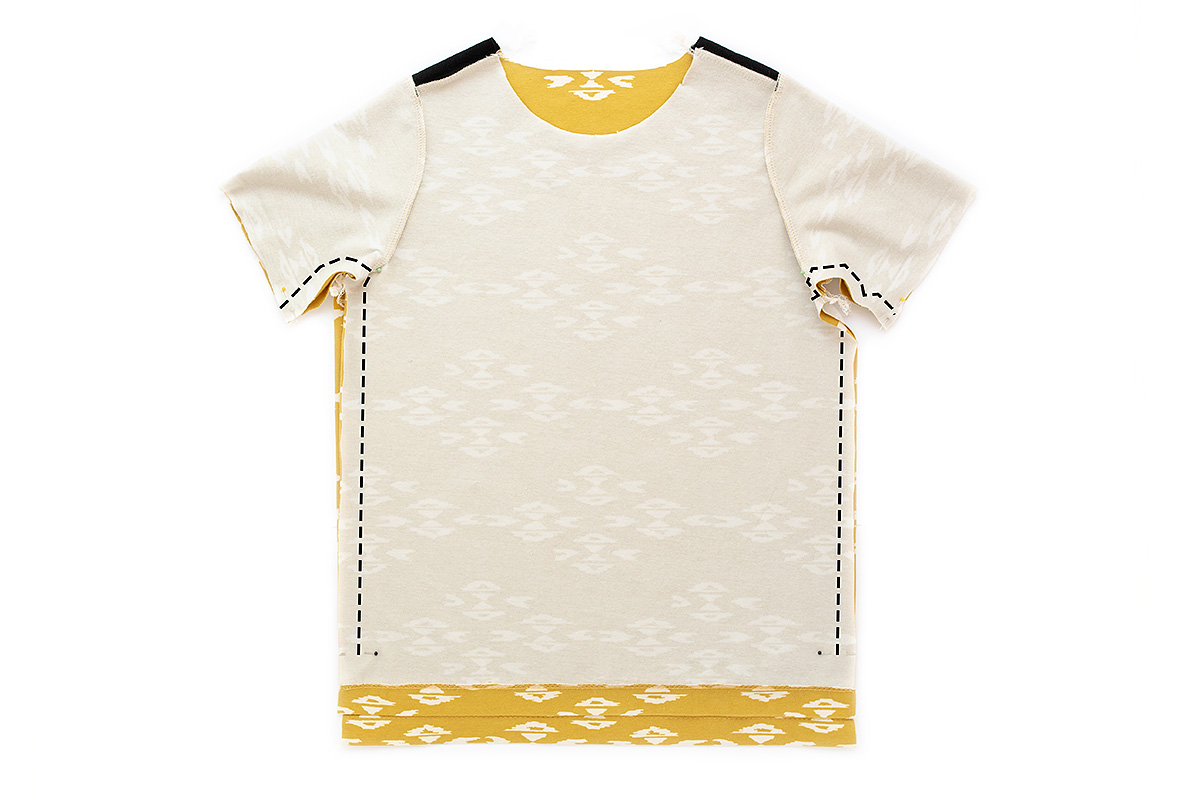
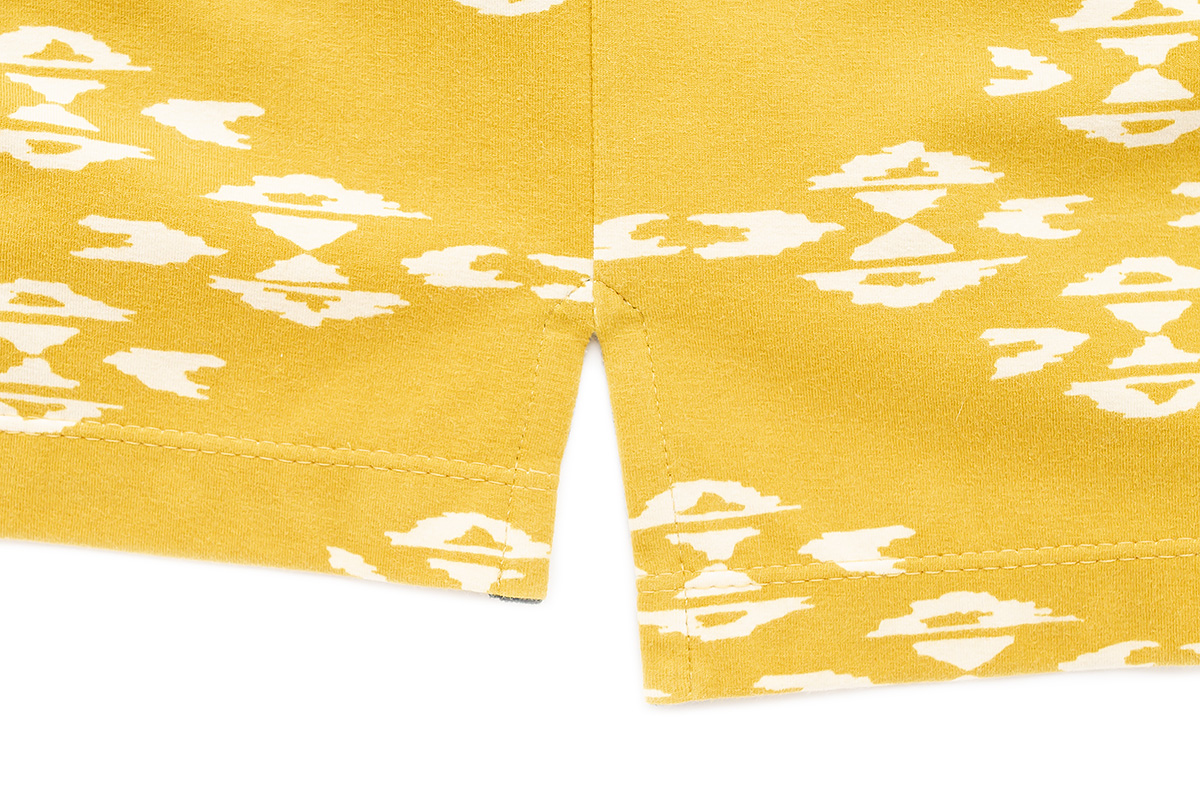
Due to the incredible heat wave we are having in the UK at the moment, I have switched the order of the last three hacks a little. Nobody needs long sleeves and thumbhole cuffs here at the moment! So today I have a tutorial for a hi-lo hem with a side vent (or split side seam). I first used this technique in the Hawthorn Zip-up Sweatshirt, and it is such a lovely detail to add to t-shirts that would otherwise be more basic. Using twill tape to finish the vent also gives an opportunity to add a pop of contrast colour.
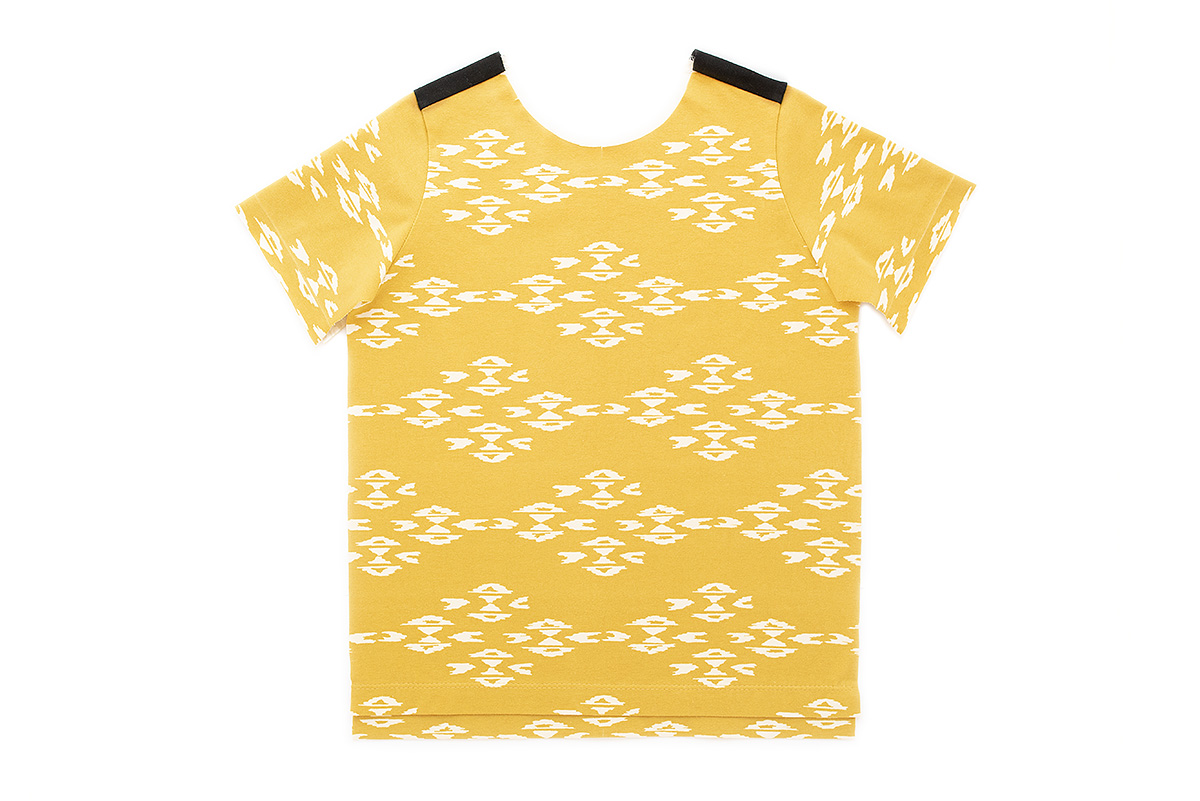
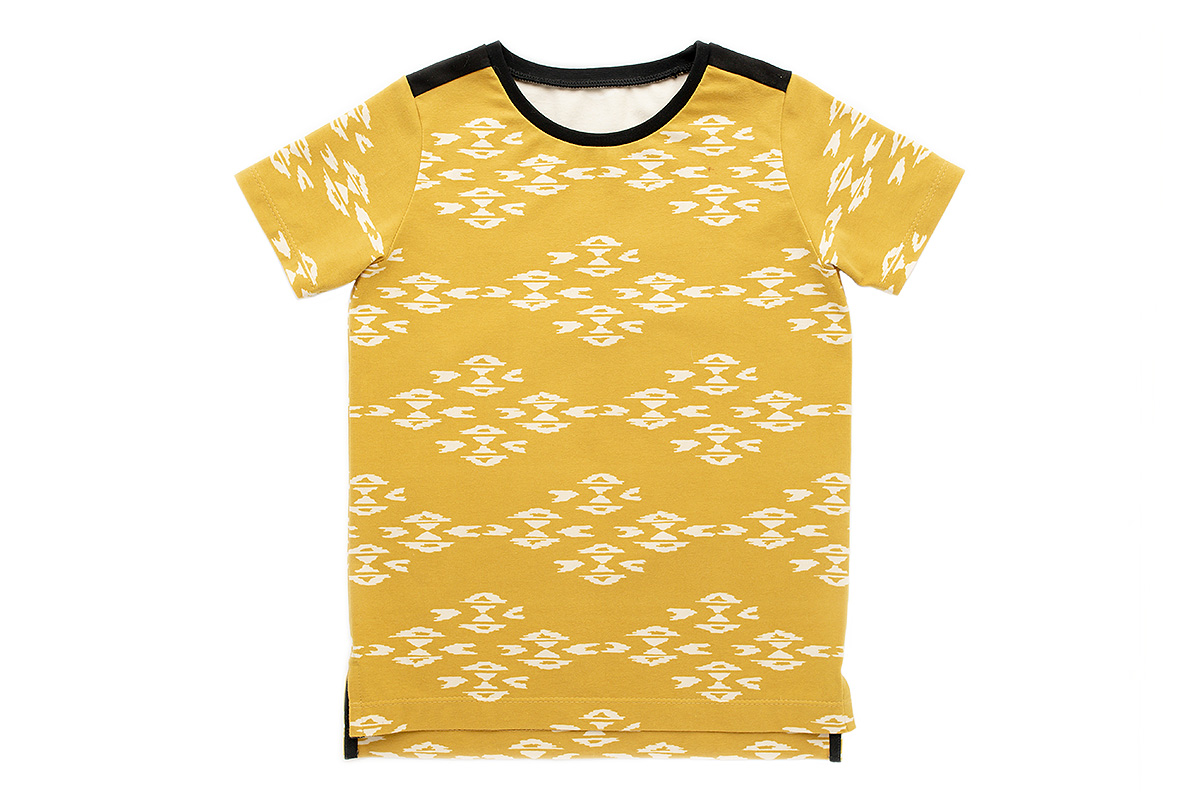
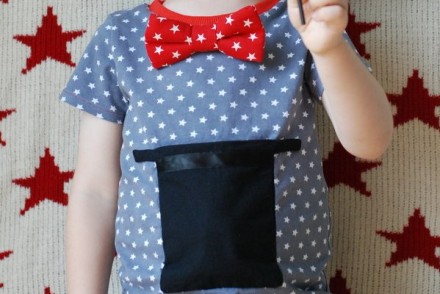
The fabric used for this T-shirt is the Overshot Gold print, from the Observer collection by April Rhodes. This print was available on both knit and woven. Both of my sons loved this print and the combination of mustard and black.

This tutorial has a lot of steps but most of them are very quick and easy to do. Once you’ve made a couple you’ll find it’s a very quick process to make these side vents. So let’s begin:
You will need:
- Rowan Tee pattern
- Regular Rowan Tee supplies
- Free hi-lo hem side vent template
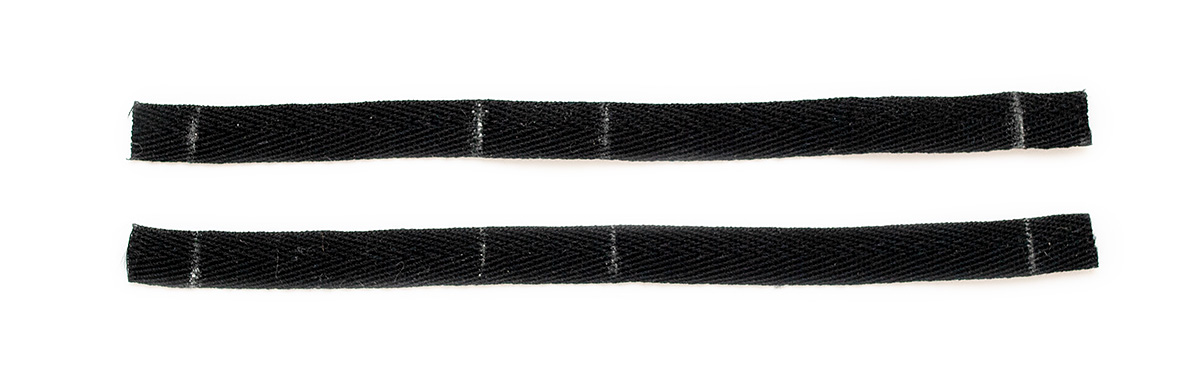
- A small amount of 1cm (3/8″) wide twill tape
- Wondertape or fabric glue
- Edgestitching foot (not essential but highly recommended)
[MailingListSubscribe file=’80f0563394260a26b70d9a55fc5ad032′]
PATTERN PIECE ADJUSTMENTS
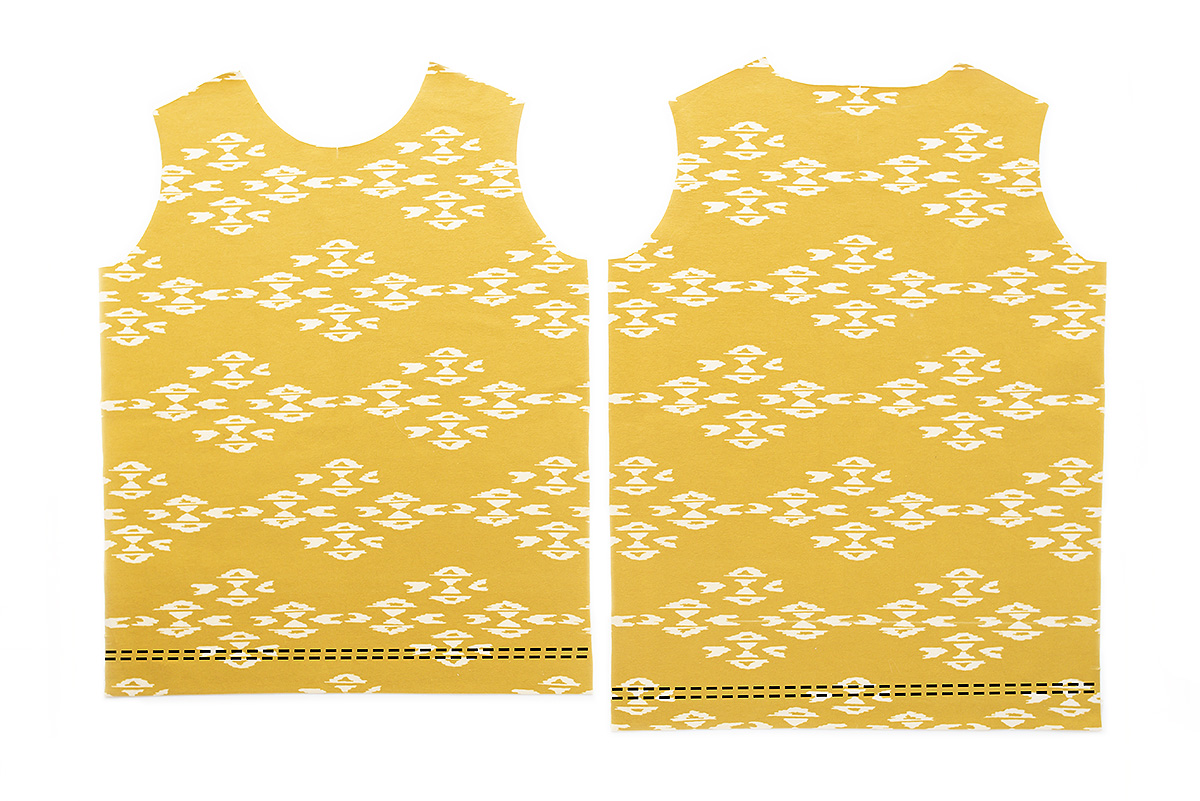
First mark the top of the vent on both the front and back body. This should be 10cm (4″) up from the regular hem line (not the cuffed hem).
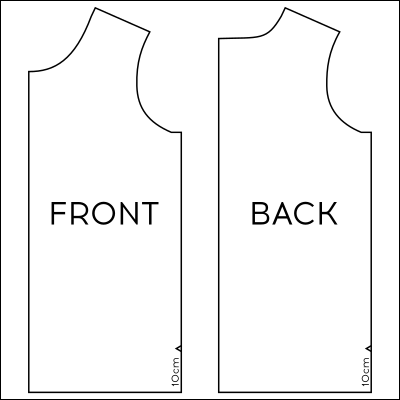
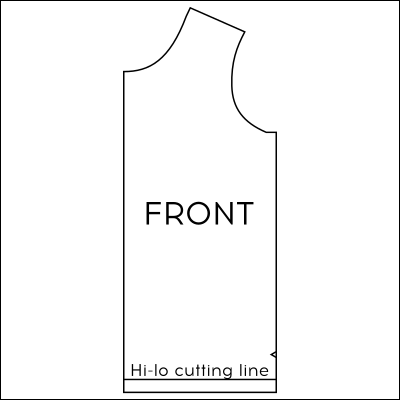
Next draw a line across the FRONT body piece only, that is 2.5cm (1″) above the regular hem line. Fold the pattern piece up along the new line and use that to cut the front piece.
CUTTING FABRIC
OPTIONS: this hack is compatible with all of the options in the original Rowan Tee pattern, except for the cuffed hem on the body (show in view C). I have chosen shoulder stripes, with a neckband and short hemmed sleeves.
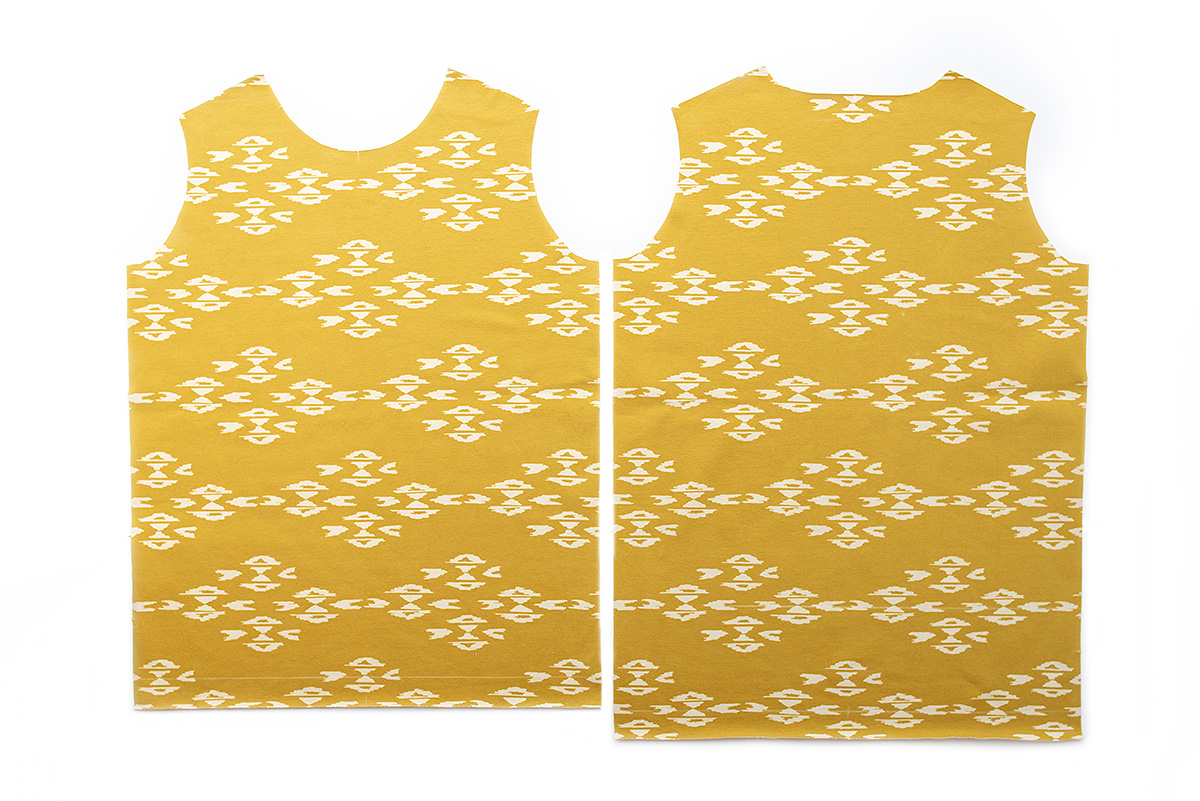
Choose your options and cut your pattern pieces as usual. I have chosen to sew a short sleeve T-shirt with hemmed sleeves and contrast shoulders.
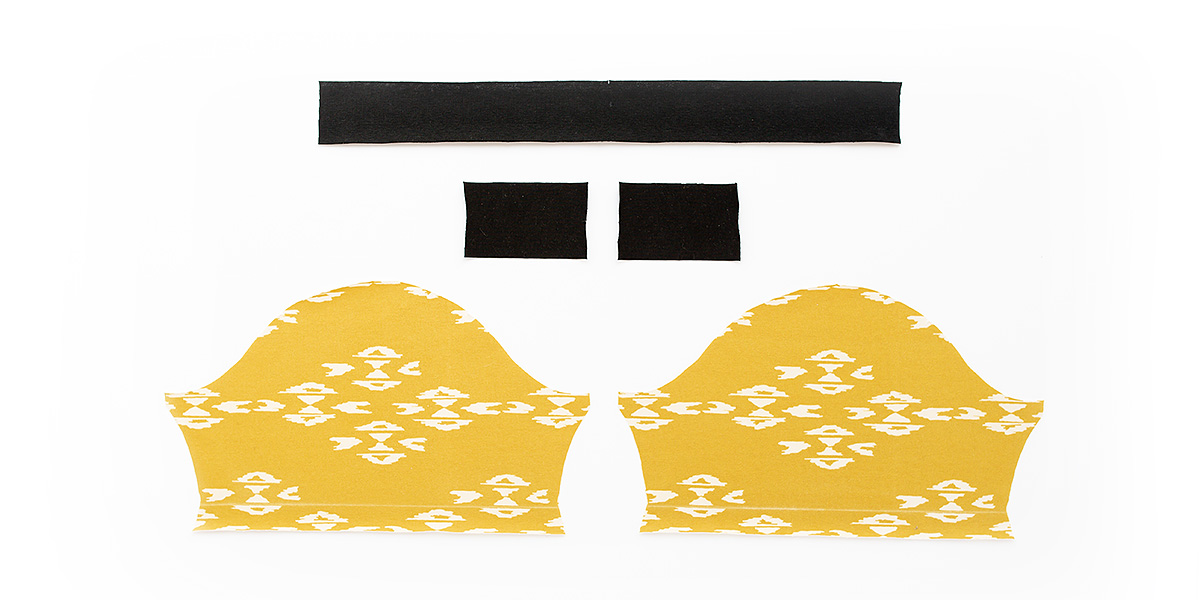
You will also need to cut 2 lengths of 1cm (3/8″) wide twill tape, using the free pattern piece. Transfer the pattern markings, using a suitable fabric marker. I’ve left a bit more space after the bottom back marking than on my pieces below, to give you a bit more wiggle room.
Pre-press the hem on the front and back body pieces. Fold the bottom 2.5cm (1”) to the wrong side and press well. For this tutorial there is no need to unfold these hems before sewing.
 SEWING INSTRUCTIONS
1. Take your front body piece and back body pieces, and hem them separately. Hem using a double needle. Use a 2.2cm (7/8″) seam allowance. Start at one side seam and sew all the way across.
2. Follow the original Rowan Tee pattern instructions, until the end of step 3 on page 24. The sleeves should be attached but the side seams have not been sewn yet.
3. Arrange the sleeve on the fold and the front and the back with right sides facing. Line up the notches on the front and back for the split side seam. The instructions for this step vary here slightly, depending on whether you are using a sewing machine or a serger.
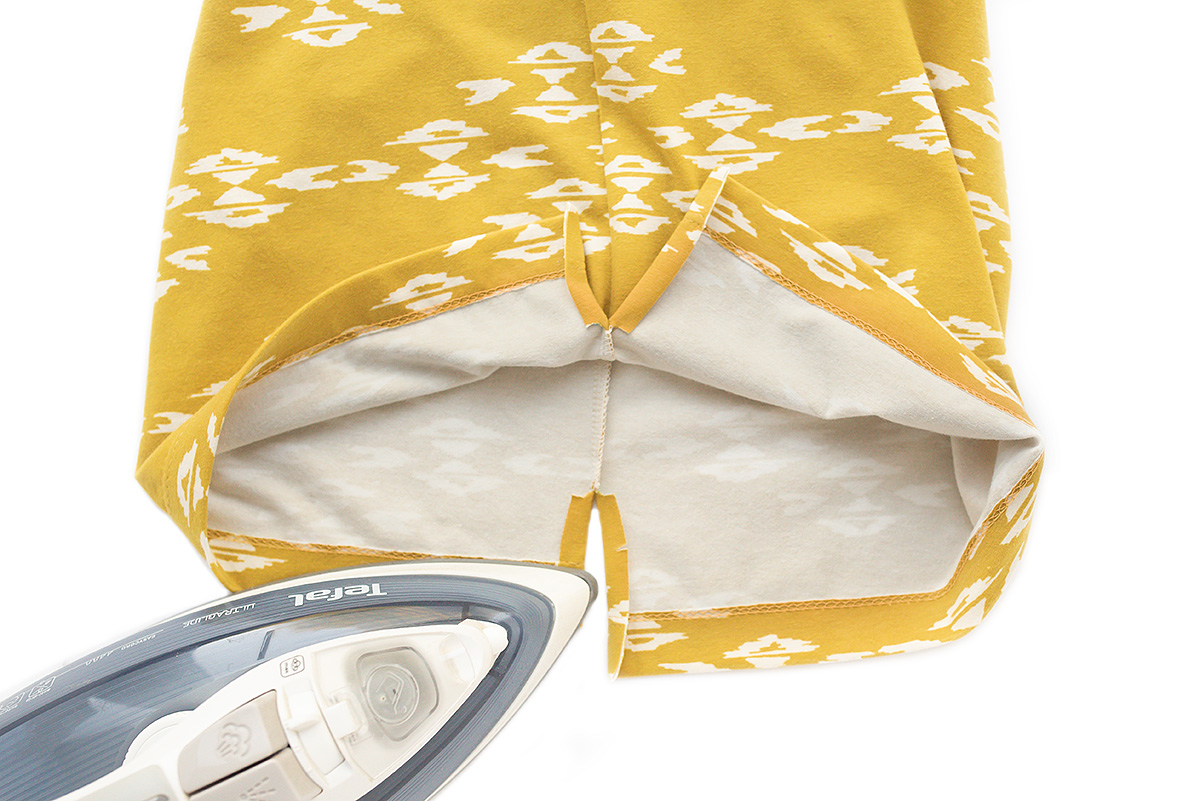
SEWING MACHINE: sew from the bottom of the sleeve, along the arm to the armpit, and then down as far as the split side seam notches. Sew the seam with a stretch or zigzag stitch and a 1cm (3/8”) seam allowance. Back stitch a couple of times at the notches.
Clip into the side seam just at the point where your stitches end for the split seam. Press the seam allowances towards the back of the T-shirt. You can now continue to step 4.
SERGER: To ensure you stop serging at the top of the vent, I recommend starting at the split side seam notches and sewing up towards the armpit and along the sleeve.
TIP: To start serging it helps to cut into the seam. Start at the notches and cut in 6.5mm (1/4”) and UP 2.5cm (1”). In the photo below the blue chalk is the notch marking.
Arrange the t-shirt on your serger so the hems are behind the needles. Line up the mark where you need to start sewing with the needles. Lift up the presser foot.

Push the fabric underneath. Move it across enough so that the fabric in front of the blade will be sewn with a 1cm (3/8”) seam allowance. Make sure the area under the needles is pushed across enough so the stitches will catch the fabric. Serge the seam.
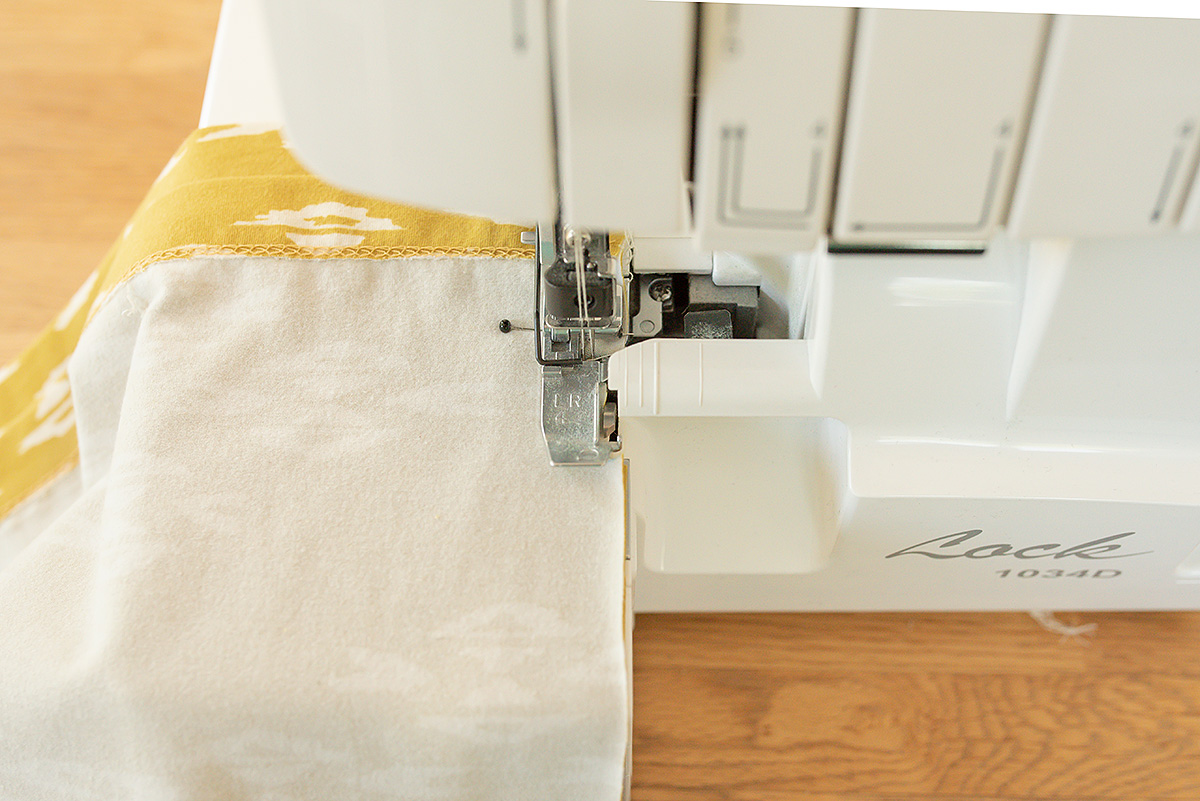
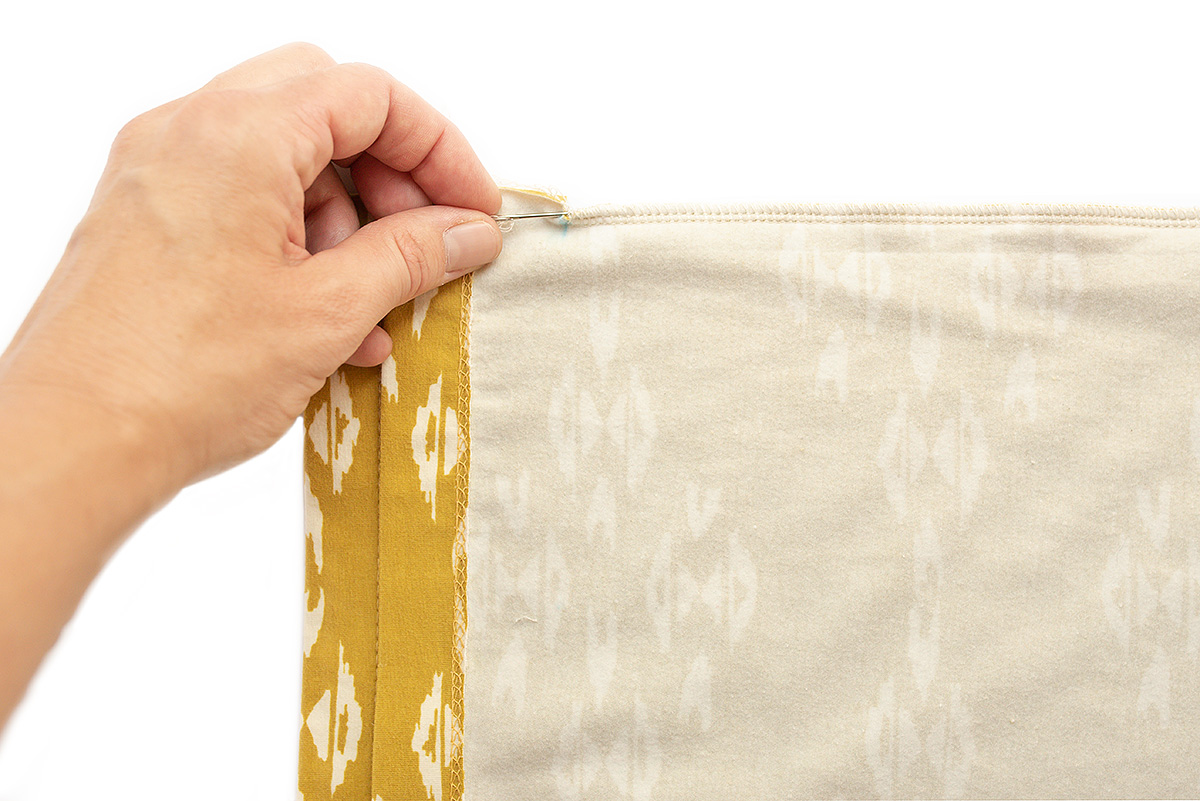
Leave a long tail of serger thread and thread it back through the seam. If you find the stitches at the split seam are pulling apart badly then reinforce them with a few stitches on the sewing machine.
Press the seam allowances towards the back.
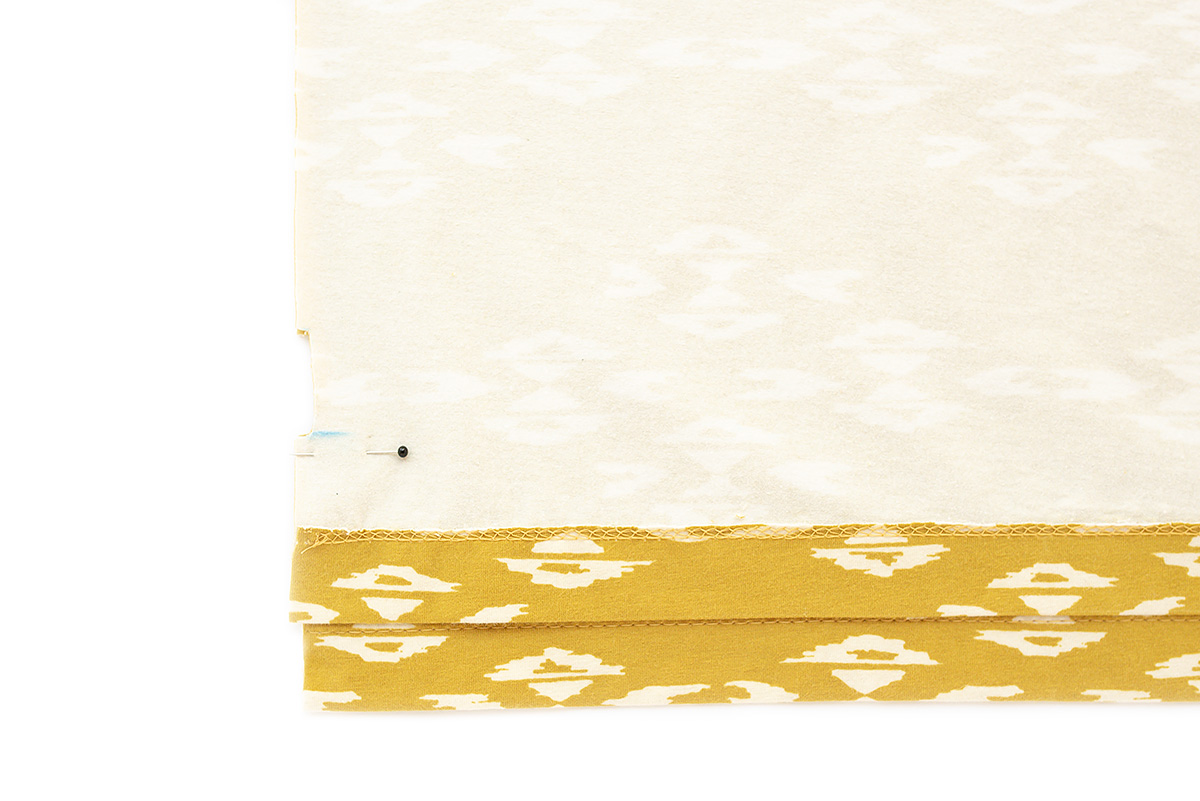
4. Pre-press each of the unsewn sections of the front and back side seams. Fold 1cm (3/8”) to the wrong side and press.
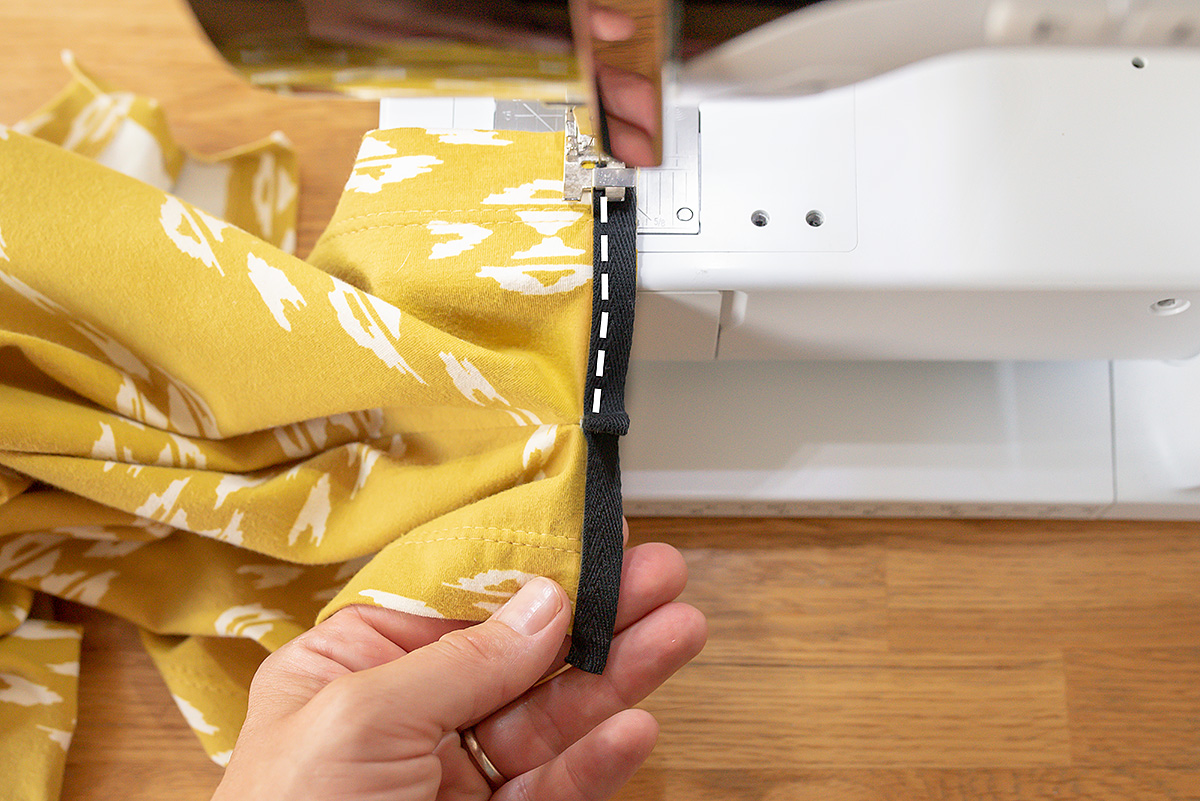
5. Arrange the side seam with right sides up. Place the twill tape on top along the front seam allowance, so the outer edge of the tape barely covers the edge of the t-shirt. This will give a neater finish on the inside of the side vent.
Make sure that the bottom front twill tape marking lines up with the bottom of the hem. You should have 1cm (3/8”) of twill tape hanging off the bottom. The tape should continue in a straight line until it meets the side seam, matching the centre front marking on the twill tape with the side seam.
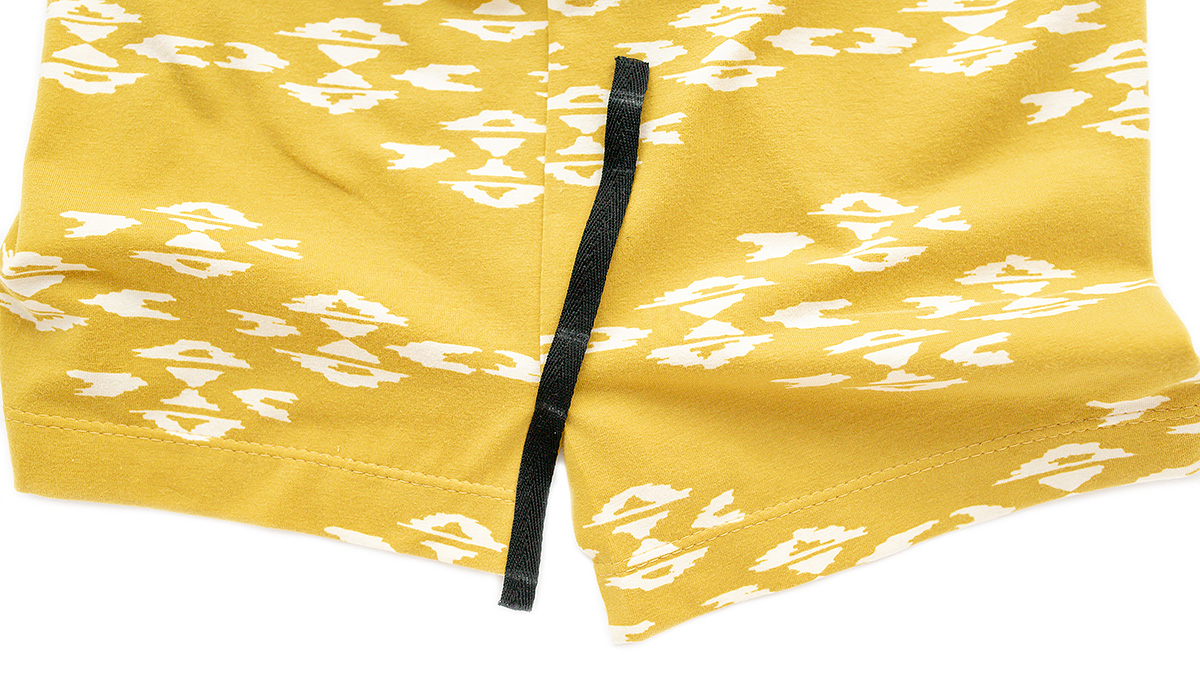
Secure with Wonder Tape or fabric glue. Place a pin at the side seam and make sure the side seam allowance of the t-shirt (above the top of the vent) is still facing the towards the back.
6. Edgestitch along the edge of the tape. Adjusting your needle slightly to the left or right can help. Start at the side seam and sew down to the bottom of the front of the t-shirt.
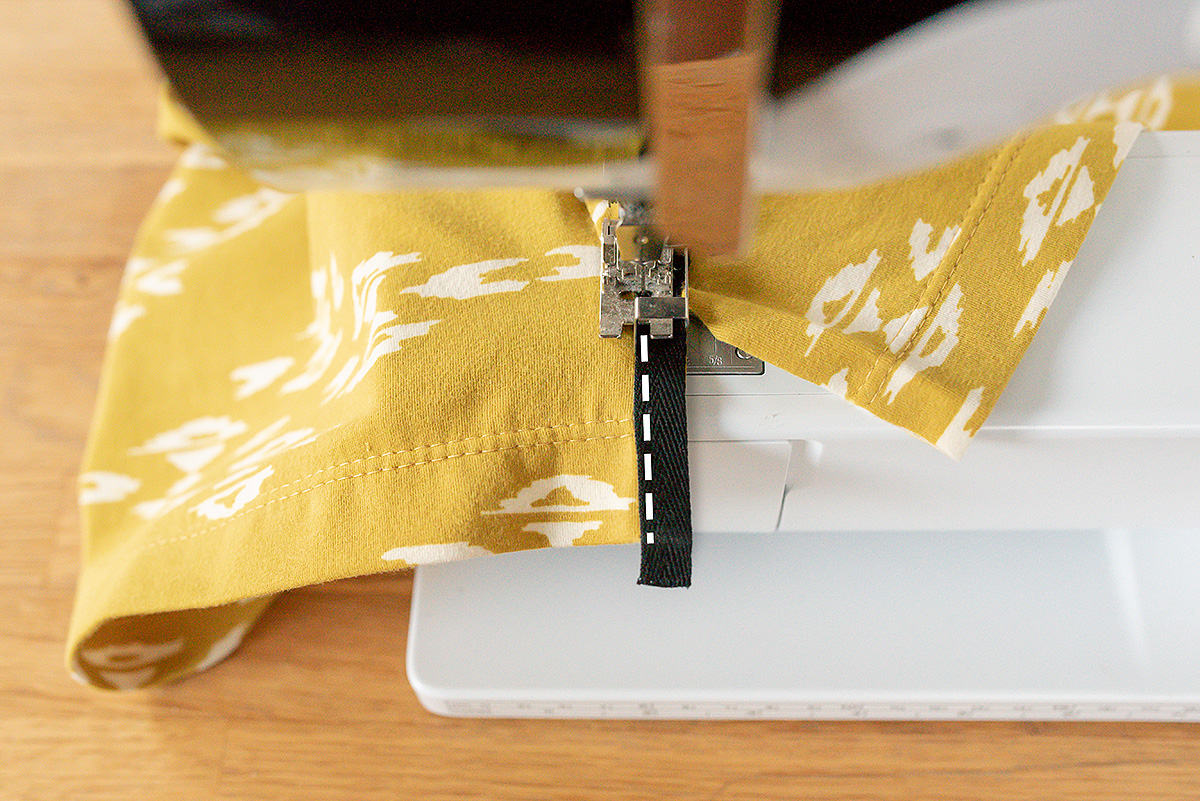
IMPORTANT: Make sure to pull the back seam allowance out of the way so it isn’t caught in the stitches.
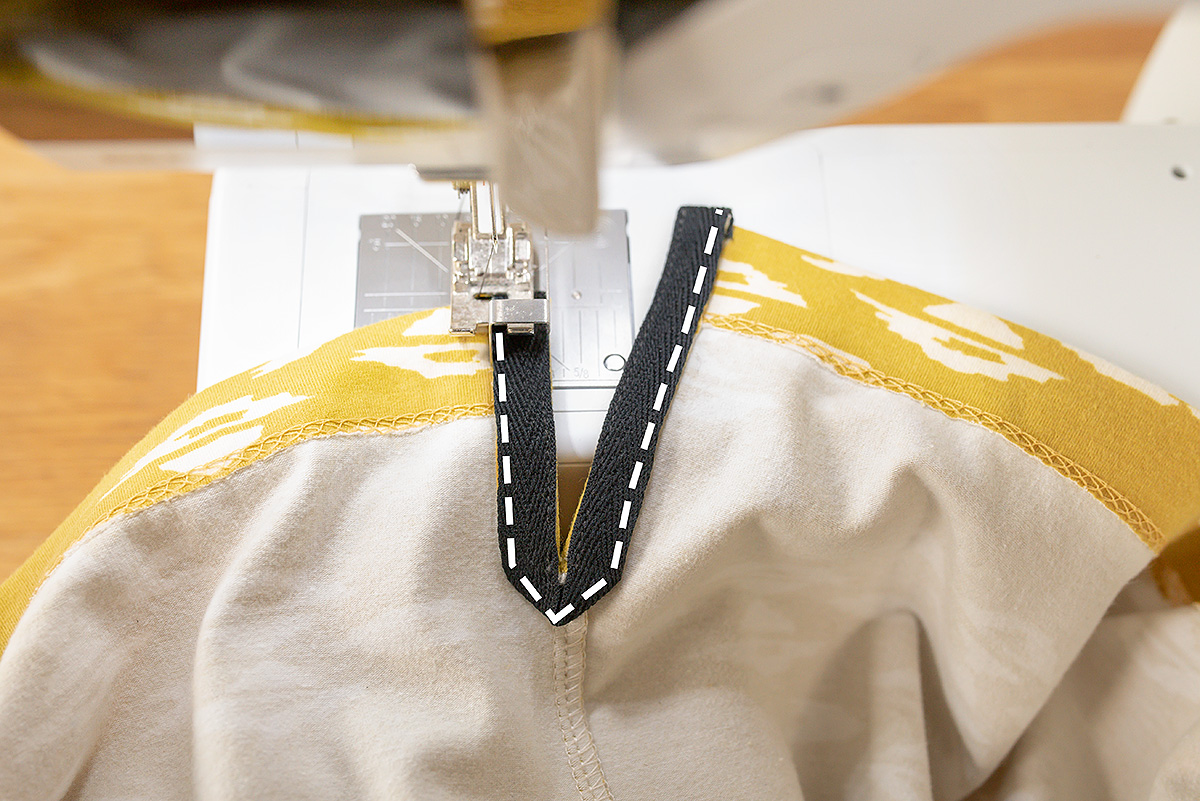
7. Arrange the tape as shown and make sure the distance between the centre front mark (where it meets the side seam) and the centre back mark is still 2.2cm (7/8″). If not, make adjust the centre back and bottom back markings.
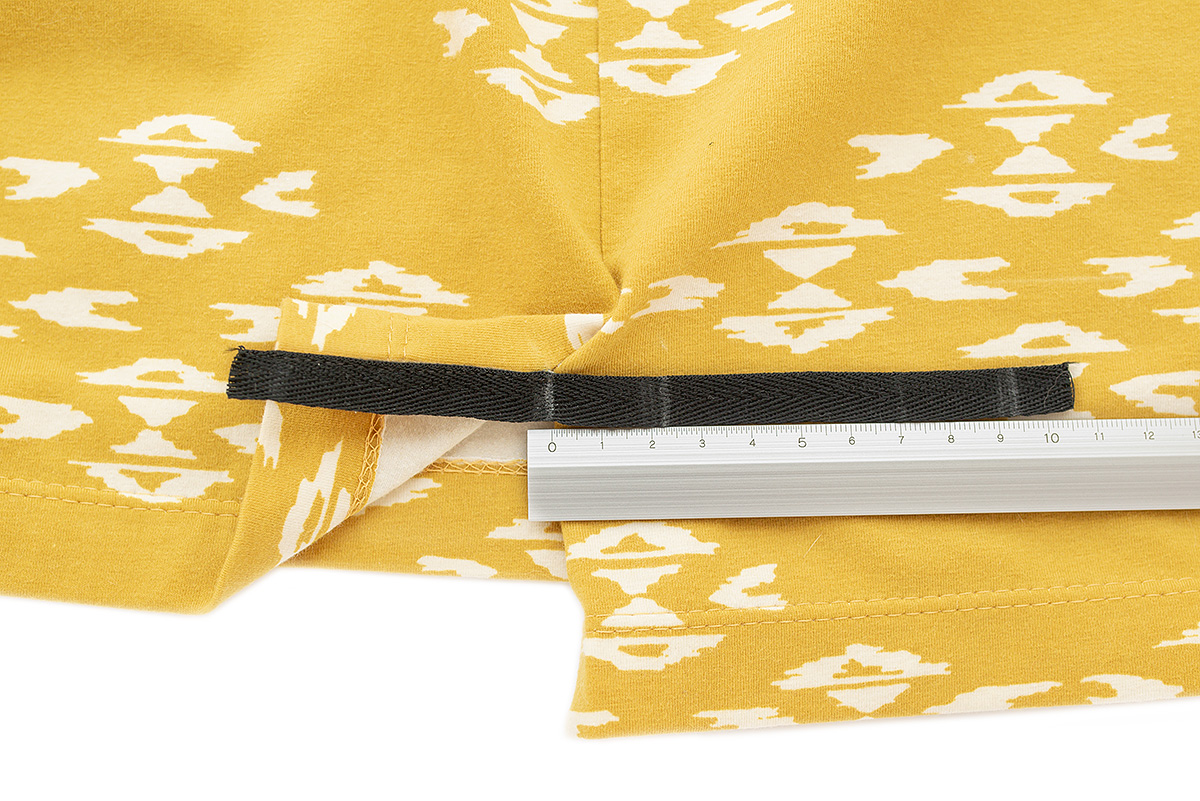
Slide the centre back mark on the twill tape so it meets the front centre mark. Both of the marks should now line up with the side seam. You will have an excess fold of tape at that point. Secure the tape down the front seam allowance, using Wonder Tape or fabric glue. Again, the outer edge of the twill tape should barely cover the edge of the t-shirt.
8. Edgestitch along the edge of the tape, sewing from the side seam down to the bottom of the hem on the back. Hold excess fold of tape out of the way towards the front when starting to sew, so you do not stitch it down.
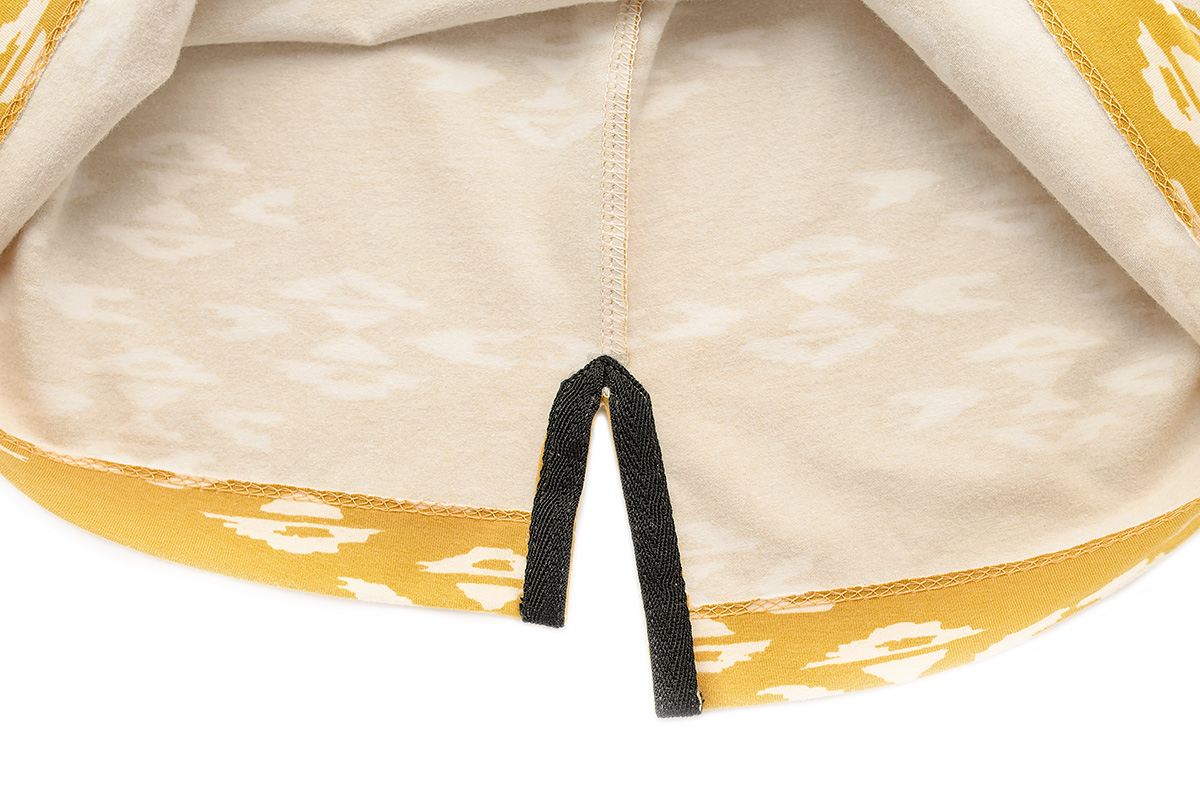
9. Turn to the wrong side of the t-shirt. Fold up and secure the ends of the tape, using Wondertape or fabric glue. If you have a lot of excess tape on the back section of twill tape then trim it to about 1cm (3/8″) long.
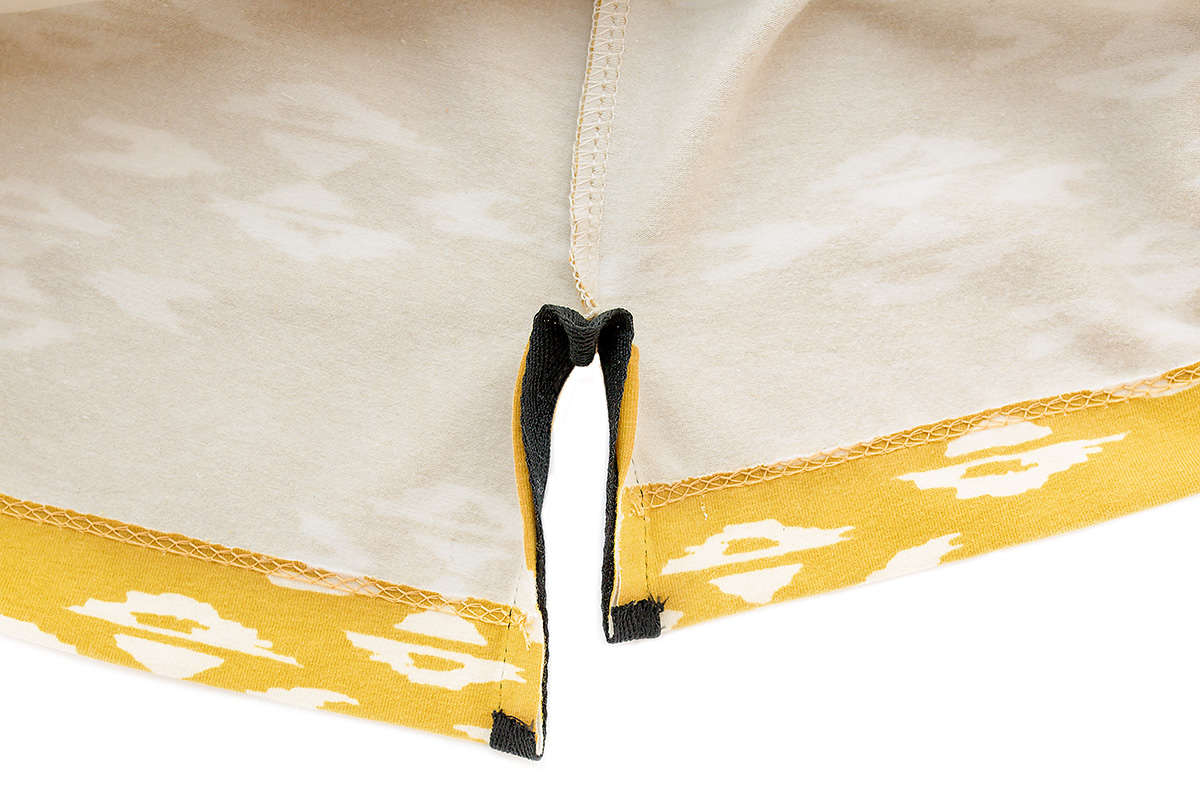
10. Fold the seam allowances of the side vent over, so their wrong sides now face the wrong side of the t-shirt.
Secure in place using Wonder Tape or fabric glue. The bottoms of the twill tape will now be hidden.

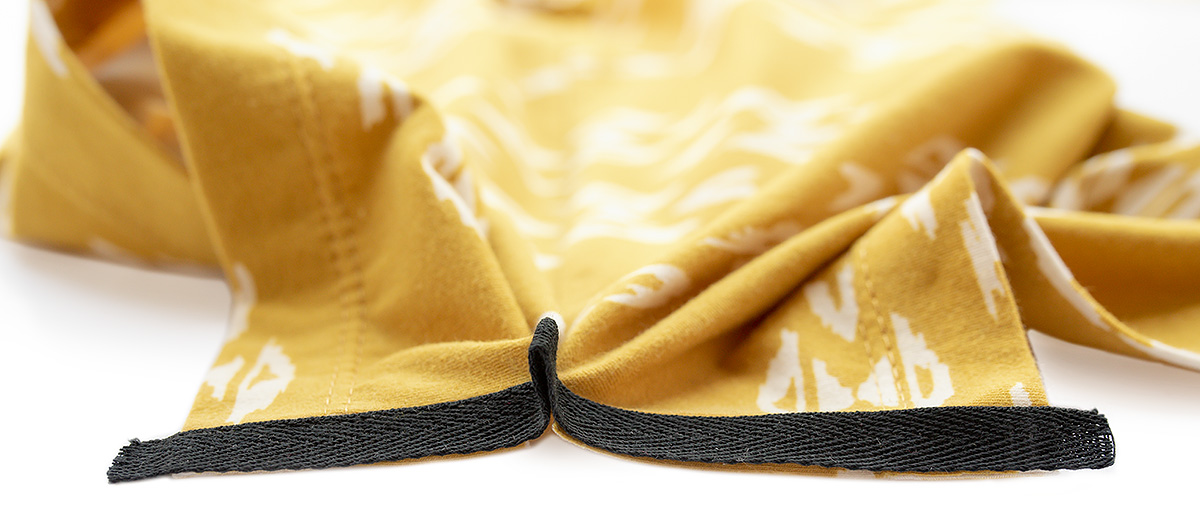
11. To arrange the top of the twill tape so it lies flat, push point 2 upwards and point one will flip over and move downwards. Arrange so you have an arrow shape at the top. Ideally the two changes of direction on each side should be at the same level. Make sure the point of the arrow is exactly in line with the side seam.

12. Edgestitch all around the twill tape. When you need to change direction leave your needle down, lift up the presser foot and pivot the fabric before sewing again. Back stitch at the start and end.
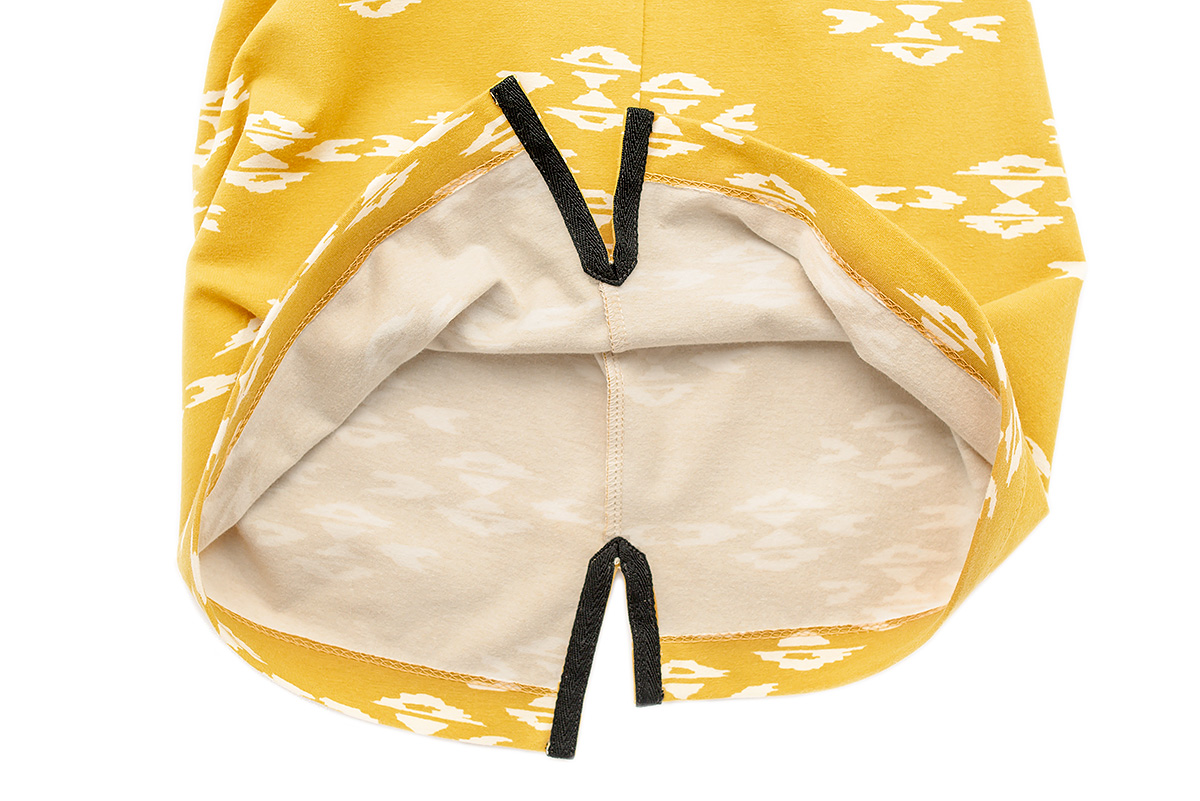
Your split side seam should now look like this from the right side and the wrong side of the t-shirt.
13. Repeat steps 4 to 12 for the other side vent.
14. Return to page 25 of the Rowan Tee pattern instructions to finish the sleeves and neckline.

If you’ve made any of the hacks in the Rowan Tee hacks series, then don’t forget to add a photo to the albumb in the Titchy Threads Facebook group. I have seen some amazing versions so far. Look out for the thumbhole cuff tutorial next!


I always love how beautifully you finish things! Lovely hack! I will be trying this.