

These snoods are fairly quick to sew and would make great gifts for any age. They’re also pretty cheap and easy to make. I made mine using this fleece blanket from Ikea. It costs £2.89 for 170cm by 130cm, which would make up to ten child sized snoods.
Of course, you don’t have to add the beard but who wouldn’t want the option of accessorising their snood with a variety of moustaches? Don’t fancy being Santa today? In one easy move you can become a sophisticated Victorian gentleman instead.

To make one you will need;
-
Fleece
-
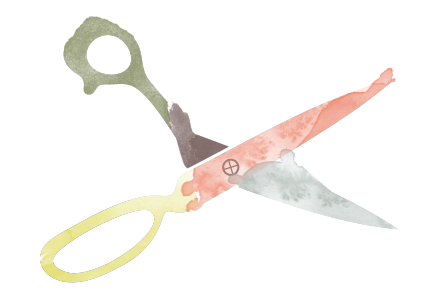
Fabric scissors or rotary cutter
-
Matching thread
-
Velcro
-
White fleece and stuffing for Santa’s beard
-
Black felt for moustaches
-
Tailor’s chalk or fabric marker
All seam allowances are 3/8″.
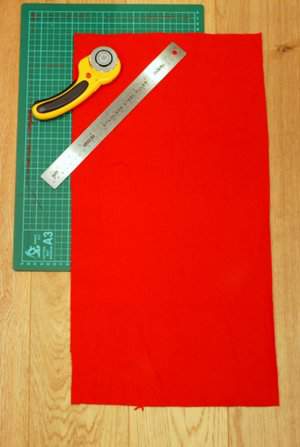 You basically need a rectangle of fabric.Length: I measured Casper’s head around the biggest part at the back and his nose at the front. This was 21″ (52.5cm). I then added 2″ (5cm), for seam allowance and so it’s easy to get on. So my length measurement was 23″ (57.5cm).
Width: I measured level with Casper’s nose to his shoulders to get the height of the snood. This was about 5″ (12.5cm). I then doubled this and added 1″ (2.5cm) for seam allowance. So the width of my fabric was 11″ (27.5cm)
 You only need to do this if you’re including a beard.Fold the fabric in half across the width, so you have a long thin bit of fabric. If your fabric has a ‘right’ side then make sure this is showing. Work out the centre point along the length, about 1″ (2.5″) down from the fold. Mark this, unfold the fabric and sew on a piece about 4″ wide.Trust me, it is much much easier to sew the velcro on now than after step 3.
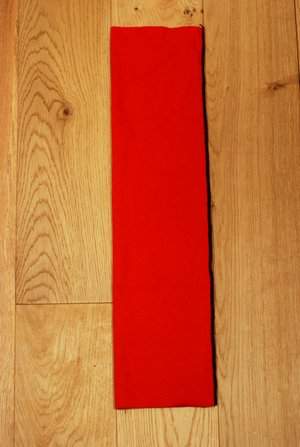 It is vital to sew the correct edge here otherwise you’ll end up with a long narrow tube better suited to warming hands than necks. I used black thread so it is clearly visible in the photo.Fold the fabric in half across the width. Make sure the velcro you have just sewn is hidden inside the fold, so you are folding ‘right’ sides together. Sew down the long seam. I used my overlocker but it is fine to use a sewing machine – just use a zig zag stitch to allow for the stretch of the fabric. Trim the seam allowance.
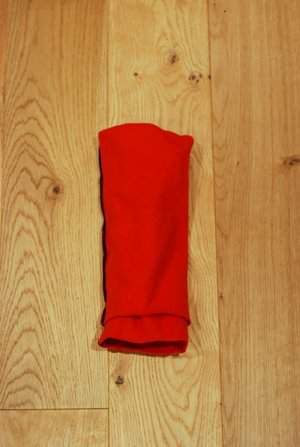 Take one edge of the tube and fold it into itself, pushing it through until you have folded it in half. Make sure the seam you have just sewn is exposed.Sew the exposed seams together, leaving a gap of about 1″ (2.5cm) to turn your snood inside out. It helps to remove the free arm on your sewing machine at this point.
 Pull the fabric on the inside of the tube through the small gap that you left. Keep going and eventually a snood will magically appear. You now need to sew up the gap by hand.
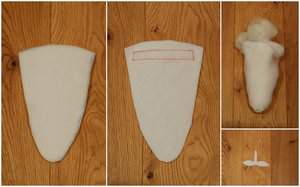 I used a section of white fleece about 13″ by 11″ (32.5 by 27.5cm). Fold the fabric in half ‘right’ sides together so you now have a piece 6.5″ by 11″ (16.25cm by 27.5cm). Draw a beard shape on your fabric and cut out both sides together.Sew the other side of the velcro onto the ‘right’ side of one of your beard pieces. Then place the two pieces together (‘right’ sides together), sew around the edge of the beard, leaving a small gap for turning. I left the gap at the middle of the top so I could sew a moustache in easily.Turn the beard inside out through the gap, fill with stuffing and sew the gap together by hand, sewing in the moustache if you’re adding it.
An easier option would be to just cut a white beard out of white felt and not worry about making a stuffing version.
You can then make as many extra beards and moustaches as you wish and wear your snood with pride.


too cute!
The moustache is fab! Enjoyed this post. Came from the Blog Hop.