
It is Boy Week this week over at Project Run & Play. I love following it each season and I’ve wanted to join in with the sew along since I first found out about the competition. Finally I’ve managed it. Every week is boy week round this way so it seemed like the best week to aim for when the themes were announced.

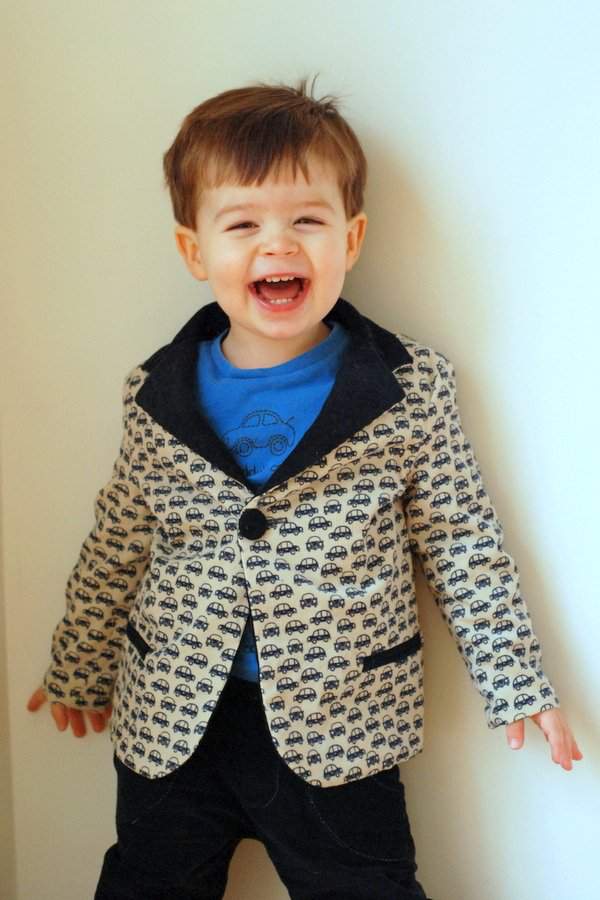
I had hoped to finish the blazer in time for Rowan’s birthday at the start of the month but, for various reasons, didn’t quite manage it. We have a couple of weddings coming up soon though so I decided to make some co-ordinated trousers to finish the outfit and he should get a lot of wear out of both items. Rowan is absolutely obsessed with cars at the moment. The first thing he says when he gets up in the morning is “play cars” and he spends quite a lot of time each day making traffic jams.
Fabric
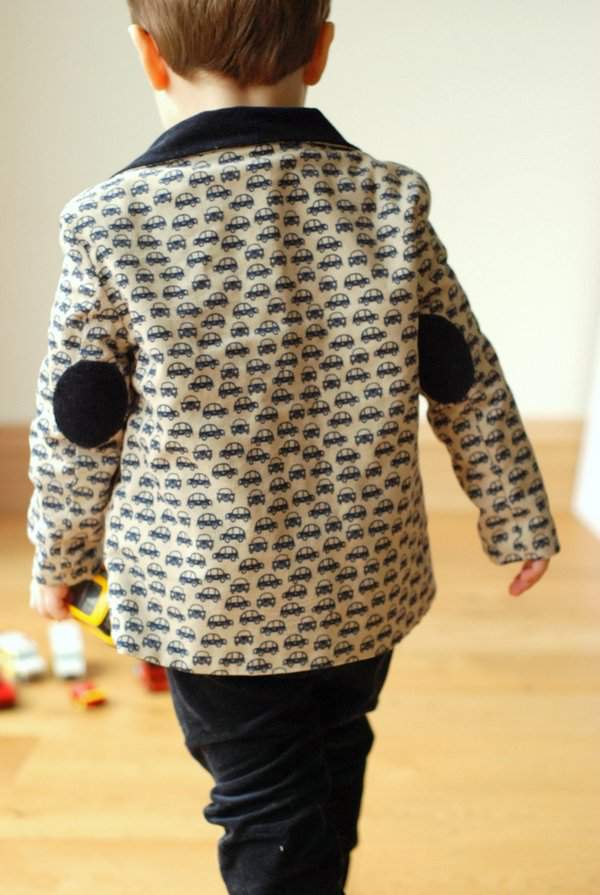
I bought the main fabric for the blazer – Trefle Cars Pin Cord from Kokka – back in September after visiting my nearest decent fabric shop, The Eternal Maker. It’s about an hour from me and when I got there I was a bit overwhelmed by all the choice and didn’t end up buying anything. I’d noticed this lovely cord while I was there though and ordered it a few days later. It is so so soft and was wonderful to sew with. The last time I sewed with cord I used a cheap one from Fabric Land and it was anything but lovely. I bought the contrast navy pin cord (also used for the trousers) and the polka dot poplin for the lining from my local John Lewis. The other car print was also from The Eternal Maker but I can’t find it on their site and don’t know the name of it.
Blazer Pattern
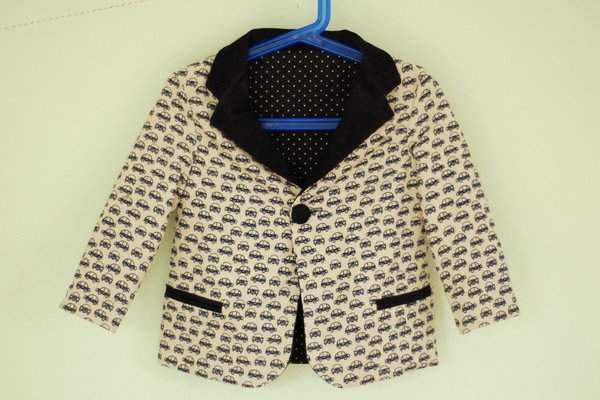
The pattern is The Basic Blazer from Blank Slate Patterns. I first purchased this when it was the Toddler Blazer pattern last March – that’s how long I’ve been planning to make one. I’m so glad I finally did and already have plans for another one for my eldest. I did a few things differently to the instructions in the pattern;
- Cut the back on the fold. I made a muslin and it looked like the fit might be a little bit small on Rowan so this gave an extra inch on the back. In fact he probably didn’t need it but it does mean the blazer can be worn over a lightweight jumper so he’ll probably get more wear out of it.
- Added an inch to the middle of the collar pieces to match the extra inch on the back and clipped into the seam allowance after basting the collar to the jacket
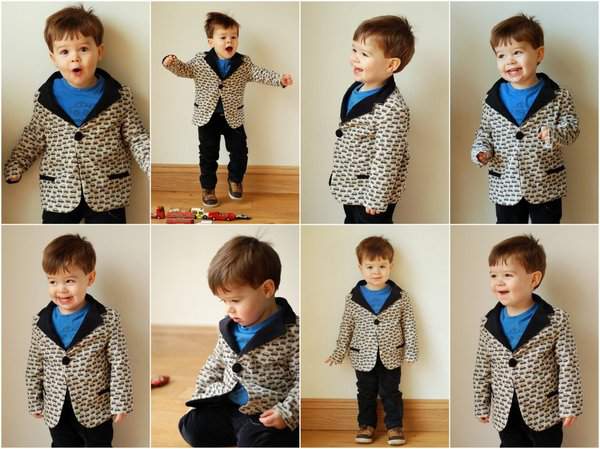
- Added elbow patches in the contrasting navy cord. Unfortunately, despite referring to Kristin’s great tutorial and measuring several times on the lining I got the placement a bit too high and they’re more like tricep patches. The main problem is that Rowan just won’t keep still. Also he didn’t like the frayed edges on the lining and would keep pulling on them so I didn’t like to keep it on too long. I was so tempted to redo them but just resisted.
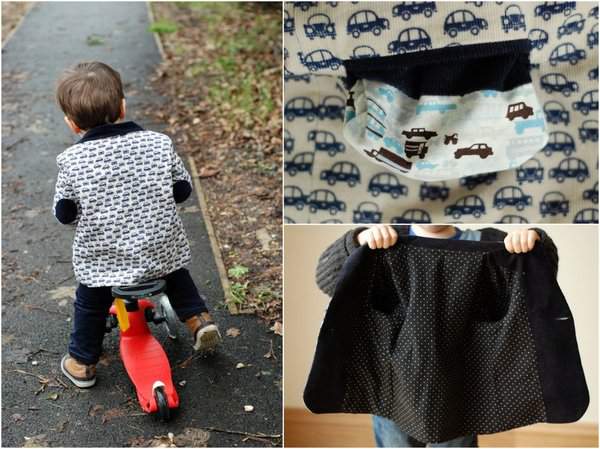
- Used tutorials from this blog for the double welt pockets (this one and this one), adjusting the measurements for the pattern’s pocket size. This means you don’t need to top stitch around the pockets if you prefer not to. I used the contrast navy cord for the welts and underwelt and then added a different car print for the pocket bags.
- Used this tutorial to line the jacket, which results in turning the jacket through an opening in one of the lining sleeves. After sewing up the sides and collar I turned and pressed the top and bottom of the lapels before turning back inside to sew the bottom seam.
I thought the car fabric would make this a definite win but it took a few attempts before Rowan would even wear it. I feared that all the time would be wasted but fortunately he’s very happy to wear it now.
Trousers Pattern
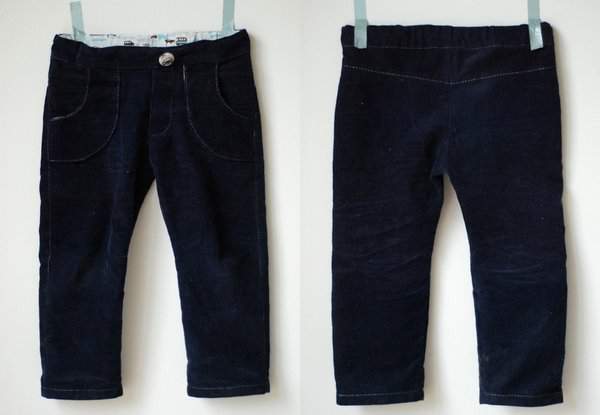
The trousers are made from my own pattern. It is for a 2 year old and I’m working on getting a free pattern available and tutorial written up soon. The main features are;
- Skinny fit
- Separate yokes on the back
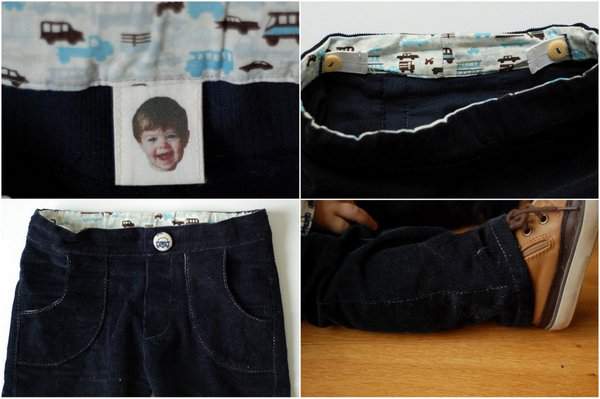
- Patch pockets on the front, cut on the bias – lined with the same car fabric as the welt pockets on the blazer
- A faux fly with a non working button and buttonhole on the waistband. I used the trefle car fabric to cover the button with. I plan to try a zip fly for the next pair.
- A waistband facing that uses the same car fabric as the welt pockets
- An elasticated waistband that goes 3/4 around with a flat front. The buttonhole elastic feeds through two buttonholes and is held in place with two buttons attached to the facing.
- Top stitched seams using silver metallic thread
- A personalised label with a picture of Rowan on it. I got this fabric printed from Spoonflower, originally used it for this project and have a little bit left to make labels with.
When I first started sewing I would push myself to learn something with every new project but I had become a bit lazy about doing that recently. I am definitely bringing that back again this year and certainly learned a lot making both the blazer and the trousers. Overall I’m really pleased with how the outfit turned out and both garments work well today and as separates. Rowan just needs a co-ordinating bow tie and a shirt and he’ll be ready for the wedding. Now I need to make something for my other boy.


Love this look! And those labels are the coolest idea EVER!!
Thanks Sabra. It is fun adding these labels.
Oh that is one awesome blazer!! And those pants too! Good for you pushing yourself to learn something new…I always feel like I’m trying to squeeze my sewing in…which is not very conducive to learning new things 😉 And, yes, indeed those labels are awesome!! 🙂
Thanks Jane. It’s hard to do it if you’re tired or really busy but worth it if you can make some time for it. Anyway, you’re way ahead of me with the washis 🙂
Just lovely! The fabric choices are awe-some. The tiny elbow patches & pants. Yep, i’m digging the whole thing!
Thanks so much Mae.
I love it! That car fabric is fantastic! I love that its corduroy too. You did a great job! And I love the skinny, navy cords! Good luck!
I think if all corduroy was like this I’d use it all the time. Thanks Heather.
So worth all the hard work. Rowan looks so cute. You got some really good pictures of him with lovely expressions . Well done again xx
Ta Mum.
This is awesome!
This is sooooo cute! Love all the details and that label- awesome! It’s so nice to see you sew a long, hopefully I’ll get mine done in time. Oh! I can’t wait for that pant pattern, my little Miss E would love those.
Thanks Celina, I’ll get working on that pattern 🙂 I hope you get yours finished in time – can’t wait to see it.
LAURA! i love this so much!
Super cute – love the fabric! I’m going to add this to my features for Saturday.
Thank you! 🙂
Unbearably cute. Love the whole look, the contrasting collar, the welt pockets and those pants, definitely keen for a tutorial!
Thanks Sophie. Your amazing blazers made me want the pattern in the first place.
it’s so nice to see decent clothes for wee boys – great makes and what a cutie!
Awesome!! I pinned I hope you don’t mind 🙂
Thanks Elaine and no I don’t mind at all. I’m quite addicted to pinterest myself.
aw man, sorry about the elbow patch snafu. love the blazer, though, and REALLY love the pants! i’d definitely make a pair of those for O! good luck with the sewalong this week!
What a great little outfit!! Oh how I miss having a little boy that I could dress like that. My boy has outgrown blazers with cars on them – although I might make him that blazer at some point. 🙂
So many things I love about this outfit Laura! It looks so well made. I love the personalised tag, the mini elbow patches, the fabrics, the skinny jeans…well all of it! I think I need to try out some new techniques soon!
This is great, love the outfit!!!!!! Awesome sewing:)
Laura, You are quite the seamstress! Such a beautiful job! Your work is so well done, I love all the details…the elbow patches and the fun, personalized tag:). Rowan looks so happy to be modeling his new outfit!
I love that look, he looks like he belongs in Vegas with a big gold chain around his neck. That tag is fun! and I think Lined jackets are awesome.
Way to go Momma!
with love
-Jo
CRAZY cute!
Really cute! You did a great job & he is adorable in it!
Oh wow, this outfit is amazing! I looooove those pants!! And the blazer is incredible. It looks like a lot of work, but the results are fantastic!
Of course I love this Laura! And thanks for all of the tips and links to other blog posts making this project easier for others to follow. Great post!
I love this, the fabrics, the patterns, the labels, I L O V E A L L O F I T!
I found you site via Dana from MADE and start pinning things. i woll come back soon!
Thank ou for sharing!
Greetings from Germany
Marit
Thank so much Marit. It’s great to hear from you.