
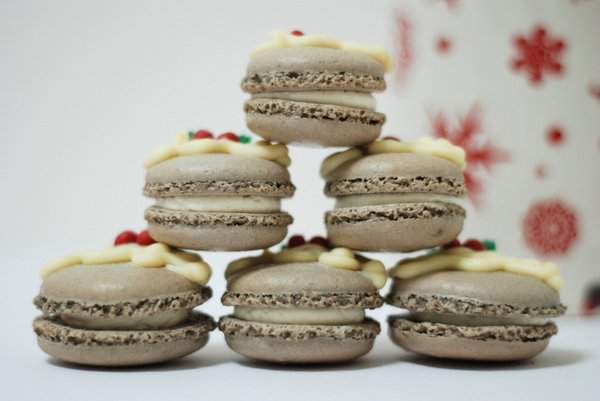
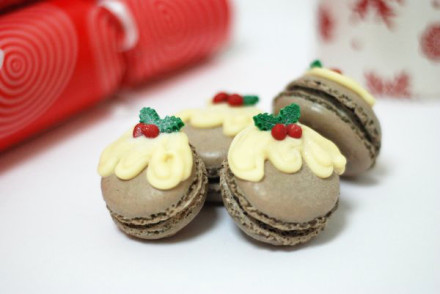
Christmas Pudding Macarons
I have made quite a few batches of macarons now and thought it would be helpful to share some of the tips I’ve picked up along the way. I also share an extra little trick at the bottom of the post that will guarantee perfect feet every time. I have only ever made them using the Italian meringue method so I can’t comment on the French (or Swiss) meringue method. It seems that the Italian mergingue method is a little less temperamental so I will be sticking with it for now. There are a few things to remember but overall I think macarons are a lot less difficult than their reputation suggests. Also, even if they don’t look perfect I haven’t made any that didn’t taste great.
Tip 1: Use a food processor
Always process your icing sugar and almonds together in a food processor then sift very carefully so that what remains is a fine powder. Without this stage your macarons are likely to be lumpy instead of smooth and shiny. The terrible photo below is from my first ever batch of macarons. They are very lumpy as I didn’t follow this step, although I did use a sieve. They tasted amazing though and so the macaron obsession was born.

Chocolate Macarons
If you make macarons fairly often then you can save some time by processing a double quantity and keeping what you don’t need in an airtight container.
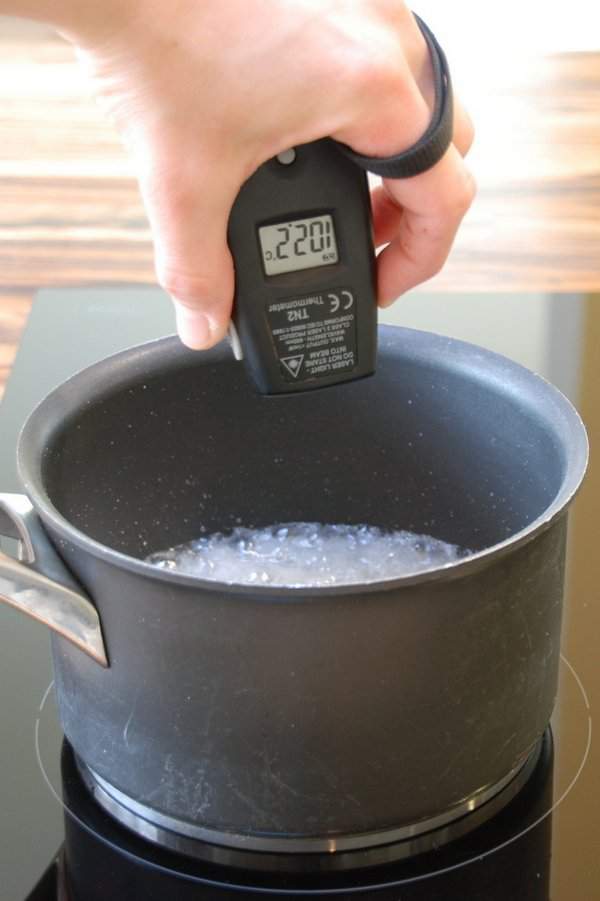
Tip 2: Choose the right thermometer
This is essential for the Italian meringue. Initially I used the same thermometer I use for tempering chocolate but I soon realised that it was unreliable for boiling sugar. The one I use now is a laser thermometer and although there is some variation in temperature depending on what spot I point it to, I check the centre and take it off the heat as soon as I see the temperature reach 115°C. Do not stir the sugar syrup at all.
Tip 3: Sure as eggs is not eggs
I use these liquid egg whites from a packet, which you can buy in Waitrose or Tesco. For me this is much easier than breaking lots of eggs and it doesn’t leave me wondering how to use up all the egg yolks. If you’re using egg whites from fresh eggs then the general advice for a more stable meringue is to age them for a few days before making your macarons. Leave them in the refrigerator in an airtight container for four to five days. Also, be very careful not to get any yolk in when you separate the eggs.
Wherever you get your egg whites from make sure that they are at room temperature before you start making your macarons.
Tip 4: Start whisking the eggs at the right time
Start whisking your egg whites at the same time as you start heating the sugar and water mixture. Turn the speed up once the sugar syrup reaches 105°C. Try to time it so that you pour the sugar syrup on when the eggs are frothy.
Tip 5: Watch the sugar syrup carefully
The temperature can increase in jumps so pay close attention once it passes 100°C. Don’t do something silly like get distracted taking photos! If the temperature reaches 120°C then I would abandon, turn off you mixer and start another batch of the sugar syrup. Sugar is fairly cheap so it’s not worth risking a failed batch of macarons just to avoid this.
Tip 6: Don’t undermix
If you undermix then your macarons will not have a smooth surface but will have little peaks. It is easy to test this by dropping a spoonful of the mixture onto a plate, tap once or twice and see if any lumps disappear. If they don’t then very carefully continue to mix until the mixture is smooth and gently flowing but still relatively thick.
Tip 7: Don’t overmix
This is likely to cause your macarons to collapse into the feet and can also lead to cracked shells and flat macarons. Unfortunately it is easy to do. If you are colouring your macarons make sure you add the food colour early enough so you can obtain a consistent tone without overmixing. The photo below is an example of a slightly overmixed batch. Although they look okay, if you compare them to the ones at the top of the post, you can see that the feet extend outwards beyond the rest of the shell.
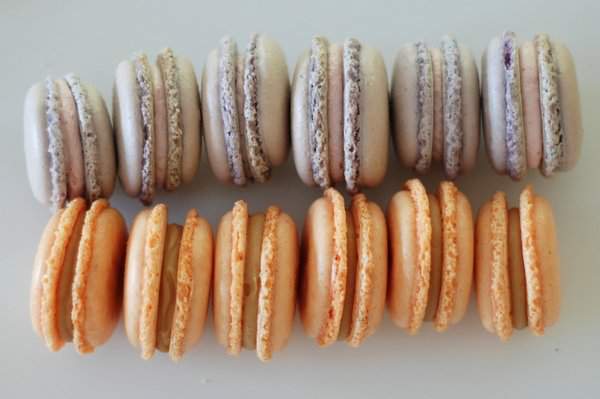
Raspberry Buttercream and Salted Caramel Macarons
Tip 8: Don’t let the mix sit for too long
It helps if you have enough baking trays so you can pipe all of the mixture out quickly. Until recently I didn’t have enough so would have to rotate them. I found that the macarons I piped later on had grease spots on the surface of the shells. If I am making more than one colour from a batch I will separate out the almond, icing sugar and egg mixture into different bowls and then add the correct proportion of the meringue to each bowl. This means I can delay mixing until I am ready to use that colour. To be able do this I make sure I weigh the mixing bowl I am using for the meringue in advance so I am able to divide it up easily.
Tip 9: Pay attention to your oven temperature
It is far better to use too low a temperature than too high. Also, if you are worried about how reliable your oven is then check the temperature with an oven thermometer. My oven was a bit too high when I baked my Fried Egg Macarons, so the white part was browned slightly.
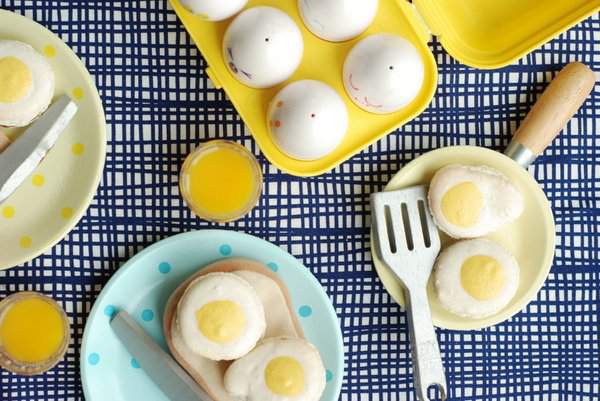
Fried Egg Macarons
Tip 10: Don’t be afraid to return them to the oven
After you remove your macarons from the oven, test one in the middle of the baking tray to see how easily it will pull away from the baking paper. If it is very sticky and doesn’t seem to have formed a ‘skin’ on the bottom then put them back in the oven for a couple more minutes on a lower temperature (around 145°). Once the are cooked be patient – wait for them to cool before removing them from the baking paper.
Tip 11: Use a template
I always use a template as it helps to achieve a consistent size. You can download a circle template from my previous Fried Egg Macarons post. If you want to make shaped macarons then I find it works better if the shape has curves rather than sharp edges. I’ll also let you in on a little secret – shaped and decorated macarons really help to hide any imperfections. You do have a trade off though as they won’t rise quite as much as the traditional circle.
Tip 12: Macaron resources
I have found the book ‘Secrets of Macarons’ by José Maréchal to be invaluable. It is a very small book but don’t let that put you off as it’s very thorough. Other recipes I’ve seen use the same ingredients and fairly similar ratios though. You can also find a lot of information on the internet, especially on the blog Not So Humble Pie.
It might seem overwhelming to consider all of the tips above at once but it will become natural after you have made them a few times. As I mentioned above I have another little trick for you. You may still be wondering how can I guarantee you perfect macaron feet? Well, this is how….
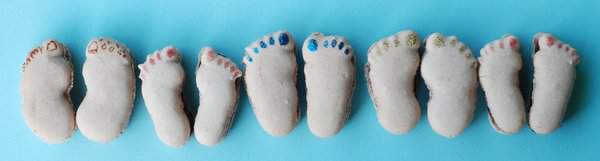
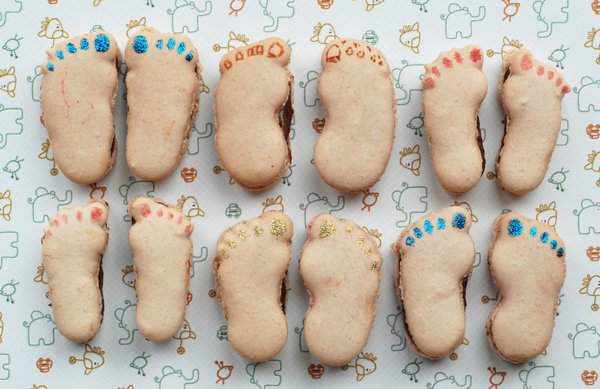
I think these might put me on the verge of being classed as a macaron geek (or am I there already?) but wouldn’t they be perfect for a baby shower? Fortunately I managed to get perfect ‘macaron feet’ on these feet. I couldn’t really show you them otherwise could I?

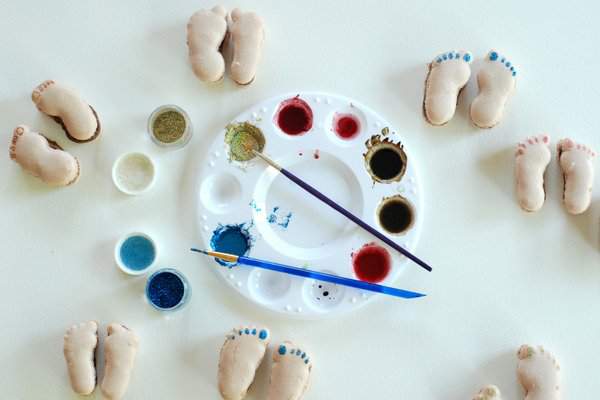
I painted the toe nails with edible glitter and powder food colours that I mixed with clear alcohol. This is a slightly better option than using water as it will evaporate quicker. You can still use water if prefer.
So what do sort of filling do you use for feet shaped macarons? Cheese, of course. I made a mocha mascarpone cheese filling, a delicious combination of chocolate, coffee and mascarpone cheese. These are the classic ingredients for tiramisu, I’m just replacing the sponge fingers with macarons. The recipe is from here although I’ve included it below with the metric conversion. The coffee I was using had been left here by my Colombian sister-in-law (thanks Natalia!) who is a coffee addict so I went a little easier on that as I thought it might be pretty potent. Also, I don’t actually drink coffee so didn’t want it to be too strong. I love the smell and the occasional coffee chocolate but despite trying it every few months I cannot drink the stuff. This frosting is superb though and the coffee flavour was just right for my tastes – I could have eaten the whole lot.
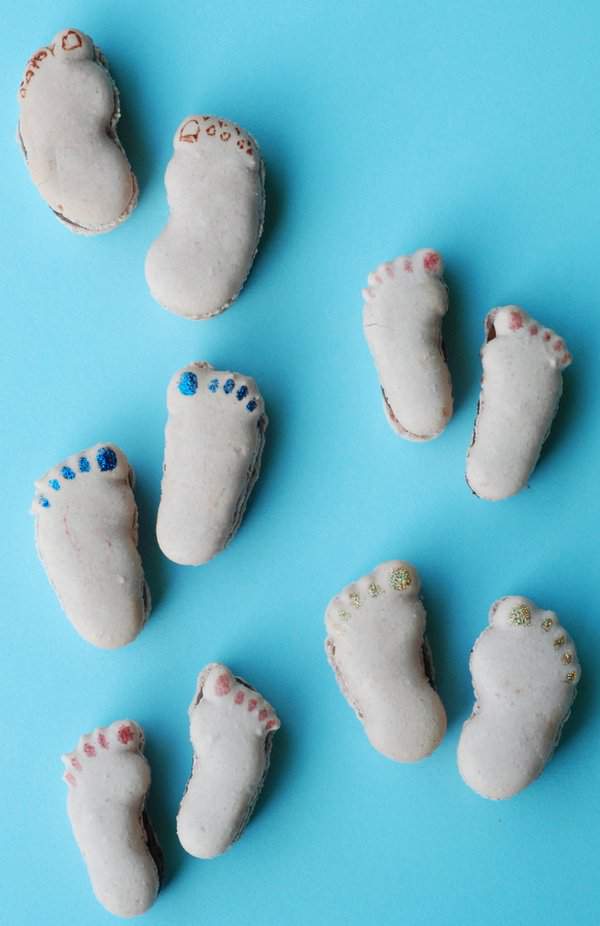
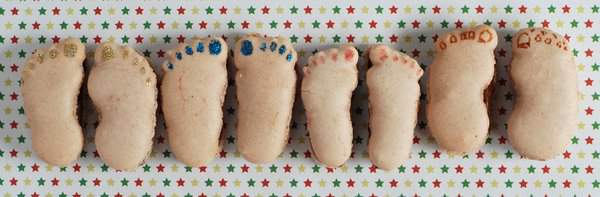
Macarons out for a stroll
I am sending these feet macarons over to the latest Mactweets – Mac Attack #30 : Vacation Getaway Macarons. When I was decorating my little feet macarons I kept thinking about strolling barefoot on the beach and nearly added flip flops to them. I’m hoping we get enough sun here soon so we can enjoy some days out at the beach.

Recipe
Macarons
You can find the recipe (with added spices) on my Christmas Pudding Macarons post.
Mocha Mascarpone Frosting {Click for printable recipe}
Ingredients
50g natural unsweetened cocoa powder
10g instant espresso powder
300ml pot double cream, chilled
280g caster sugar
250g mascarpone cheese, chilled
If you are going to use this frosting for macarons then I’d advise keeping them chilled until close to serving as my tops starting sinking and the icing was oozing out a little after only half an hour out of the fridge (albeit on a hot day).
Method
1. Sift cocoa powder into a large bowl. If you have a stand mixer use the bowl for that.
2. Add the espresso powder.
3. Bring 200ml of the double cream just to the boil in small saucepan.
4. Slowly pour the cream over the cocoa and coffee mixture. Whisk until the cocoa powder is completely dissolved. This takes about 1 minute.
5. Add the remaining 100ml of cream and the caster sugar. Stir until the sugar dissolves.
6. Cover and chill until cold (for at least 2 hours).
7. Add the mascarpone to the chilled mixture. Using an electric mixer, beat on a low speed until it is smooth. At this point increase the speed to medium-high and beat until the mixture is thick and peaks form when the mixer is removed. Do not overbeat or mixture will curdle.
8. Place in a piping bag with a large plain nozzle. Pipe onto one macaron and sandwich another one on top.
The macarons can be kept refrigerated for 2-3 days but are best served at room temperature. You can also freeze them for up to a month. Allow to defrost before serving.
Serve and enjoy!

Macaron stack


This is such a useful how to and I LOVE the little feet at the end – so cute!
Thank you!
I love the feet! I tried ducks and bears and it didnt work well.
Sorry to hear that Joy. Bears would be really cute. I hope they work better for you next time.
Interesting tips. I think using a template is so important! Funny you say you use your laser for the sugar syrup. I have an infra-red temperature gun that I use for everything except sugar syrup. I find my old candy thermometer works better for it. Love the little feet at the end…so cute!
This is a fantastic post, thanks for all the useful tips! I love the fried egg and feet macarons, great ideas 🙂
I blogged about Macarons too, but a more simple recipe. Check out my baking mat – v handy for even piping!
http://claireabellemakes.com/2012/04/17/macaron-love/
claireabelle x
Amazing tips and adorable feet! Just Pinned.
Those little feet are just amazing. I am not much of a baker, but your posts sure make me hungry!
omg those feet macarons are AWESOME!
I love the tips and am bookmarking this post – and your macs are wonderful! I love the feet for the summer Mactweets challenge! Brilliant and masterly! Thanks for getting in touch!
Thanks Jamie, I love joining in with the Mactweets challenges.
Oh Laura, these are just too ADORABLE! Song playing in my head, ‘these boots were meant for walking’ {read feet}… CUTE! I love each of the macs you’ve created. Those fried eggs have me GRINNING! You are mac-talented! Must add the resource for tips on our MacTweets sidebar! May we? Thank you for joining us at MacTweets!
Thanks for your lovely words Deeba. Of course you can add it as a resource, I’d love for you to use it.