

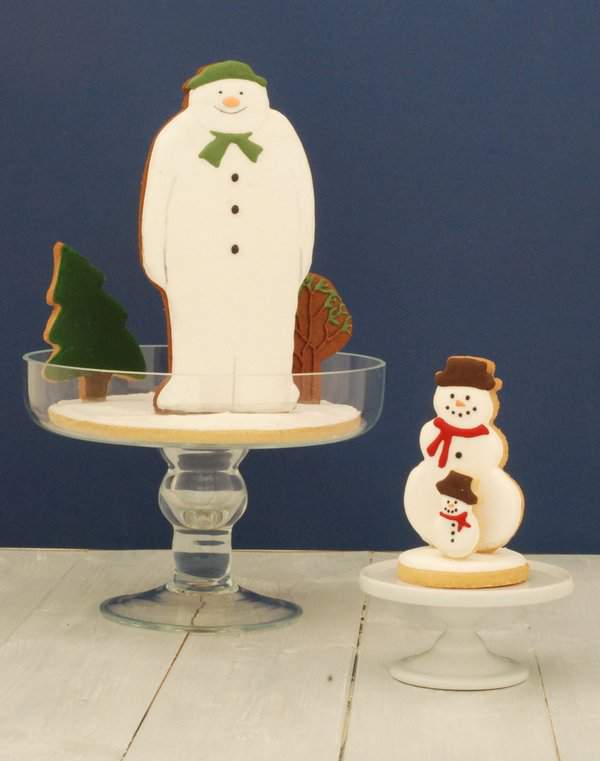
This isn’t just any snowman, it’s THE snowman. I’m sure you’ll recognise him, but just in case you don’t, he’s from the short animated film called ‘The Snowman’ by Raymond Briggs. I consider this to be essential viewing at Christmas time and it’s been on at this time of year for as long as I can remember. I even played the song ‘Walking in the Air’ on the piano in an assembly when I was in first school, my one and only public performance. According to this article by The Metro the film is being remade in time for Christmas this year and the song is going to be covered by Noel Gallagher.
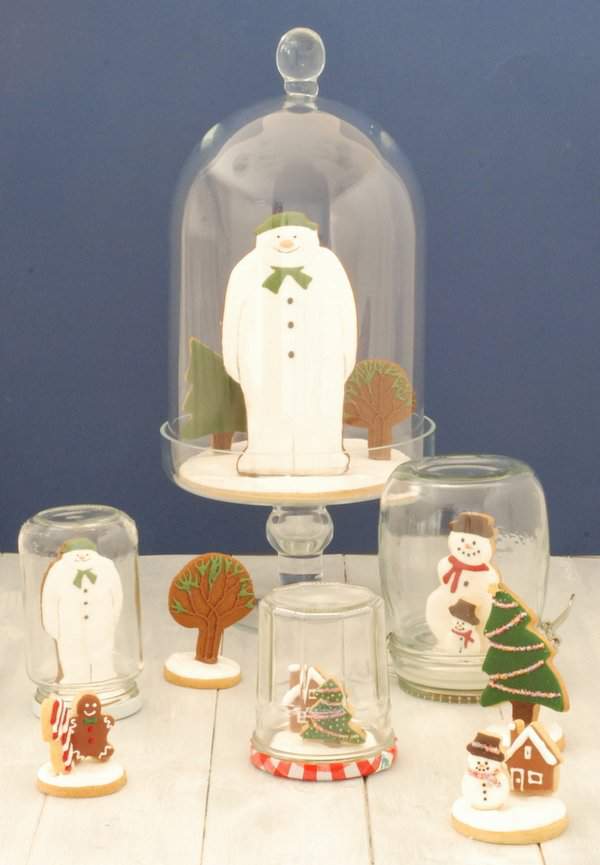
I’ve wanted to turn this snowman into a cookie for a while. In fact I’d like to turn Father Christmas and all the different snowmen from the party into cookies, maybe one day. While I was sat in the kitchen one day, thinking about making the snowman cookie, my eye fell upon my glass cake dome and I realised it would be perfect for creating the look of a snow globe.

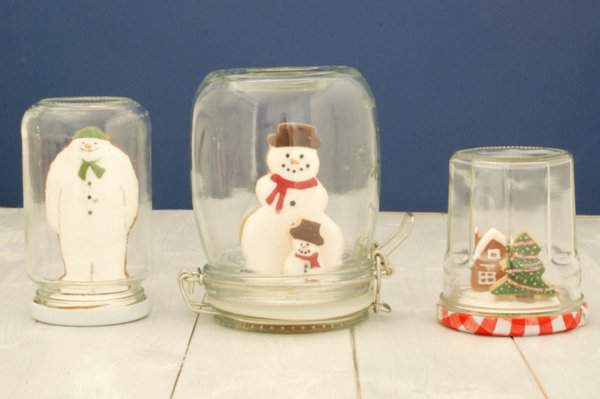
Obviously you can’t shake it up and down like a proper snow globe to make the snow scatter but it makes a festive Christmas decoration that has the added benefit of being edible. If you don’t want make one this large then you can always make mini versions using suitable sized jam jars positioned upside down. They’d make really cute presents too.
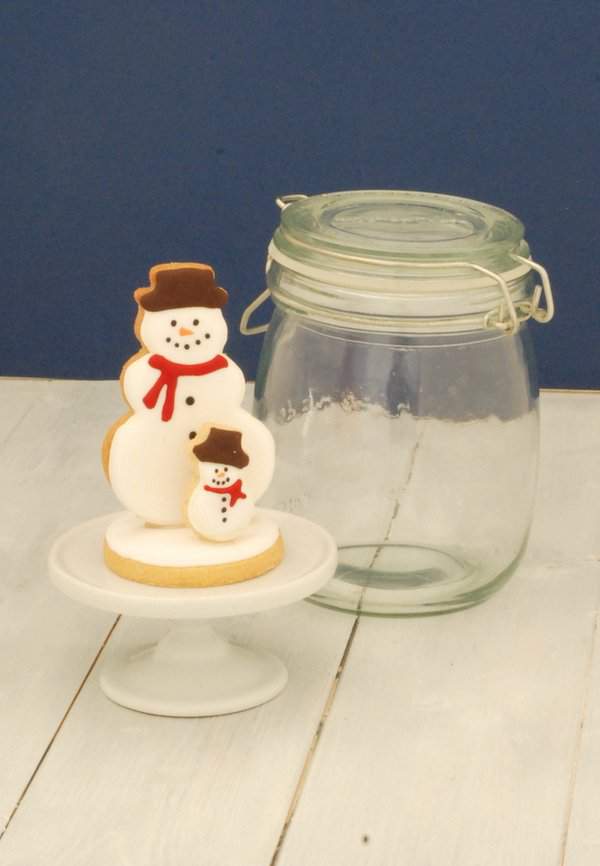
The main snowman is a gingerbread cookie adapted from a recipe in Peggy Porschen’s Pretty Party Cakes. I’ve shared it at the bottom of this post. I also bought the glass cake dome from Peggy Porschen’s Parlour. To get the right shape I had to print and cut out a template and then cut the cookie dough using a knife. I did find the recipe baked slightly unevenly, which made it a bit difficult to flood with royal icing – I had a bit of a leak with one cookie. It’s very tasty but I think I’ll try and find a different gingerbread recipe for this sort of cookie. If you don’t want to decorate them or just want to pipe details on top with firmer icing rather than outline and flood then I’d definitely recommend it.
The base and some of the other cookies use a vanilla sugar cookie recipe from the same book. This is a really reliable recipe that doesn’t spread and your cookies will stay perfectly flat for decorating. I found a small plate that just fit inside the cake stand and cut round that to get the large circle. For the smaller ones I used cookie cutters. If you want to make ones to go inside jam jars then just see if your cutter will fit into the jar (not the lid, this is where I went wrong) with a little bit of room to spare. Also make sure the cookies you plan to make will fit in the hole as well by checking those cookie cutters. You can fix the base to the lid with a bit of royal icing to make it more secure.
To make the cookies stand up I used Isomalt, a sugar substitute that I bought here – it’s a tip I picked up from Amy Atlas’s book Sweet Designs. She used it to make some fantastic Oscar Statuette cookies and credits Patti Paige of Baked Ideas with the technique. You just melt it, dip the bottom of the cookie in it and then position your cookie in place on the base. Hold for a few seconds until the Isomalt has set and your cookies will stand up on their own. I almost had a disaster when I slightly knocked my large snowman cookie and he fell to the floor. Luckily, after a quick repair to his hat he was as good as new again.
Gingerbread Cookie Dough (adapted from recipe in Peggy Porschen’s ‘Pretty Party Cakes’)
Ingredients
Hot mix ingredients;
180g molasses / dark brown muscovado sugar
4 tbsp clear honey
2 tsbp black treacle
2 tbsp orange juice
2 tbsp ground cinnamon
2 tbsp ground ginger
1 tsp allspice
1 tsp ground nutmeg
seeds from 1 vanilla pod
pinch of salt
Other ingredients;
200g unsalted butter, cut into cubes
1 tsp bicarbonate of soda
450g plain flour
Method
1. Put all the hot mix ingredients into a large saucepan and bring to the boil while stirring
2. Remove the pan from the heat and gradually add cubes of butter. Stir in gently.
3. Once all the butter is combined add the bicarbonate of soda and whisk briefly until combined.
4. Pour into the bowl of a stand mixer and leave to cool.
5. Prepare your mixer with the paddle attachment.
6. Once cool, sieve in the flour and mix on a low speed until the mixture just forms a dough.
7. Wrap the dough well in cling film and chill in the fridge for at least two hours. It keeps well in the fridge for a couple of days or freezes well if you don’t want to use it soon. Just move it into the fridge the day before you want to use it.
8. Place the dough between two pieces of cling film and roll it to roughly 5mm thick.
9. Prepare a baking tray with baking paper and cut shapes out of the dough using cookie cutters. It is best to keep similar sized shapes on a single tray. If there is a slight variation place the smaller shapes in the middle of the tray. If there is a lot of variation then use multiple baking trays.
10. Chill the cookie dough again for at least half an hour.
11. Preheat the oven to 200°C and bake the cookies for 10-12 minutes until they are slightly browned. They will firm up as they cool so don’t think they should be really hard when just baked.
12. Leave until slightly firmer then use a palette knife to move onto a wire rack and leave until cold. They will last up to a month if kept in a cool dry place.
Decoration
I used royal icing made from Tate & Lyle royal icing sugar, coloured with paste food colours. I also used an edible food pen to add the detail for the mouth and hand painted some shadow details using watered down black food colouring.
Enjoy!


This is one of the cutest things ever! Seriously, you are amazingly talented! I would love to try these someday…but I know that they won’t turn out anywhere close to these! Awesome.
I never fail to be amazed by how talented you are! When are you going to start your own bakery/giving cookie making classes? I’ll definitely sign up 🙂
These cookie snow domes are just genius. I love them.
Excellent! I’ve saved a few jelly jars to do this same project with my kids! Yours looks fantastic, thanks for the tips! Did you actually go to the Peggy Porschen Parlour? The pictures of it are amazing, I’m sure the treats are too!
That sounds like fun. Yes, I did go to the Parlour although I had just been to the William Curley cafe down the road for cake so didn’t actually try a cake! Maybe (hopefully) next time.
I don’t know how I missed these last year!?! I LOVE THEM! You are so all-around creative, Laura!