

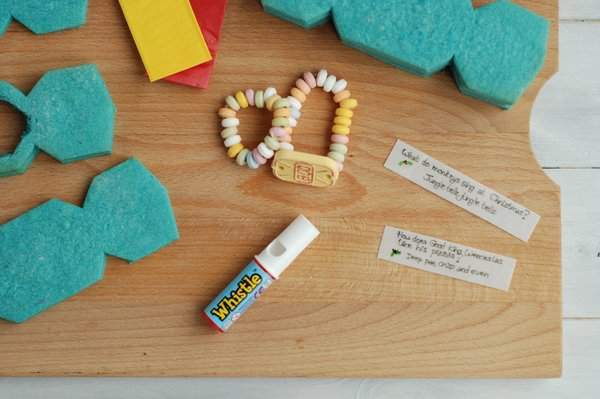
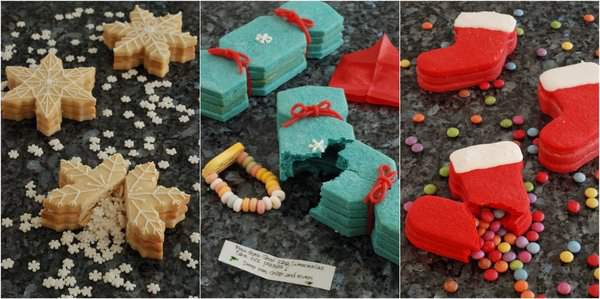
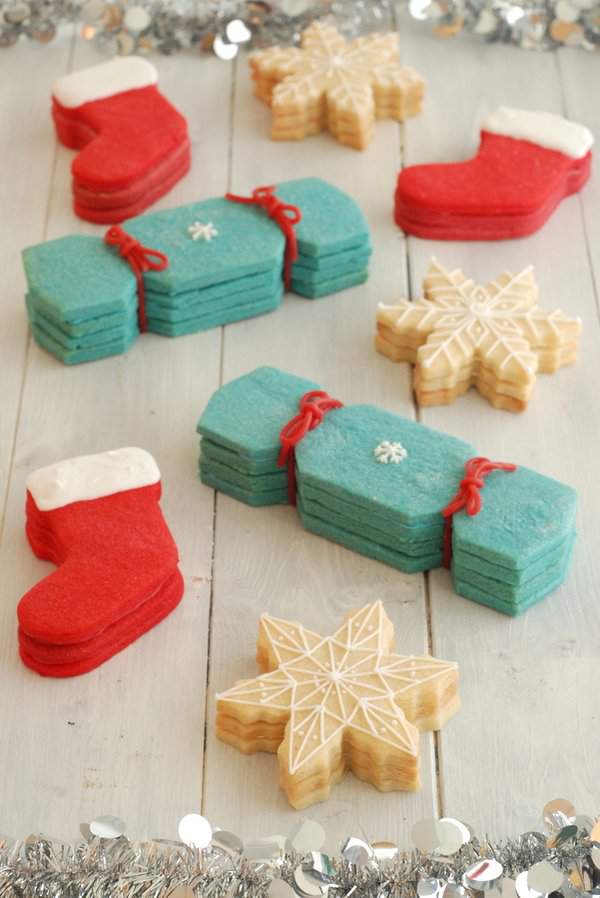
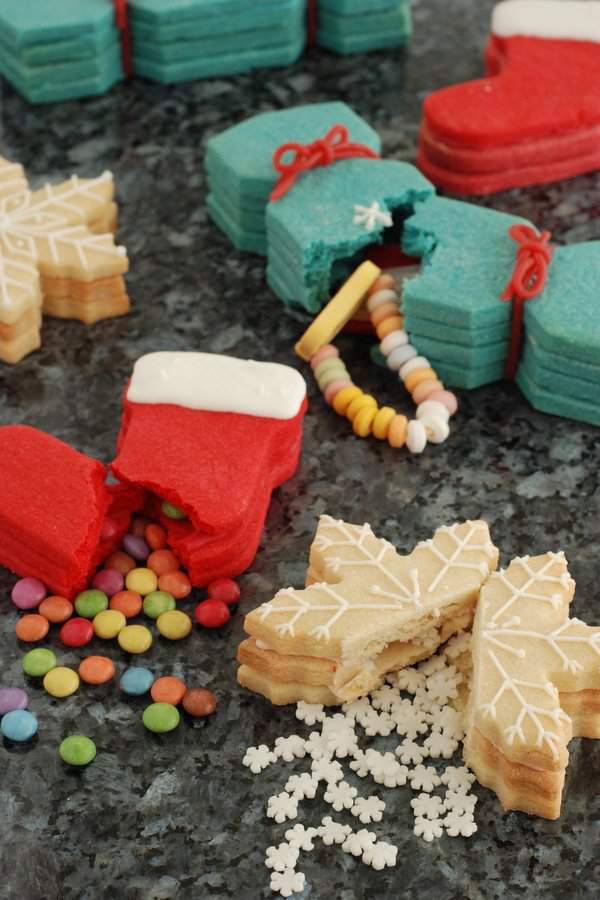
These cookies are so fun to give to children although I’m sure a lot of adults would enjoy them too. The Christmas stocking has mini smarties as presents inside and the Snowflake Cookie is sprinkling the snow we all want for Christmas Day. Finally I made some Christmas Cracker Cookies with a cracker hat and cheap jewellery (made of sweets of course) plus some edible jokes (made with rice paper and an edible pen). I tried to make edible hats too but realised that they’d just crack when they were folded. The ties on each end are strawberry laces, which are surprisingly hard to make neat bows with.
Each cookie is really made up of three or four layers so they’re far too big to have one each, at least not in one sitting, but they can always be shared after opening. I plan to give the last crackers to my boys to ‘pull’ on Christmas Day but they won’t get to eat it all that day.
I have been looking forward to making cookies in this way since I first spotted these piñata cookies on lauralovescake. Laura got the idea and recipe for these fantastic cookies from this post on She Knows. I have seen several other brilliant versions of the idea since, such as these Trick or Treat Cookies for Halloween on Not Martha and these drum cookies that Glory of Glorious Treats did for the recent 12 days of Christmas Cookie Project organised by Callye of Sweet Sugar Belle. There are so many other possibilities for ways to use this technique and I’m looking forward to seeing some of the ideas that other people come up with.
The cookies are not really much more difficult to make than regular cookies, although they do take a bit longer. You’ll save yourself decorating time if you dye the cookie dough to fit your design – just add paste colouring while it’s in the mixer. I found the easiest way to get the centre out of the middle layer was to cut it out using a knife just after baking – initially I used a small cookie cutter but the cookie seemed too delicate for it. It does depend on the cookie dough you use though – I adapted my usual sugar cookie recipe by adding peppermint exact. The recipe is at the bottom of the post.
Once the cookies have cooled they will be quite tough. At this stage don’t knock your cookies off the cooling racks as you’ll find all the cookies with the centres missing will break and you’ll have to make anoher batch! I can be so clumsy sometimes. If you want to make a layered cookie then use royal icing to stick the layers together. Save your best looking cookie for the top and pipe royal icing around the edges of the middle cookie and carefully place on top of the bottom one. If you’re using another middle cookie then add now and leave to set for a few minutes. Add your filling and then use more royal icing to glue the top layer on. Leave for at least an hour before adding any other decorations.

I found it quite relaxing sitting down and piping the details on the snowflakes but if it’s not really necessary if you want make these in a hurry.
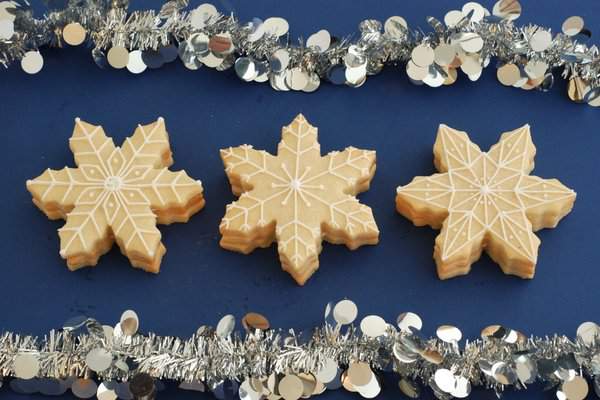
The snowflake cupcake sprinkles were sent to me by Jo from the lovely shop Just Bake. She has a great selection of baking supplies if you need to stock up.
Peppermint Sugar Cookies (adapted from Sugar Cookie recipe from Pretty Party Cakes by Peggy Porschen)
{Click here for printable recipe}
Ingredients
Makes approximately 20-30 cookies (single ones) depending on the size of the cutters. I used a double batch to make all my layered cookies. You can always freeze any leftover dough – wrap well and keep in the freezer for up to a month.
200g butter, at room temperature
200g caster sugar
1 large egg
2 teaspoons peppermint extract
425g plain flour, sifted
Method
1. Place the butter and sugar together in a mixer bowl. Cream together until just pale and creamy using the paddle attachment. Do not over mix as your cookies will be more likely to spread.
2. Add the egg and peppermint extract and beat until just combined.
3. Gradually add the flour until it all comes together to form a dough.
4. Wrap well in clingfilm and chill in the fridge for at least one hour before rolling out.
If you are using food colouring then I suggest using paste food colours and adding in the mixer as this helps to mix the colour in evenly. Mix until it is just combined.
5. Roll your dough out to about 5mm thick and cut out your shapes. Place on a baking tray lined with baking paper and place in the fridge to chill again for about half an hour.
6. Pre-heat your oven to 180°C and bake the cookies for around 8-10 minutes. I baked my stockings for 8, snowflakes for 10 and crackers for 12 minutes.
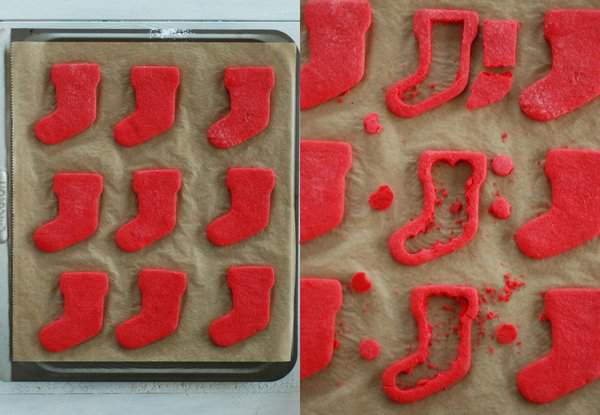
7. If you are planning to make layered cookies then cut the centres out for the middle one or two cookies. I used 3 cookies for each of the stockings and snowflakes so needed one middle layer for every two outer layers. For the crackers I used 4 layers so I would be able to put more in – this means you need two middle layers for every two outer layers.
8. Once they have cooled decorate as you like. They taste great on their own too. If you’re making up a layered cookie then use royal icing to ‘glue’ the layers together. Make sure to save your best looking cookie for the top layer.
Enjoy!


Fantastic. I love them all. So neatly executed too.
Laura, You are on a roll this Christmas! Phenomenal!
OMG, that is such a cute idea…. I would love to be a kid in your house.
Kiss the boys.
Merry Christmas xx
These are ridiculously amazing!
these are amazing! I am blown away by the creativity! Love it!
Now that is just too clever! It’s like a twofor. Two treats for one!! Love!
These are ridiculously amazing! You are so talented 🙂
So sweet – I just love those little red stockings.
Your cookies are amazing…I love the Christmas variations, I think my favourite are the Christmas stockings!! Lovely photos too! Happy Christmas 🙂
The cookies look great.
this is incredible! So impressive… I worry mine would not be nearly as perfect as yours